
Busy night, one hot pan, and bold flavors—kimchi fried rice is the move when you need dinner fast but still want something satisfying.
You’ll stir-fry tangy kimchi with a touch of gochujang, fold in rice until toasty, and finish with sesame oil and a fried egg. It’s common on casual Korean menus and in home kitchens, great for weeknights, late-night snacks, or a quick weekend lunch.
If you keep cooked rice in the fridge and a jar of kimchi on hand, this recipe suits you. Expect tender grains with a lightly crisp edge, spicy-sour kimchi heat, and a rich, saucy yolk to pull everything together. No special equipment required beyond a skillet and a spatula.
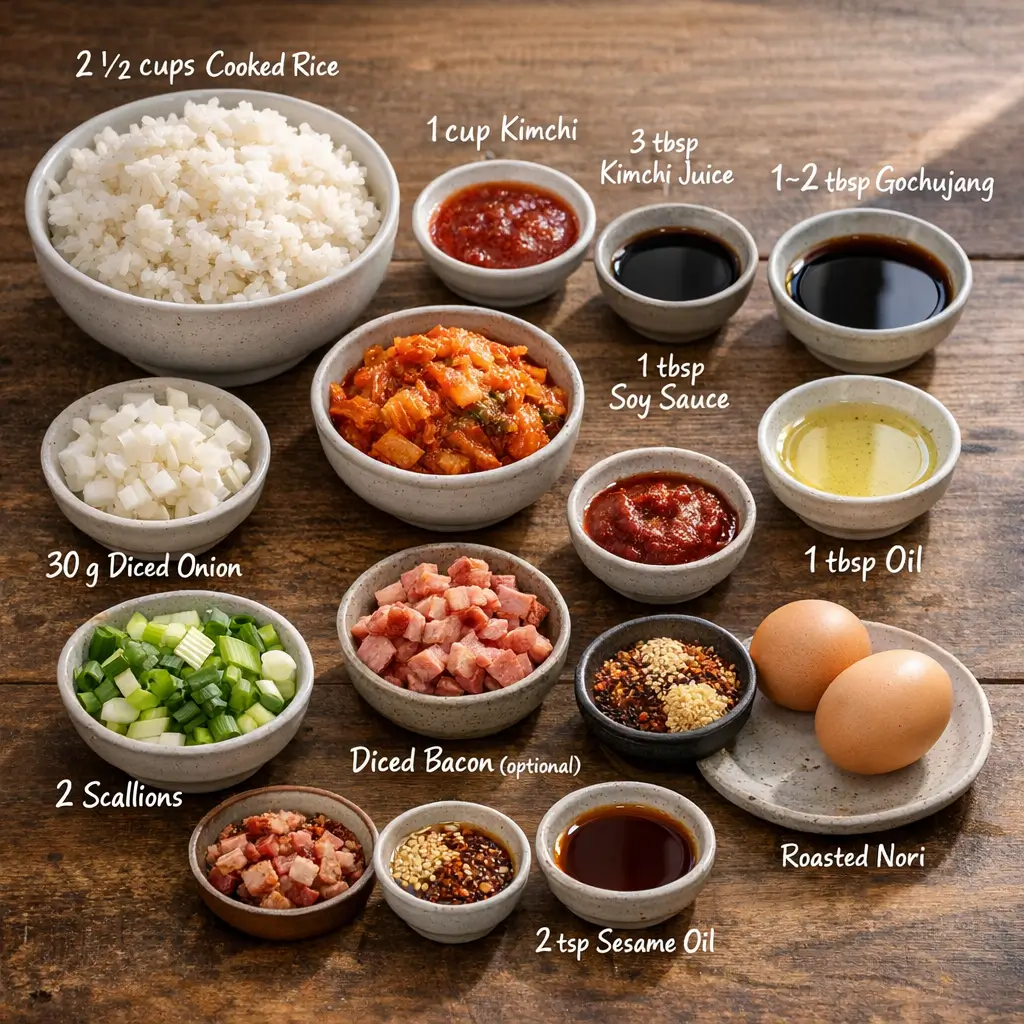
INGREDIENTS — Kimchi Fried Rice
- 2 1/2 cups (400 g) cooked short- or medium‑grain rice (day-old if possible; break up any clumps)
- Purpose: the base; slightly dry rice fries better.
- Sub: jasmine or brown rice works; freshly cooked rice can be used if spread on a sheet pan to steam off for 10–15 minutes.
- 1 cup (160 g) well‑fermented napa cabbage kimchi, chopped
- Purpose: provides tang, spice, and moisture.
- Sub: radish kimchi (kkakdugi) or mixed-grain kimchi; for milder heat, rinse lightly and pat dry.
- 3 tablespoons (45 ml) kimchi juice (from the jar)
- Purpose: seasons and moistens the rice without making it soggy.
- No juice? Add 2 tablespoons water + 1 teaspoon rice vinegar and a pinch of sugar.
- 1–2 tablespoons (15–30 g) gochujang (Korean chili paste)
- Purpose: depth and savory heat.
- Spice-sensitive? Start with 1 tablespoon. Spicy lovers can add 1 teaspoon gochugaru (Korean chili flakes) at the end. If you truly can’t find gochujang, use 2 teaspoons sriracha mixed with 1 teaspoon white miso as a temporary stand‑in.
- 1 tablespoon (15 ml) soy sauce
- Purpose: saltiness and umami; balances kimchi’s acidity.
- 1 tablespoon (15 ml) neutral oil (canola, grapeseed, or avocado)
- 2 teaspoons (10 ml) toasted sesame oil (finish only)
- 1/4 small onion, finely diced (about 30 g)
- Purpose: gentle sweetness to round out the sour heat.
- Optional; skip if short on time.
- 2 scallions, thinly sliced, whites and greens separated
- 2 large eggs
- Purpose: classic topping; the runny yolk mellows heat.
- Vegan? Use a plant‑based fried “egg” or a drizzle of silken tofu sauce (see Variations).
- 3 oz (85 g) diced bacon or Spam, optional
- Purpose: smoky/savory depth and a little fat to fry the rice.
- Sub: 1 small can (100–120 g) tuna, well drained; or diced mushrooms for a meat‑free option.
- 1 teaspoon toasted sesame seeds, for garnish
- 1 sheet roasted gim/nori, cut into thin strips, for garnish
STEP-BY-STEP INSTRUCTIONS
1) Prep the rice so it fries, not steams.
- If using day-old rice from the fridge, microwave 30–45 seconds just to loosen, then gently break apart clumps with clean hands or a fork.
- If using fresh rice, spread it on a baking sheet to release steam for 10–15 minutes. The surface should feel dry and the grains separate easily.
2) Heat the pan and render optional meat.
- Set a large skillet or wok over medium-high heat. Add the diced bacon or Spam and cook until lightly browned and some fat renders, 3–4 minutes.
- Scoop the meat to a plate. Leave 1–2 teaspoons of fat in the pan; drain excess. Add neutral oil if the pan looks dry.
3) Bloom aromatics; don’t burn the paste.
- Add the onion and the white parts of the scallions. Stir-fry until slightly softened and fragrant, 30–60 seconds.
- Stir in the chopped kimchi. Cook, stirring, until the kimchi deepens in color and smells sweet-sour rather than sharply acidic, 2–3 minutes. This concentrates flavor.
- Push the kimchi to the side. Add gochujang to the center with a splash (1 teaspoon) of oil if the pan looks dry. Stir 20–30 seconds to loosen and lightly toast the paste. Avoid high heat at this moment—gochujang can scorch quickly and turn bitter.
4) Season and bring moisture back.
- Add soy sauce and the kimchi juice. Stir to combine. Return the browned meat (if using) and cook 30 seconds to mingle flavors.
5) Fry the rice in stages.
- Add half of the rice. Toss aggressively to coat every grain, breaking up any stubborn clumps with the edge of your spatula. Once coated and steamy, add the remaining rice.
- Stir-fry 2–3 minutes over medium-high heat. You should hear gentle sizzling. If the pan goes quiet, it’s steaming—raise the heat slightly.
6) Toast, then finish.
- Let the rice sit undisturbed for 20–30 seconds to develop light browning, then stir; repeat once or twice. The grains should look glossy, evenly red-orange, and lightly toasty.
- Turn off the heat. Drizzle with toasted sesame oil and toss. Taste and adjust: a splash more kimchi juice for tang, soy for salt, or a pinch of sugar if the kimchi is very sour.
- Fold in the green parts of the scallions.
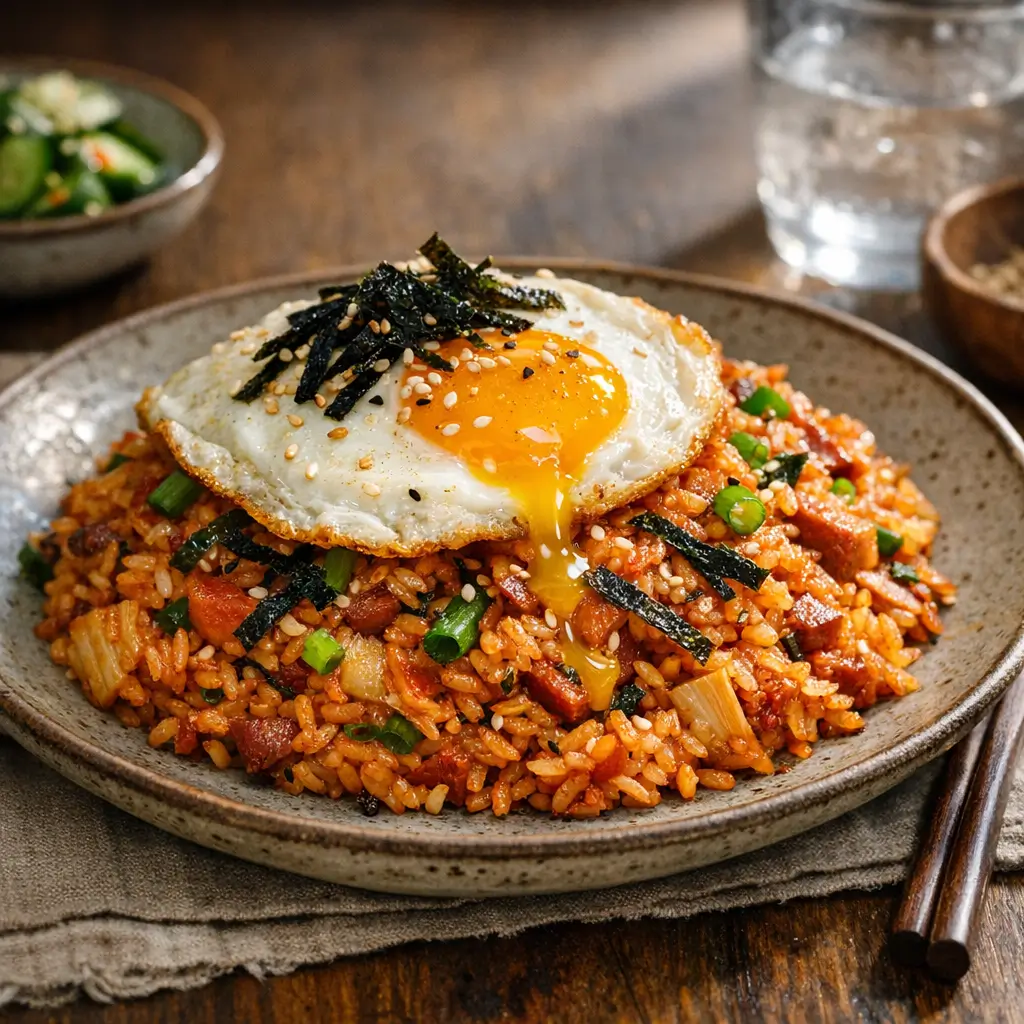
7) Fry the eggs and serve.
- In a small nonstick skillet over medium-high heat, add a thin film of oil. Fry eggs until edges are lacy and yolks still runny, 2–3 minutes.
- Spoon the rice into bowls. Top with eggs, sesame seeds, and gim/nori strips. Serve immediately.
Safeguards for beginners:
- Measure wet ingredients before heating the pan. Stir-fries move fast.
- Keep a dry towel or oven mitt near the skillet handle; it gets hot.
- If the rice begins to stick, reduce heat briefly and add 1–2 teaspoons oil.
WHAT TO EXPECT
- Texture: Separate grains with a light, crisp-chewy bite. A few lightly browned bits are welcome. If your rice is on the softer side, the dish will still be delicious—just less toasty.
- Flavor: A balanced mix of spicy, tangy kimchi and savory gochujang, rounded by soy and sesame. The egg yolk softens the heat and adds richness.
- Color and aroma: Brick-red rice with visible kimchi pieces. You’ll smell lactic tang and toasted sesame; if it smells sharp and raw, cook the kimchi another minute.
- Variability: Different kimchi brands range from mild to very spicy and sour. Adjust gochujang and kimchi juice to taste. Electric stoves may need a touch more time for browning; gas typically browns faster.
WAYS TO CHANGE IT UP
-
Vegetarian or vegan
-
Use vegan kimchi (many commercial kimchis include fish sauce or salted shrimp) and skip bacon/Spam. Add diced king oyster mushrooms or extra-firm tofu seared until golden for heft. For a yolk-like finish, whisk 2 tablespoons tahini with 1 tablespoon warm water, a pinch of turmeric and black salt, and drizzle over the rice.
-
Spicier or milder
-
For more heat: add 1 teaspoon gochugaru with the sesame oil at the end, or slice in a fresh chile. For less heat: use 1 tablespoon gochujang and replace the rest with extra kimchi juice; add a small pat of butter off-heat to soften edges without masking flavor.
-
Faster or simplified
-
Use a 2-cup microwaveable rice pouch and pre-chopped kimchi. Skip the onion and rely on scallions. Cook the egg first in the skillet, set aside, then finish the rice in the same pan—fewer dishes.
-
Extra‑crispy bottom (scorched rice vibe)
-
After step 6, press rice into an even layer and cook undisturbed 1–2 minutes over medium-high heat until you hear a deeper crackle. Scrape up the toasty bits and mix through.
Trade-offs: Adding more liquid (extra kimchi juice or soy) boosts savoriness but can soften the rice. Extra browning improves texture but may dull the bright red color.
SERVING AND STORAGE
Serve hot in bowls, topped with the fried egg and garnished with sesame seeds and gim. A few crisp banchan (quick cucumber salad or seasoned spinach) balance the richness. A bowl of light soup—soybean sprout (kongnamul-guk) or seaweed (miyeok-guk)—is a common pairing.
Leftovers keep well. Cool quickly, then refrigerate in an airtight container up to 3–4 days. Reheat in a skillet with a teaspoon of oil over medium heat until hot and re-crisped, 3–5 minutes, or microwave in short bursts, stirring in between. Cook eggs fresh; yolks don’t reheat well.
Avoid leaving rice at room temperature for extended periods. If reheating for kids, reduce heat by stirring in a little plain cooked rice or a splash of water to mellow the spice.
CULTURAL CONTEXT
Kimchi fried rice belongs to the broader family of Korean bokkeum-bap, or “stir‑fried rice,” a casual category built on leftover rice plus whatever is on hand. It’s commonly sold in bunsik (snack) shops and cooked at home when kimchi is plentiful.
For readers interested in the deeper tradition behind kimchi, the communal practice of kimjang—making and sharing large quantities of kimchi for winter—was inscribed by UNESCO on the Representative List of the Intangible Cultural Heritage of Humanity. Explore an overview of kimjang and its seasonal cycle here: UNESCO: Kimjang, making and sharing kimchi.
COMMON QUESTIONS AND TROUBLESHOOTING
-
My rice turned mushy. What went wrong?
-
Too much surface moisture causes steaming. Dry the rice briefly on a sheet pan, use less kimchi juice, and raise the heat so you hear steady sizzling. Also avoid crowding a small pan.
-
I only have freshly cooked rice. Can I still make this?
-
Yes. Use slightly less water when cooking the rice, then spread it out for 10–15 minutes to vent steam. A fan near the tray speeds this up.
-
I don’t have gochujang. What’s the best workaround?
-
The flavor is unique, but a quick blend of sriracha and a little white miso approximates heat and savoriness. You can also skip it and rely on kimchi and soy sauce for seasoning; reduce the kimchi juice slightly so the rice stays dry.
-
My kimchi is very sour—how do I balance it?
-
Stir in a small pinch of sugar or a dab of honey with the soy sauce. The fried egg yolk also helps soften acidity.
-
Can I use brown rice or other grains?
-
Brown rice, barley, or mixed grains work; they’ll be chewier and take a minute longer to crisp. Keep liquid low and heat high.
-
What if I can’t eat eggs or want it vegan?
-
Skip the egg and finish with a drizzle of toasted sesame oil or the tahini “yolk” described above. Make sure your kimchi is vegan if needed.
-
Is Spam or bacon required?
-
Not at all. They add smoky depth and extra fat for frying, but canned tuna, tofu, or mushrooms are great alternatives—or leave protein out entirely.
-
Can I double the recipe?
-
Yes, but fry in two batches so the rice sears instead of steams. Combine both batches at the end with sesame oil.
-
How should leftovers be reheated safely?
-
Reheat until steaming hot throughout. In a skillet, stir continuously and check for hot spots; in a microwave, heat in 45‑second bursts, stirring between.
CONCLUSION
With a jar of kimchi and a bowl of rice, you’re minutes away from a deeply comforting meal. If you try this version, leave a comment with what brand of kimchi you used, how spicy you went with the gochujang, and any swaps you loved—your tweaks help other home cooks dial it in.
Leave a Reply