
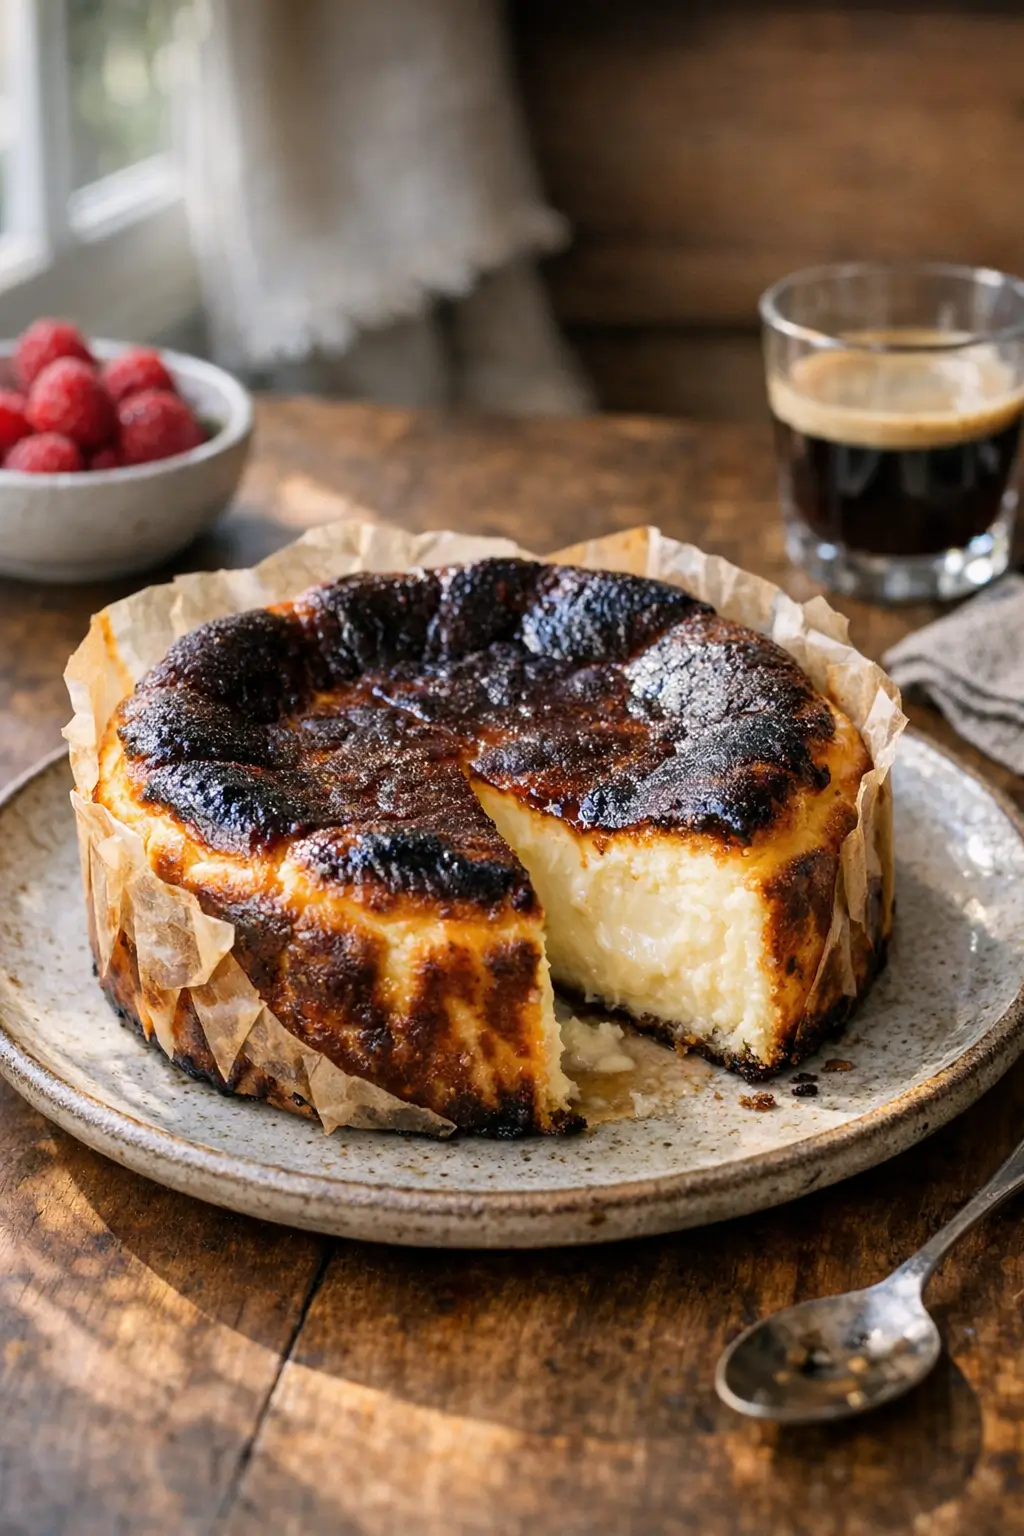
If you love the idea of cheesecake without the fuss, Basque Cheesecake is the one to know. It skips the crust and the water bath, leans on high heat for a caramelized top, and stays soft in the center.
The result is dramatic to look at and deeply comforting to eat. Perfect for celebrations, cold-weather weekends, or whenever you want dessert with minimal planning.
This version is scaled for a small household and suits newer bakers as much as seasoned cooks. Expect a bittersweet, burnished top, a custardy middle, and slices that don’t need to be perfect to taste perfect.
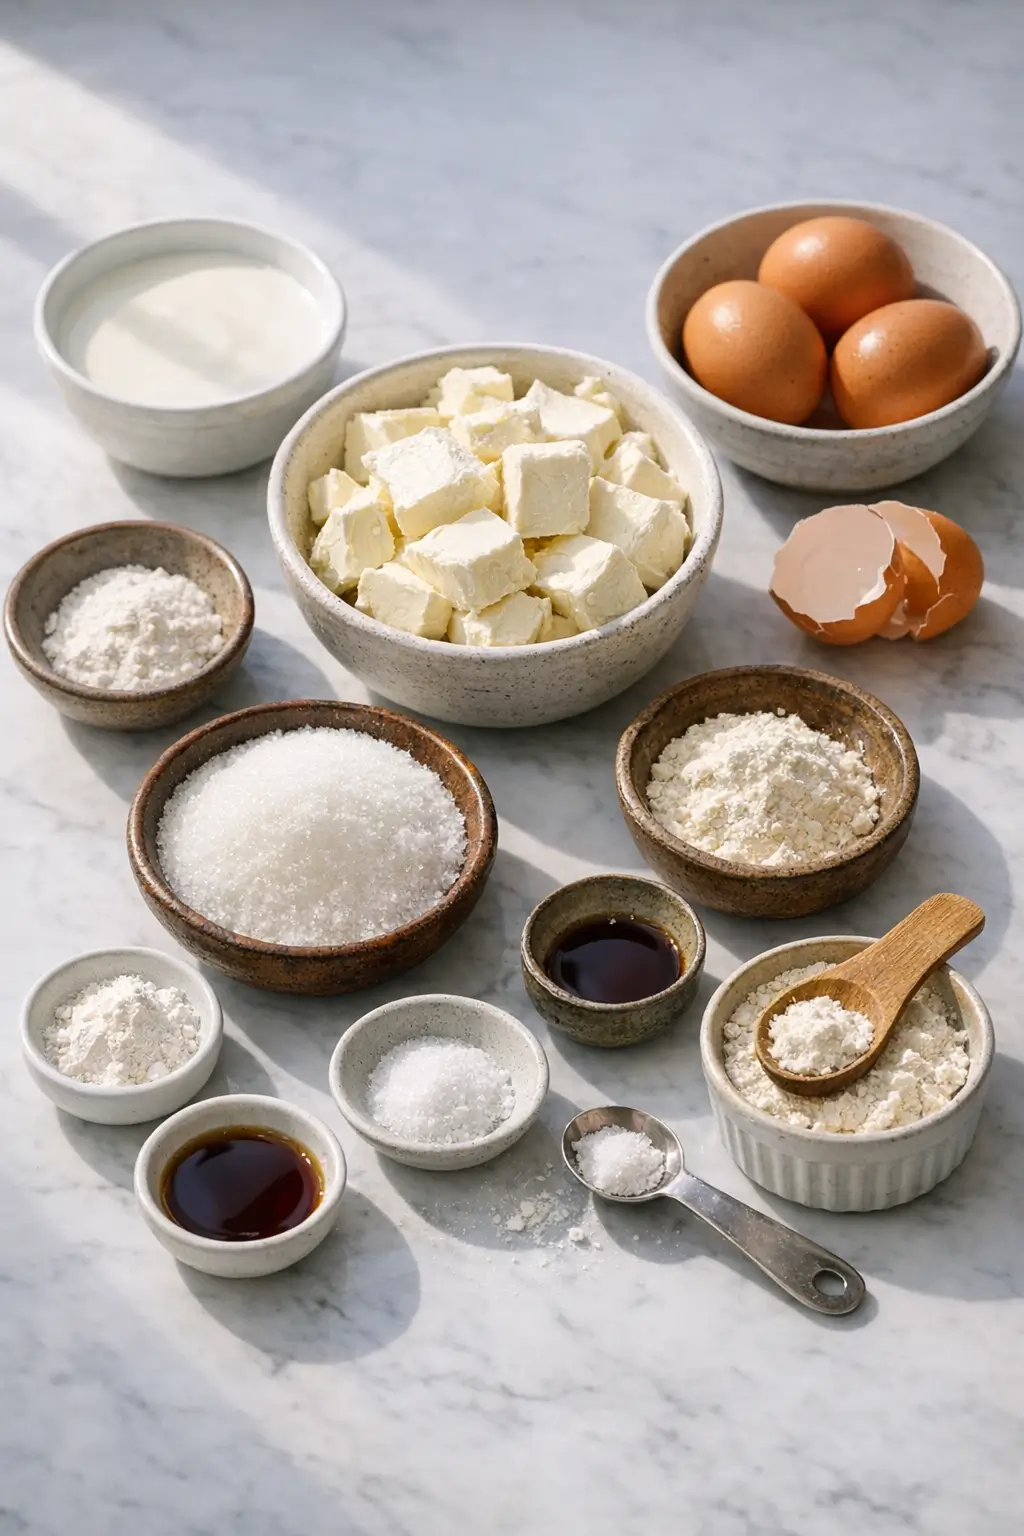
INGREDIENTS (Basque Cheesecake)
-
Makes: one 6-inch cake (about 4 modest servings)
-
Pan: 6-inch springform or 6×3-inch cheesecake pan, plus 2 large sheets of parchment
-
450 g (16 oz) full‑fat brick cream cheese, room temperature — the base for a smooth, rich texture
-
Avoid whipped or reduced‑fat; they won’t set properly.
-
150 g (¾ cup) granulated sugar — sweetness and browning
-
¼ tsp fine salt — balances the sweetness
-
3 large eggs, room temperature — structure and custard body
-
180 g (¾ cup) heavy cream, room temperature — silkiness and moisture
-
10 g (1 Tbsp) all‑purpose flour or cornstarch (optional) — a touch of insurance for a cleaner slice
-
Skip it for a softer, more pudding‑like center.
-
1 tsp vanilla extract (optional) — rounder flavor
-
Or scrape ½ vanilla bean; or leave it out for a more dairy‑forward profile.
Equipment notes: digital scale (recommended), stand mixer, hand mixer, or a sturdy spatula; instant‑read thermometer (helpful, not mandatory); rimmed sheet pan to catch drips.
STEP-BY-STEP INSTRUCTIONS
1) Prep the pan and oven.
- Position a rack in the middle of the oven. Preheat to 475°F (245°C). If you know your oven runs cool, you can go up to 500°F (260°C). Place a rimmed sheet pan on a lower rack to catch any butter or batter that may seep.
- Crumple two large sheets of parchment into balls, then uncrumple. Overlap them in a cross and press into a 6-inch springform so the bottom and sides are fully lined. Let the parchment extend 2–3 inches above the rim; those ruffled edges are part of the look and protect against overflow.
- Safety note: exposed parchment tips may darken at these temperatures. Keep them away from the upper heating element and trim any excessive spikes.
2) Soften and smooth the dairy.
- In a bowl, mash the room‑temperature cream cheese with a spatula until pliable. Add sugar and salt. Beat on low (stand mixer or hand mixer) until completely smooth, 1–2 minutes, scraping the bowl as needed. The mixture should look satiny with no visible lumps.
- Tip: If your cream cheese is still stiff, microwave it in short 5–8 second bursts just until pliable—do not let it melt.
3) Add eggs, then cream.
- Beat in the eggs one at a time on low, fully incorporating each before adding the next. Mix just until homogenous; avoid whipping in air.
- Add the vanilla, if using. Sift in the flour or cornstarch, if using, and mix briefly. Stream in the heavy cream and mix on low until silky and pourable, about 30 seconds. If tiny lumps remain, blend briefly with an immersion blender for an ultra‑smooth batter.
4) Fill and bake.
- Pour the batter into the lined pan. Tap the pan lightly on the counter a few times to pop any large air bubbles.
- Bake until the top is deeply browned—mahogany to nearly black in spots—the edges are puffed and set, and the center still wobbles like soft flan when you jiggle the pan. For a 6-inch cake at 475°F, this is typically 28–38 minutes; at 500°F, start checking around 24 minutes. Ovens vary, so trust the look and the jiggle over the clock.
- Doneness cue for extra confidence: an instant‑read thermometer inserted 1 inch from the edge and 1 inch deep should read around 185°F (85°C). The very center will be much softer and under that temp—that’s correct.
5) Cool gradually.
- Set the pan on a rack and cool to room temperature, 60–90 minutes. The cake will deflate and may crack as it settles. That’s expected and part of the style.
- For the creamiest texture that still slices neatly, chill until cold, at least 3–4 hours or up to overnight. If you prefer a spoonable center, serve closer to room temperature after the initial cool.
6) Unmold and serve.
- Release the springform ring. Peel away the parchment gently from the sides. If the parchment clings, slip a thin knife between cake and paper while the cake is still slightly cool to the touch.
- Warm a sharp knife under hot water, wipe dry, and cut in swift strokes, wiping the blade between cuts for clean slices.
Beginner safeguards
- Work with fully room‑temperature dairy to avoid lumps and overmixing.
- Keep the mixer on low; too much air gives you a soufflé rise and dramatic collapse.
- Don’t bake until the center is firm. Pull it while the middle still shimmies. Overbaking leads to a dry, chalky center once cool.
- If the top darkens too fast before the edges look set, tent very loosely with foil for the last few minutes, leaving plenty of venting so steam doesn’t hinder browning.
WHAT TO EXPECT
- Texture: Edges will be gently set and creamy, while the middle stays custardy and almost pudding‑soft. A slight sink in the center is normal.
- Flavor: Sweet, dairy‑rich, and gently salty with a pleasant, caramelized bitterness on the surface. Vanilla adds roundness but is optional; the cake is delicious without it.
- Visuals: The top should range from chestnut to near‑black patches. Parchment seams create ruffled sides. Cracks and a bit of collapse will happen; they don’t affect taste.
- Variables: Dark, nonstick, or smaller pans brown faster; glass insulates and may require a few extra minutes. Eggs and cream from different brands can slightly change set firmness. Ovens calibrated a bit cool or hot will shift timing by 5–10 minutes—watch the jiggle.
WAYS TO CHANGE IT UP
-
Vegetarian/vegan‑adapted: Use plant‑based cream cheese and full‑fat coconut cream in place of heavy cream, and choose cornstarch over flour. Expect a slightly looser set and a more pronounced coconut note. Pull from the oven when the edges are set and the center barely wobbles; chill thoroughly before slicing.
-
Spicier or milder: For gentle warmth, whisk ½ tsp ground cinnamon into the sugar or add the scraped seeds of ½ vanilla bean for a more aromatic profile. To lessen bitterness, bake just to a deep amber rather than near‑black, or sprinkle 1 Tbsp sugar over the batter before baking for sweeter caramel notes.
-
Faster/simplified: Blend all ingredients in a food processor until smooth and bake as directed. Serve at room temperature once cool instead of fully chilling for quicker dessert. Smaller bakes (ramekin “mini” cheesecakes) can be done by dividing the batter among 6–8 parchment‑lined 6‑oz ramekins and baking at 450°F until dark and jiggly, 14–18 minutes; watch closely because they go from browned to very dark fast.
Trade‑offs: More browning means more bittersweet flavor and slightly firmer edges. Less browning preserves milder dairy notes but the top won’t be as dramatic. Flour/cornstarch helps with clean slices but softens the custardy middle a touch.
SERVING AND STORAGE
- Serving temperature: Room temperature shows off the custardy center; chilled slices cut cleanest. If chilled, let the cake stand 20–30 minutes before serving to soften.
- Pairings: Bitter or nutty elements complement it—unsweetened whipped cream, espresso, toasted nuts, macerated berries, or a small glass of dry or off‑dry sherry.
- Portions: This 6‑inch cake serves about 4 modest slices. For smaller tastes, slice into 6 thinner wedges.
- Storage: Cover and refrigerate up to 5 days. The top may weep slightly after day 2; blot gently with a paper towel before serving.
- Freezing: Wrap individual slices tightly and freeze up to 1 month. Thaw overnight in the refrigerator. Expect a slightly firmer, less glossy center after thawing.
CULTURAL CONTEXT
Basque cheesecake is often credited to La Viña, a bar in San Sebastián, where pastry‑lean desserts lean on dairy and simple technique. For a concise overview of its modern history and how the “burnt” style spread around the world, see this encyclopedia entry: Basque cheesecake.
For readers interested in Basque culture beyond the dessert, the Basque Museum & Cultural Center (Boise, Idaho) maintains exhibits and resources on Basque history in the American West and the Basque diaspora. These links are educational and not recipes.
COMMON QUESTIONS AND TROUBLESHOOTING
-
The top didn’t brown enough. What happened?
-
Likely causes are a cool oven, an oven rack set too low, or parchment sticking up and shielding heat. Next time, preheat longer, move the rack up one notch, or finish under the broiler for 15–30 seconds—watch constantly.
-
The center collapsed a lot. Did I do something wrong?
-
Some sink is normal. Excessive collapse often means the batter was aerated too much or you baked a bit short. Mix on low speed, tap out bubbles, and bake until the outer 1–2 inches are fully set and the top is deeply browned before pulling.
-
How do I know it’s done without ruining the jiggle?
-
Start checking a few minutes early. Look for firmed edges and a dark top. If you have a thermometer, a reading near 185°F about 1 inch from the edge is a reliable cue. Open and close the door quickly to hold heat.
-
Can I skip the flour/cornstarch?
-
Yes. Many versions omit it entirely and rely on eggs alone. Using no starch yields a looser center that’s lovely at room temperature but may ooze if sliced warm.
-
Can I substitute mascarpone or sour cream?
-
Replacing up to 25% of the cream cheese with mascarpone or sour cream works, but the cake may set slightly softer and taste tangier. Keep total dairy the same and watch the bake; it may finish a few minutes sooner.
-
My cheesecake leaked a little fat. Is that normal?
-
A small buttery rim can appear; it’s common when baking at high heat. Line well with parchment to prevent seepage, and set a sheet pan underneath to catch drips.
-
How far ahead can I make it?
-
Up to 24 hours in advance for best texture. Chill, then let sit at room temperature 20–30 minutes before serving.
-
Can I make it gluten‑free?
-
Absolutely. Use cornstarch instead of flour, or omit the starch entirely; both approaches are common.
CONCLUSION
You don’t need a water bath or a perfect top to get a memorable dessert here. If you try this Basque Cheesecake, leave a comment with your bake time, oven temp, and whether you used starch—those details help other home cooks. Share any tweaks you enjoyed so others can learn from your kitchen, too.
Leave a Reply