
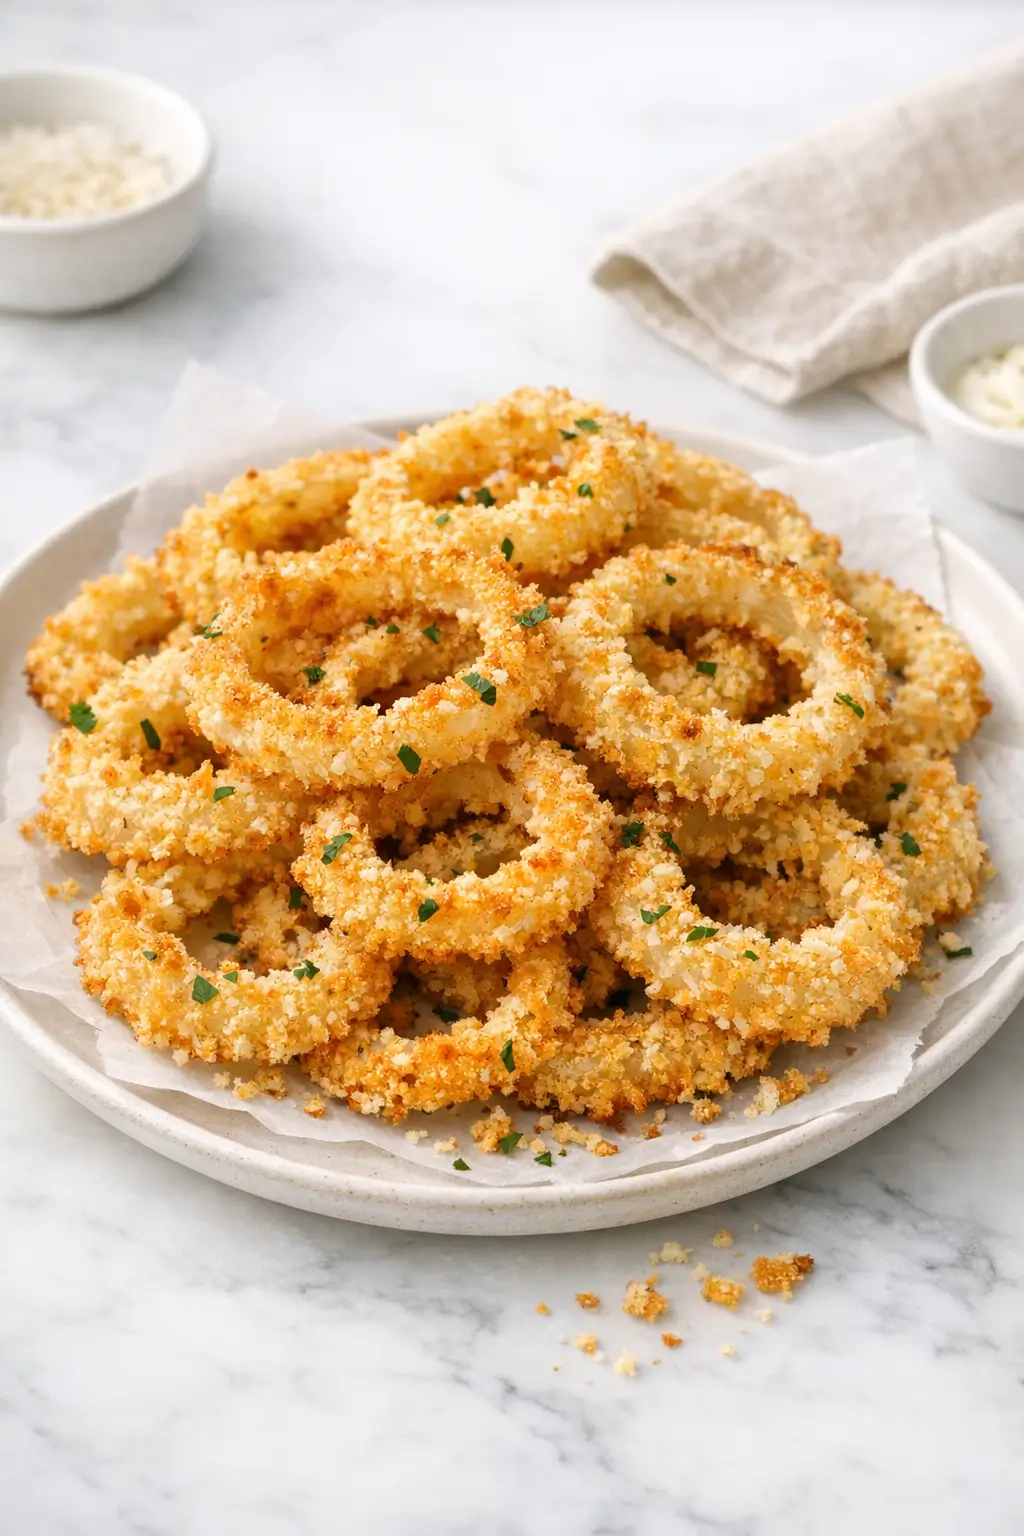
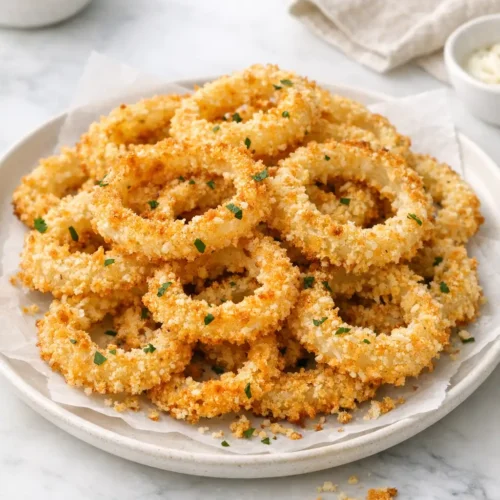
Crispy onion ring chips in the oven are an easy way to get that salty-onion crunch without setting up a deep fryer or buying a bag of snack chips.
If you’re walking in the door on a busy weeknight, start by heating the oven and slicing the onions; the coating comes together while the pan preheats.
Cooking in a small kitchen? Lay out a sheet pan, two bowls, and a cutting board first so you’re not juggling hot trays and dirty dishes later.
These are a fun bar-style side for burgers or grilled food, or a snack platter item any time of year.
You can expect light, lacy, shattery chips with real onion sweetness, more like a cross between onion rings and kettle chips than classic fast-food rings.
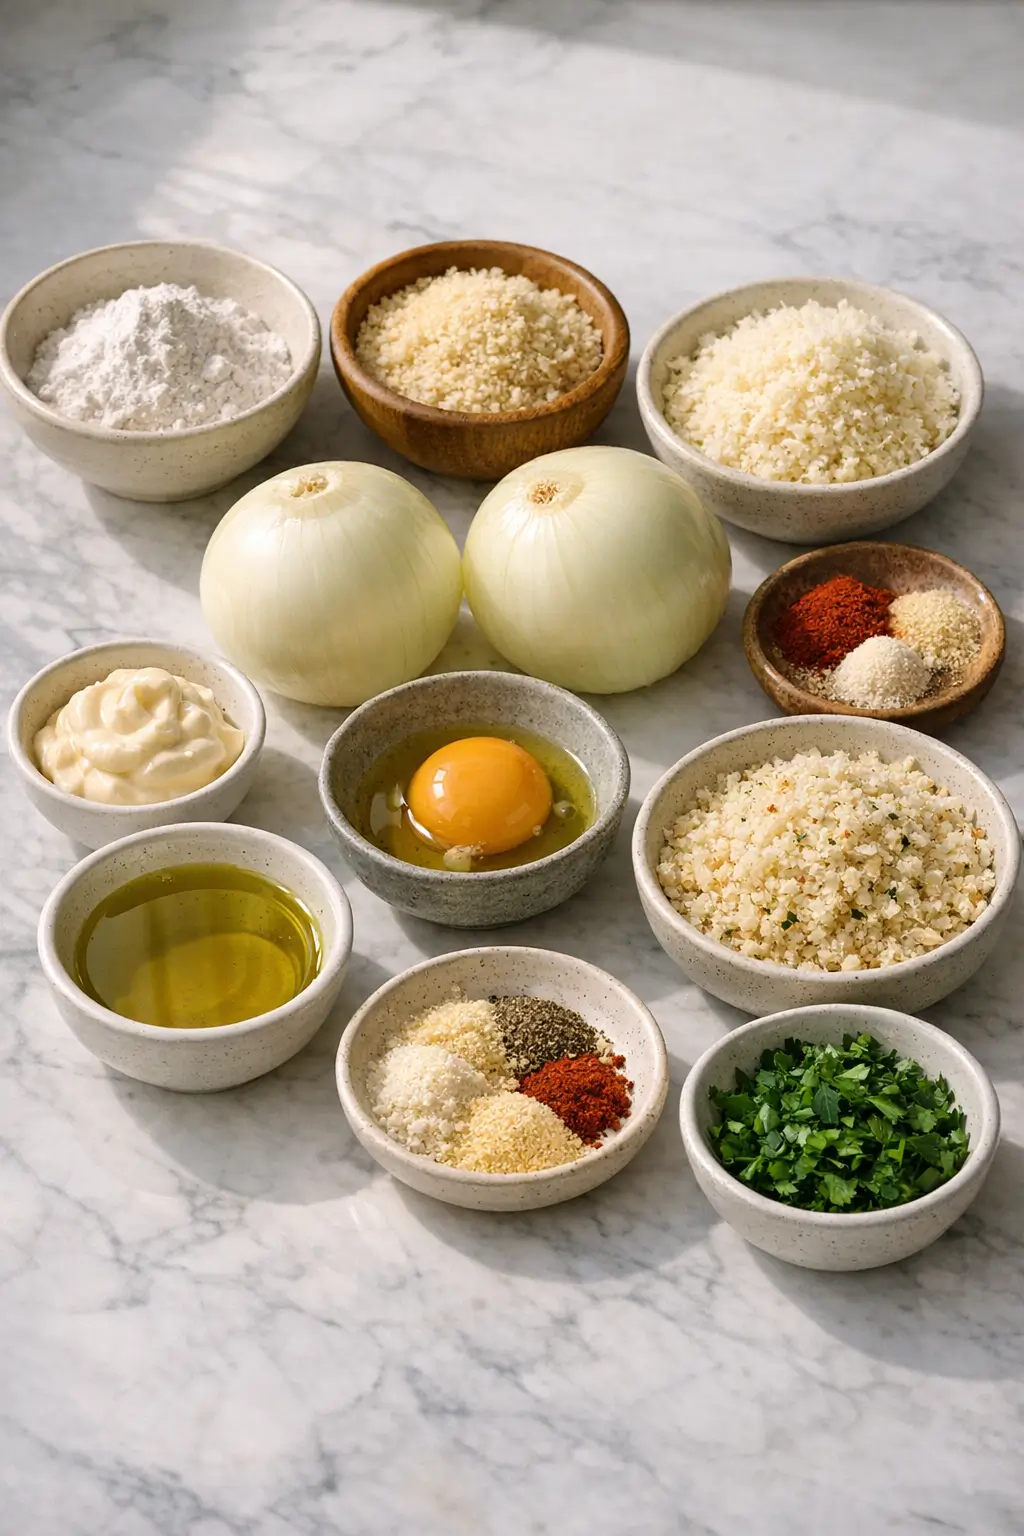
Ingredients
Serves 3–4 as a snack or side
- 2 medium sweet onions (about 500 g / 1.1 lb total), peeled
- 2 tbsp olive oil (30 ml), plus more for brushing the pan
- 1 large egg
- 2 tbsp mayonnaise (30 g)
- 1/2 cup / 60 g all-purpose flour
- 1/2 tsp fine sea salt, plus more to finish
- 1/4 tsp black pepper
- 1/2 tsp garlic powder
- 1/2 tsp smoked or sweet paprika
- 1 cup / 60 g finely grated Parmesan cheese (from a block, not pre-shredded)
- 1 cup / 60 g panko breadcrumbs
- 1–2 tbsp chopped fresh parsley or chives (optional, for serving)
The flour and egg–mayonnaise mixture help the coating cling, while the Parmesan and panko give you the brittle, chip-like crunch.
Substitutions:
- Use yellow onions instead of sweet if that’s what you have; they’ll taste a bit sharper.
- For a richer flavor, swap half the olive oil for melted butter.
- Gluten-free: use a 1:1 gluten-free flour blend and gluten-free panko.
Step-by-Step Instructions for Crispy Onion Ring Chips in the Oven
- Preheat and prepare the pans.
- Heat the oven to 400°F / 200°C, placing one rack in the upper third and one in the lower third.
- Line 2 large rimmed sheet pans with parchment paper, then lightly brush or spray with olive oil.
Kitchen note: A lightly oiled, parchment-lined pan helps the cheese and crumbs sizzle instead of cementing to the metal, which is a common reason these chips stick and tear.
- Slice the onions into “chip-friendly” rings.
- Trim the root and stem ends from the onions, then cut them crosswise into 1/4-inch (about 6 mm) slices.
- Gently separate the slices into rings, keeping both large and medium rings; very tiny center pieces can be saved for another use.
- Pat the onion rings dry.
- Lay the rings on a clean kitchen towel or paper towels.
- Pat dry on both sides to remove surface moisture.
Kitchen note: Excess moisture is the main reason oven onion ring chips go limp. If your onions are very juicy, give them an extra minute on the towels before coating.
- Mix the dry coating.
- In a shallow bowl, whisk together the flour, 1/2 tsp salt, pepper, garlic powder, and paprika.
- In a second shallow bowl, combine the panko and grated Parmesan, tossing well so the cheese is evenly distributed.
- Make the egg–mayonnaise binder.
- In a third shallow bowl, whisk the egg, mayonnaise, and 2 tbsp olive oil until smooth and slightly thick.
- This mixture should be pourable but coat the back of a spoon; if it’s very thick, whisk in 1–2 tsp water.
- Set up a simple breading station.
- Arrange your bowls in this order: seasoned flour → egg–mayo mixture → Parmesan–panko.
- Keep the oiled sheet pans close by.
- Coat the onion rings.
- Working with a few rings at a time, dredge in the seasoned flour, tapping off any heavy excess.
- Dip into the egg–mayo mixture, letting extra drip back into the bowl.
- Finally, press gently into the Parmesan–panko so both sides are well coated.
- Transfer coated rings to the prepared pans, leaving a little space between each one.
- Finish layering the coating on the pan.
- If you have a bit of Parmesan–panko left, sprinkle it in small mounds under any sparsely coated rings, or between them to create extra cheesy “chips.”
- Lightly mist or brush the tops with a thin film of olive oil for even browning.
- Bake until deeply golden and crisp.
- Bake for 18–22 minutes, rotating the pans front-to-back and swapping racks halfway through.
- Watch during the last 3–5 minutes: the chips should be deep golden at the edges and firm when nudged with a spatula.
- If your oven runs hot, start checking at 15 minutes to avoid scorching the cheese.
- Cool briefly on the pan.
- Remove the pans from the oven and sprinkle the onion ring chips lightly with salt while hot.
- Let them sit for 5–7 minutes so the cheese and crumbs firm up.
- Use a thin spatula to loosen and transfer to a platter.
- Garnish and serve.
- Scatter chopped parsley or chives over the top for color and freshness if using.
- Serve warm as-is, or with simple dips like ketchup, aioli, or a yogurt-based sauce.
Kitchen note: If some chips on the edges brown much faster, pull those off with tongs and return the pan for a few more minutes so the thicker center pieces can catch up.
What to Expect
These oven-baked onion ring chips are crisp and lacy around the edges, with a slightly thicker, tender center where the onion softens.
They will not be identical to deep-fried rings, but the Parmesan–panko crust gives a satisfying, brittle crunch when you bite.
Flavor-wise, you’ll get gentle onion sweetness, a savory, cheesy edge from the Parmesan, and a little warmth from the paprika and garlic.
Different onions behave differently: sweet onions caramelize and brown more, while standard yellow onions can taste a touch sharper and may need an extra pinch of salt.
Ovens vary, so your chips may brown a bit more on one side of the pan; rotating and swapping racks helps even things out.
Kitchen note: If your chips cool completely and feel a little soft, put them back on a parchment-lined pan and reheat at 350°F / 175°C for 4–6 minutes to revive the crunch.
Ways to Change It Up
- Simple vegetarian (already) and an easy dairy-free twist.
- As written, the recipe is meatless.
- For a dairy-free version, skip the Parmesan and use all panko with an extra 1/4 tsp salt and a pinch more paprika.
- The chips will be slightly lighter and less rich, but still nicely crisp.
- Spicier chips.
- Add 1/4–1/2 tsp cayenne pepper or chipotle powder to the flour mixture.
- You can also stir 1 tsp hot sauce into the egg–mayonnaise bowl.
- Expect a noticeable but manageable burn; reduce the black pepper if you’re very heat-sensitive.
- Milder, kid-friendly version.
- Leave out the paprika and reduce black pepper to a small pinch.
- Use sweet onions and consider serving with a familiar dip like ketchup or ranch.
- These adjustments soften the spice without losing the crisp coating.
- Faster, low-mess version.
- Skip the flour step and go straight from egg–mayonnaise to the Parmesan–panko mix.
- The coating will be a little thinner and may not cling as evenly, but you’ll dirty one fewer bowl and shave a few minutes off prep.
- Herb and lemon variation.
- Stir 1 tsp dried Italian herbs into the panko–Parmesan mixture.
- Finish the baked chips with a light squeeze of lemon.
- The acidity brightens the onion and cheese, especially if you’re serving these with richer mains like burgers or steak.
Serving and Storage
Serve these onion ring chips hot or warm.
They work well as a side dish for burgers, grilled chicken, or veggie sandwiches, or as a snack piled on a platter with small dipping bowls.
You can also crumble a few over salads or baked potatoes for crunch instead of croutons.
Leftovers are best stored in an airtight container at room temperature for up to 24 hours.
For slightly longer storage (up to 2 days), refrigerate in a container lined with paper towels, knowing the coating may soften.
To reheat, spread chips on a parchment-lined sheet pan and bake at 350°F / 175°C for 5–7 minutes, just until re-crisped.
Avoid microwaving, which tends to make the coating chewy instead of crisp.
Cultural Context
Onion rings and similar fried onion snacks appear in many modern pub and diner menus, especially in the United States and the United Kingdom.
They are typically made from onion slices dipped in batter or crumbs and deep-fried, though oven-baked variations like these chips follow the same basic idea of coating and crisping sliced onions.
According to food historians, recipes for fried onion slices date back at least to the early 1800s, when British cookbooks described onions dipped in Parmesan batter and fried in fat.
For more on the long history of onions as a staple ingredient, see the National Onion Association’s overview: history of onions.
You can also read about how onion rings evolved into a common snack in Anglo-American cooking in modern reference works such as the entry on onion rings in the Oxford Encyclopedia of Food and Drink in America, which traces their popularity in 20th-century diners and fast-food chains.
Common Questions and Troubleshooting
My onion ring chips turned out pale instead of golden. What happened?
Usually the oven wasn’t hot enough, or the pans were overcrowded.
Make sure you preheat fully to 400°F / 200°C, use light-colored metal pans, and give the chips a little space so hot air can circulate.
If they’re cooked through but still pale, move the pan to the top rack for the last 3–4 minutes.
The coating fell off some of the rings. How can I fix that?
Drying the onions well and following the flour → egg–mayo → panko–Parmesan sequence helps the layers cling.
Avoid scraping the rings around on the pan while they’re baking; wait until they’ve cooled a few minutes before loosening with a spatula.
Next time, make sure the egg mixture isn’t too thin—if it runs off completely, it can’t hold the crumbs.
My chips aren’t very crispy after cooling. Can I save them?
Yes.
Spread them on a parchment-lined sheet pan and bake at 350°F / 175°C for 4–6 minutes until they crisp up again.
Just keep an eye on them so the cheese doesn’t over-brown.
Can I make these ahead for a party?
You can coat the onion rings up to 2 hours ahead, lay them on parchment-lined pans, and refrigerate uncovered.
Bake just before serving so they come to the table hot and crisp.
If you need to bake earlier, plan to re-crisp them briefly in the oven right before guests arrive.
Can I use pre-shredded Parmesan or another cheese?
Pre-shredded Parmesan often contains anti-caking agents, so it doesn’t melt and crisp as cleanly.
If you must use it, expect a slightly thicker, less lacy crust.
Hard cheeses like Grana Padano or Pecorino Romano work very similarly to Parmesan.
Kitchen note: Softer cheeses like cheddar tend to melt and spread too much here, so stick with firm, grateable cheeses for best chip texture.
Conclusion
Oven-baked onion ring chips are a practical way to turn a couple of onions and pantry staples into a crunchy side or snack without managing a pot of hot oil.
Once you’ve made them once, you can adjust the seasoning and spice level to suit your household and pair them with whatever you’re cooking that night.
If you try this version, I’d value your feedback in the comments—especially any tweaks you make to the coating or seasoning so other home cooks can benefit.
Sharing what worked (and what didn’t) helps everyone get closer to the tray of crisp, golden onion ring chips they’re after.
Crispy Onion Ring Chips in the Oven Tonight
Equipment
- 2 large rimmed sheet pans
- Parchment paper
- Cutting board
- Knife
- 3 shallow bowls
- Whisk
- Thin spatula
- Kitchen towel or paper towels
- Pastry brush or oil spray (optional)
Ingredients
- 2 medium sweet onions about 500 g / 1.1 lb total, peeled
- 2 tbsp olive oil 30 ml, plus more for brushing the pan
- 1 large egg
- 2 tbsp mayonnaise 30 g
- 1/2 cup all-purpose flour 60 g
- 1/2 tsp fine sea salt plus more to finish
- 1/4 tsp black pepper
- 1/2 tsp garlic powder
- 1/2 tsp smoked or sweet paprika
- 1 cup finely grated Parmesan cheese 60 g; from a block, not pre-shredded
- 1 cup panko breadcrumbs 60 g
- 1–2 tbsp fresh parsley or chives chopped; optional, for serving
Instructions
- Preheat oven to 400°F / 200°C with one rack in the upper third and one in the lower third. Line 2 large rimmed sheet pans with parchment paper, then lightly brush or spray with olive oil.
- Trim root and stem ends from the onions, then slice crosswise into 1/4-inch (about 6 mm) slices. Separate into rings; save very small center pieces for another use.
- Lay onion rings on a clean kitchen towel or paper towels and pat dry on both sides to remove surface moisture.
- In a shallow bowl, whisk together flour, 1/2 tsp salt, black pepper, garlic powder, and paprika. In a second shallow bowl, toss together panko and finely grated Parmesan until evenly mixed.
- In a third shallow bowl, whisk egg, mayonnaise, and 2 tbsp olive oil until smooth and slightly thick. If very thick, whisk in 1–2 tsp water until it’s pourable but coats the back of a spoon.
- Arrange a breading station in this order: seasoned flour → egg–mayo mixture → Parmesan–panko. Keep the oiled sheet pans close by.
- Working with a few rings at a time, dredge in seasoned flour (tap off excess), dip in egg–mayo (let excess drip off), then press into Parmesan–panko to coat both sides. Transfer to prepared pans, leaving a little space between rings.
- If you have extra Parmesan–panko, sprinkle small mounds under sparsely coated rings or between rings for extra cheesy “chips.” Lightly mist or brush tops with a thin film of olive oil for even browning.
- Bake 18–22 minutes, rotating pans front-to-back and swapping racks halfway through, until deeply golden at the edges and firm when nudged with a spatula.
- Remove from oven and sprinkle lightly with salt while hot. Cool on the pans for 5–7 minutes to let the coating firm up, then loosen with a thin spatula and transfer to a platter.
- Garnish with chopped parsley or chives if using. Serve warm as-is or with dips like ketchup, aioli, or a yogurt-based sauce.
Leave a Reply