
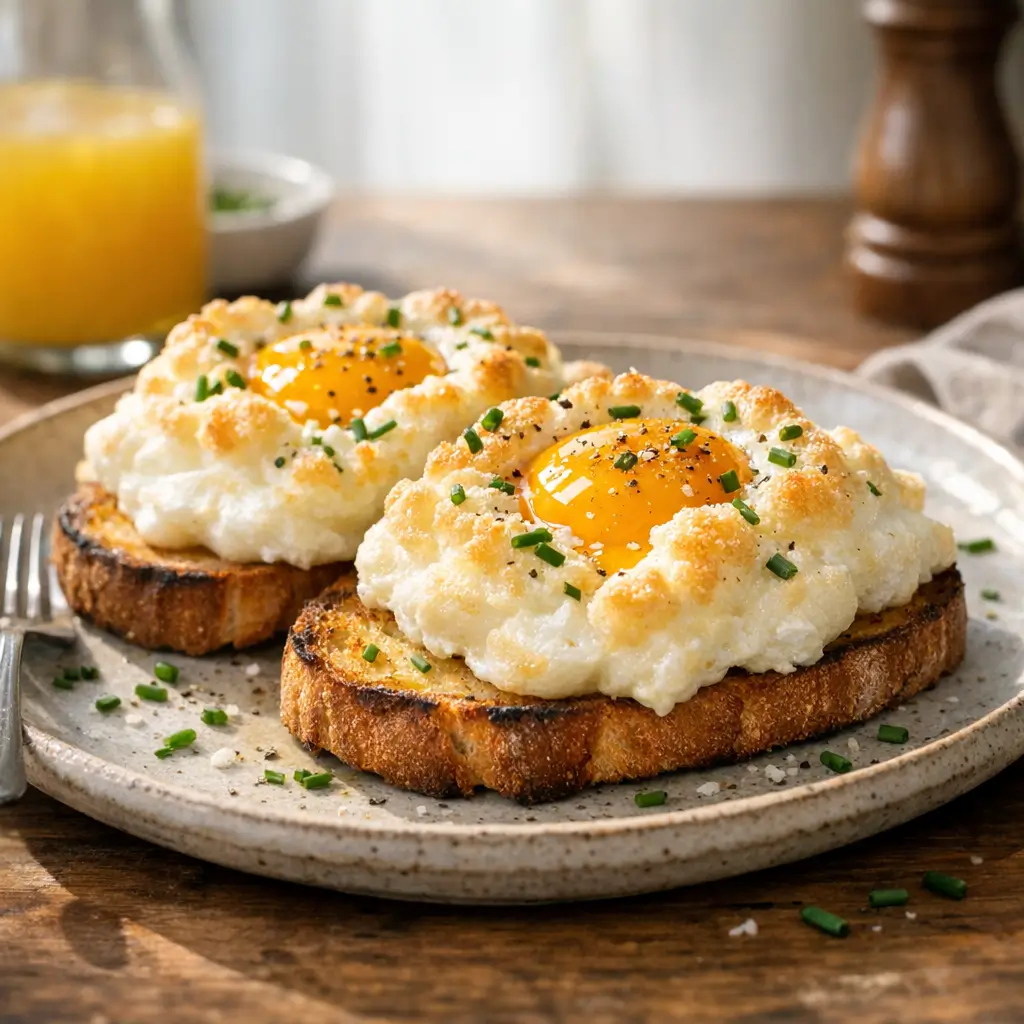
You’ve probably seen them on brunch menus and social feeds: Fluffy Cloud Eggs with billowy whites and a golden, soft yolk. They look fancy, but the method is straightforward. Separate, whip, bake, and enjoy.
Here’s the draw: a crispy-edged, airy white with a creamy center that begs for toast. Ideal for weekend breakfasts or a quick dinner, this dish suits newer cooks who want a win and busy parents who need speed without sacrificing presentation.
Expect a savory, lightly cheesy aroma, a tender marshmallow-like bite, and yolks you can set to taste. The steps move quickly once you start whisking, so a little setup goes a long way.
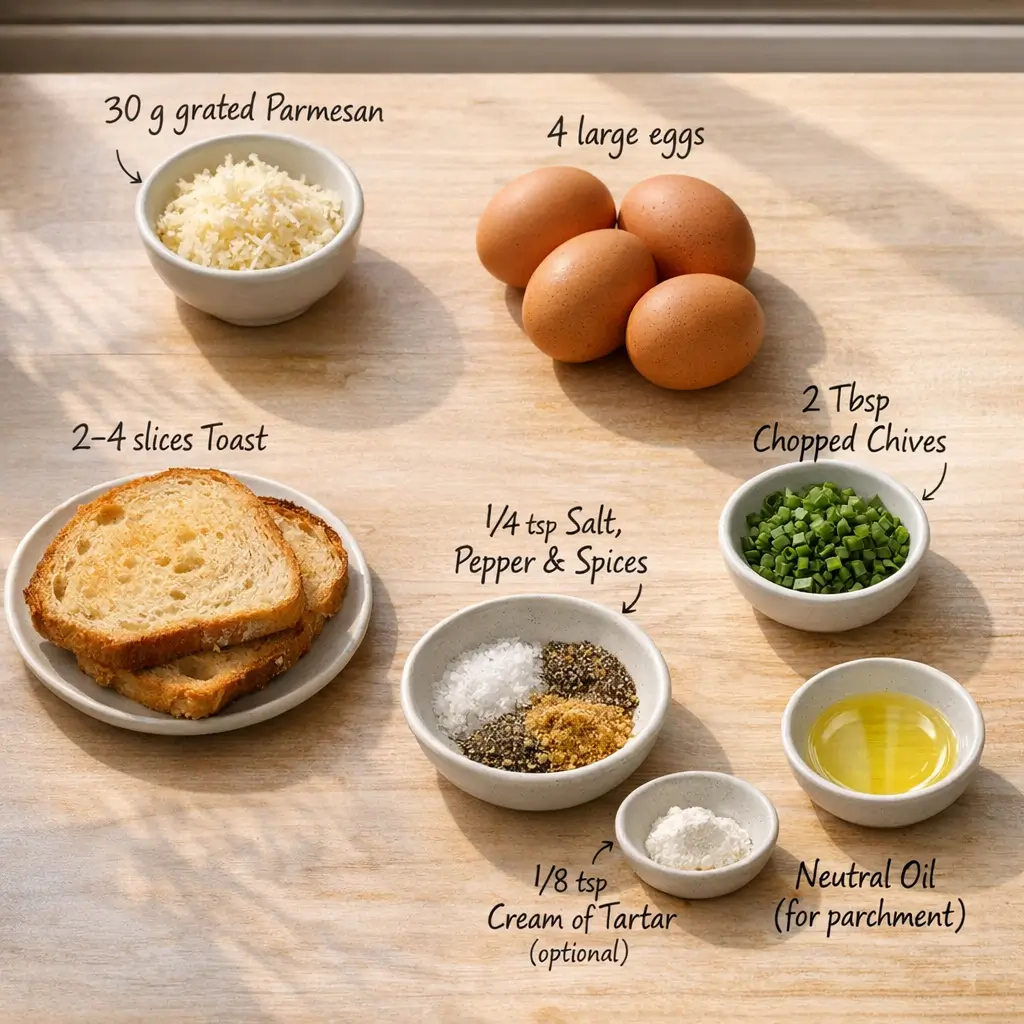
INGREDIENTS
- 4 large eggs (about 200 g without shells) — separates into whites for volume and yolks for the soft center; serves 2 generously or 3 lighter portions
- 30 g (1 oz / about 1/3 cup loosely packed) finely grated Parmesan or Gruyère — adds salty depth and helps the whites brown; use mild cheddar or pecorino in a pinch
- 1/4 tsp fine sea salt, plus more to finish — seasons the whites
- Freshly ground black pepper, to taste — balances richness
- 2 tbsp (10 g) finely chopped chives or thinly sliced scallions — herbal freshness; use parsley if you prefer
- 2–4 slices sturdy toast (sourdough, country bread, or brioche) — for serving
- Optional stabilizer: a pinch (1/8 tsp) cream of tartar or 1/2 tsp lemon juice — helps the foam hold its shape, useful in humid kitchens
- Optional fat barrier: a light spray of neutral oil for parchment — discourages sticking
Notes on sourcing: Standard large eggs, basic cheese, and fresh herbs from any supermarket are perfect. Room-temperature eggs whip faster, so pull them out 20–30 minutes ahead if possible.
STEP-BY-STEP INSTRUCTIONS
- Preheat and prep the tray.
- Heat the oven to 450°F (232°C). Line a light-colored sheet pan with parchment. Lightly mist the parchment if yours tends to stick.
- Why 450°F? A hot oven sets the airy whites before they sag. If your oven runs hot or you’re using convection, reduce to 425°F (220°C) and add 1–2 minutes to the timing.
- Separate the eggs carefully.
- Set 4 small cups or ramekins on the counter. Crack each egg, letting the white fall into a clean, grease-free mixing bowl while nestling each yolk in an individual cup.
- Beginner safeguard: Even a small drop of yolk or any grease in the whites can prevent stiff peaks. If a yolk breaks, reserve that egg for scrambled eggs and start with a fresh one.
- Whip the whites to stiff peaks.
- Using a handheld mixer or stand mixer with whisk attachment, beat on medium-low until foamy, 30–60 seconds. Add the salt (and cream of tartar or lemon juice if using). Increase to medium-high and beat until the whites are glossy and hold upright peaks with just a slight curl at the tip, 1½–3 minutes depending on mixer power and egg temperature.
- Sensory cue: The whisk should leave clear, defined lines. When you lift it, the peak stands tall rather than sliding.
- Avoid overbeating: If the foam looks dry or clumpy and starts to grain, you’ve gone too far. Add 1 tsp water and beat briefly to gently relax it.
- Fold in flavor.
- Sprinkle in the grated cheese and most of the chives (reserve a few pinches for garnish). Fold with a spatula 2–3 times, just until distributed. Overfolding will deflate the foam.
- Shape the clouds.
- Spoon the whites into 4 equal mounds on the lined sheet, spacing them well. Use the back of a spoon to create a shallow well in each mound wide enough to cradle a yolk without overflowing.
- Pro tip: Make the wells a touch wider than you think; the whites puff and the crater appears smaller after baking.
- Bake the whites first.
- Slide the pan onto the middle rack and bake until the mounds look set on the outside and lightly golden at the edges, 3–4 minutes at 450°F (5–6 minutes at 425°F). Rotate the pan halfway if your oven browns unevenly.
- Watch closely here; color develops fast. If you like extra-soft whites, err on the earlier side.
- Add yolks and finish.
- One by one, gently pour a yolk into each well. Return the pan to the oven until the yolks are cooked to your liking: 3–4 minutes for runny centers, 5 minutes for jammy, or 6 minutes for set.
- Expect a little wobble in the center; that’s the charm. Season with pepper and a pinch of salt.
- Plate and serve.
- Slide a thin spatula under each cloud to release, then transfer to toast. Sprinkle with the reserved chives. Serve immediately while the edges are crisp.
Timing variability: Egg size, oven calibration, and thickness of your mounds all change the clock. Your first batch sets the baseline for future tweaks.
WHAT TO EXPECT FROM FLUFFY CLOUD EGGS
Texture: The edges will be lightly crisp and browned, the interior airy and tender like a savory meringue, and the yolk creamy to runny depending on your timing.
Flavor: Mild and eggy with a salty-cheesy backbone from Parmesan or Gruyère. Chives brighten each bite without overpowering.
Variability: Dark pans brown faster than light ones. Convection adds color quickly, so reduce heat by 25°F (about 15°C). Parmesan is saltier than Gruyère; if using it, taste before adding extra salt.
WAYS TO CHANGE IT UP
-
Vegetarian and vegan-inspired options
-
Keep it vegetarian as written. For a fully egg-free riff, whip 6 tbsp aquafaba (liquid from canned chickpeas) with a pinch of cream of tartar to stiff peaks, fold in 2 tbsp nutritional yeast and herbs, then bake into “clouds” at 400°F (205°C) for 10–12 minutes. Trade-off: You’ll get a pleasant airy bite, but no yolk richness.
-
Spicier or milder
-
For heat, fold in 1/4 tsp red pepper flakes or use 30 g (1 oz) grated pepper jack in place of Parmesan. For kids or milder palates, skip pepper and use a sweeter cheese like mild cheddar and extra chives. Spice increases browning slightly; keep an eye on the edges.
-
Faster or simplified
-
Use a stand mixer and room-temperature eggs to reach stiff peaks in under 2 minutes. Skip the cheese and herbs for a minimalist version that bakes a bit faster. Or bake two larger mounds instead of four to speed shaping; increase the first bake by 1–2 minutes.
-
Add-ins and toppers
-
Fold in 1–2 tbsp finely chopped cooked bacon or ham, or top the finished clouds with smoked paprika, everything bagel seasoning, or a dab of pesto. Meaty add-ins add weight, so keep pieces small to protect loft.
SERVING AND STORAGE
Serve on buttered toast, English muffins, or a bed of sautéed spinach. A simple side of sliced tomatoes or avocado rounds out the plate nicely.
For a heartier brunch, pair with roasted potatoes or a fruit salad. A squeeze of lemon over the finished eggs lifts the richness.
Storage: These are best eaten immediately. The whites lose volume as they sit and the yolk continues to set from residual heat. If you must hold them, keep on a warm (not hot) plate for up to 10 minutes.
Reheating: Not recommended—the texture toughens and the yolk overcooks. If you have leftover baked whites, chop and fold them into a breakfast burrito or fried rice the same day.
Make-ahead components: You can separate eggs up to 24 hours in advance. Keep whites in a clean, covered container and yolks cushioned under a thin layer of water in another; refrigerate both and bring to room temp before whipping and baking.
CULTURAL CONTEXT
This technique combines two familiar ideas: whipping egg whites into a foam and briefly baking, much like a savory nod to meringue and soufflé methods. For a deeper look at the science—how proteins trap air and set with heat—see the Exploratorium’s overview of egg foams and functions (Science of Cooking: The Amazing Multi‑Tasking Egg).
Cloud-style eggs surged in popularity around 2017 thanks to social media, but versions of whipped, baked whites have appeared in European cookery for centuries. To explore the broader background of meringue itself, including how sugar and acid stabilize foams, read the encyclopedia entry on meringue (Meringue — Wikipedia), which provides historic and technical context.
COMMON QUESTIONS AND TROUBLESHOOTING
-
My whites won’t reach stiff peaks. What went wrong?
-
The usual culprits are fat and moisture. A hint of yolk, a greasy bowl, or even a little water can block foaming. Use a metal or glass bowl (plastic can hold grease), make sure whisk and bowl are squeaky clean, and start with room-temperature whites. A pinch of cream of tartar helps stability.
-
The clouds spread out on the pan instead of holding shape.
-
The foam was underbeaten or too warm. Beat until glossy, stand-up peaks form, and work quickly once you’ve shaped the mounds. If your kitchen is hot, chill the sheet pan for 5 minutes before spooning the whites.
-
My yolks overcooked.
-
Reduce the second bake by 30–60 seconds, and watch through the oven door. Pull early for runny centers; residual heat will finish them slightly on the plate. For jammy yolks, aim for a gentle wobble.
-
The edges browned too fast.
-
Lower the oven by 25°F (15°C) or switch to a light aluminum pan. Dark pans and convection accelerate browning. You can also tent loosely with foil in the final minute.
-
Can I make just two clouds?
-
Yes. Halve the recipe or make two larger mounds, increasing the initial bake by 1–2 minutes to ensure the centers set enough to hold the yolks.
-
Is cheese necessary?
-
No. Cheese adds flavor and a little browning, but plain clouds are delicate and lovely. Season a touch more and add extra herbs to compensate.
-
Are these safe for kids and pregnant people if the yolk is runny?
-
Use your own comfort level. If you need fully set yolks, simply bake longer. You can also seek out pasteurized shell eggs.
-
Can I use aquafaba to make a vegan version?
-
Yes for the “cloud” component. Whip aquafaba with a pinch of cream of tartar until very stiff, season, and bake mounds at 400°F (205°C) until lightly golden. There’s no yolk equivalent in this format, so plan to serve with avocado or a vegan hollandaise-style sauce.
CONCLUSION
With a little whisking and a hot oven, Fluffy Cloud Eggs deliver big visual payoff with minimal effort. Use this method as a base, then adjust bake time, cheese, and herbs to suit your taste and tools. If you try them, share what you changed—pan type, oven setting, add-ins—and leave a note with your timing so fellow home cooks can benefit from your experience.
Leave a Reply