
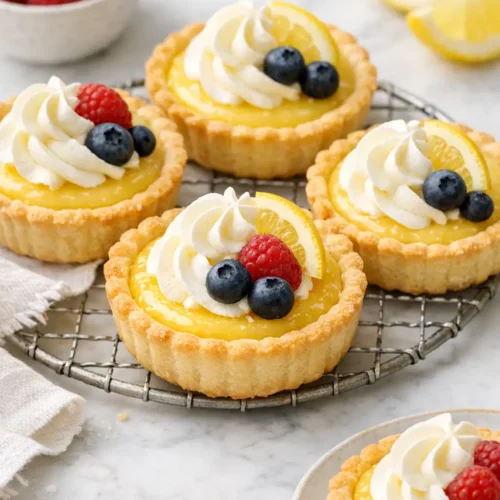
Mini lemon tartlets with creamy filling give you bright citrus flavor in bite-size form, with a buttery crust that stays crisp under a smooth, tangy custard. They show up on dessert tables, at spring or summer gatherings, and anywhere you’d normally see a lemon tart or lemon bars—just in a neater, hand-held package.
If you’re staring down a busy weeknight or working in a small kitchen, start by making the dough first so it can chill while you prep the lemon filling. When you get to the stovetop step, stay close to the pan and keep whisking; that’s the only moment that really needs your full attention.
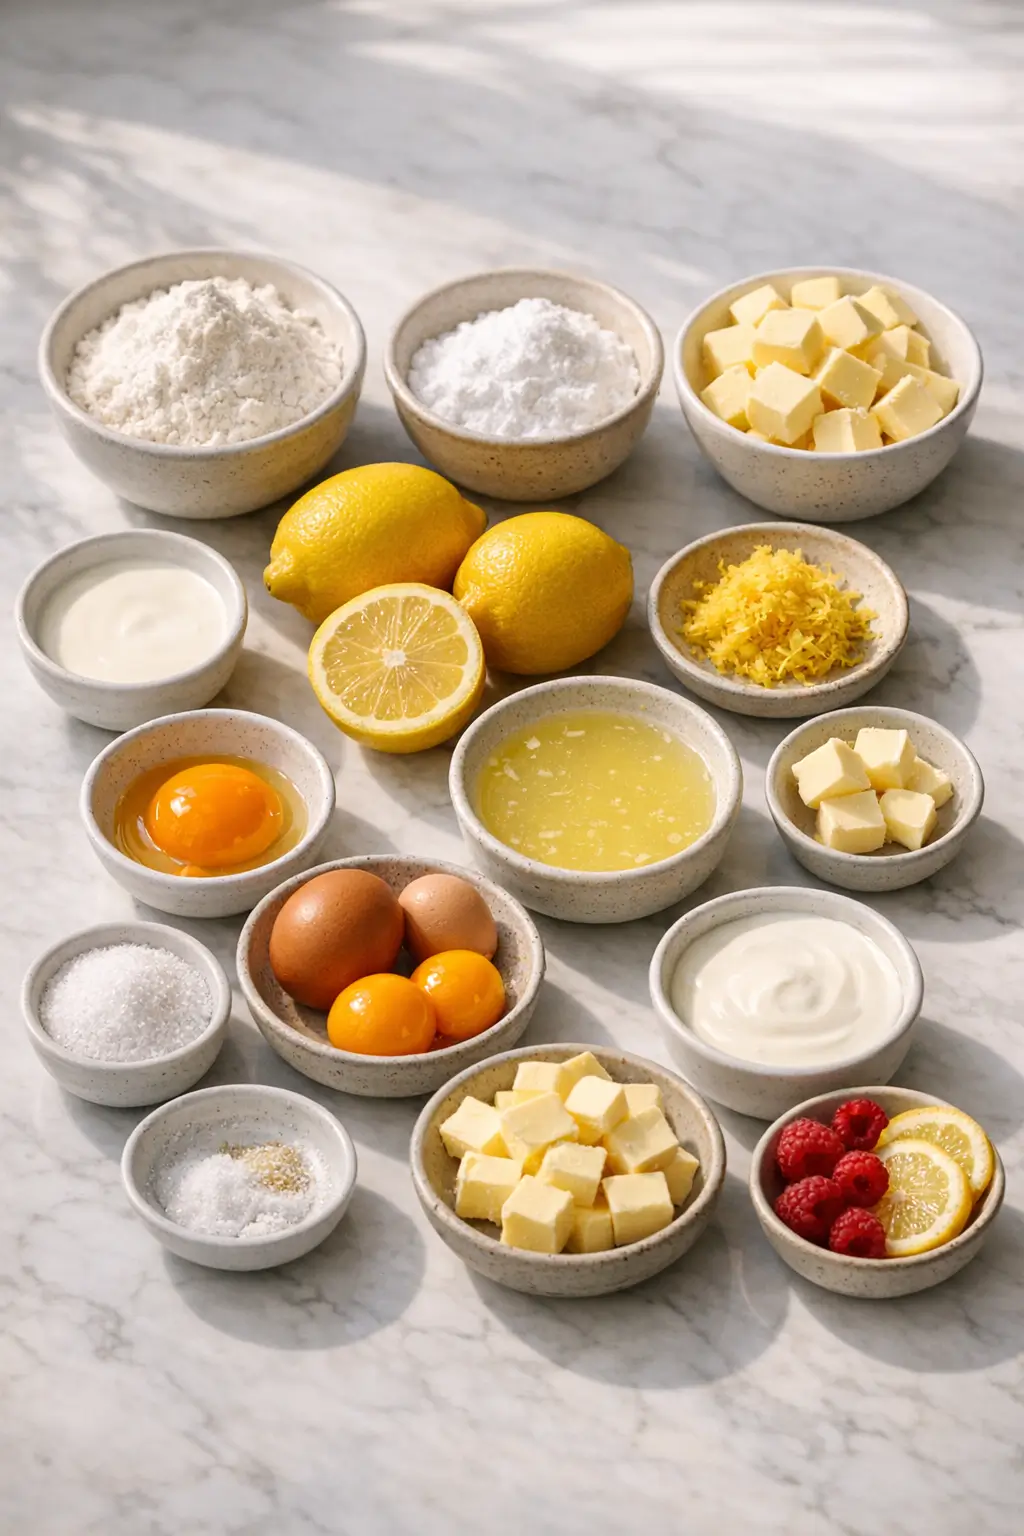
Ingredients
Makes about 10–12 tartlets (8 cm / 3-inch tins), serves 4–6
For the sweet tartlet crust
- 160 g (1 1/4 cups) all-purpose flour – base of the pastry
- 50 g (1/2 cup) powdered sugar – tender sweetness and finer texture
- 1/4 tsp fine sea salt – balances the sweetness
- 115 g (1/2 cup) unsalted butter, cool and cut in small cubes – for a crisp, short crust
- 1 large egg yolk – adds richness and helps bind
- 1–2 tbsp cold heavy cream or milk – only as needed to bring the dough together
- Optional: 1/2 tsp finely grated lemon zest – for a slightly lemony crust
For the creamy lemon filling
- 150 g (3/4 cup) granulated sugar – sweetness and structure
- 2 large eggs
- 2 large egg yolks – gives a richer, silkier custard
- 120 ml (1/2 cup) freshly squeezed lemon juice – about 3–4 medium lemons
- 2 tsp finely grated lemon zest – boosts lemon aroma
- 120 ml (1/2 cup) heavy cream – makes the filling creamy and soft-set
- 60 g (4 tbsp) unsalted butter, cut into small pieces – whisked in at the end for gloss and extra creaminess
- 1/8 tsp fine sea salt – rounds out the tartness
For topping (optional but recommended)
- 120 ml (1/2 cup) cold heavy cream
- 1 tbsp powdered sugar
- Optional: fresh berries or thin lemon slices, to garnish
Step-by-Step Instructions for Lemon Tartlets with Creamy Filling
1. Make and chill the tartlet dough
- In a medium bowl, whisk together the flour, powdered sugar, and salt until no lumps of sugar remain.
- Add the cool cubed butter. Rub the butter into the dry ingredients with your fingertips or a pastry cutter until the mixture looks like coarse crumbs with some pea-sized bits of butter.
- Whisk the egg yolk with 1 tablespoon of cold cream or milk, then drizzle it over the flour mixture. Add the lemon zest if using.
- Use a fork to toss everything together, then switch to your hands and gently press the mixture until it starts to clump. If it’s still dry and sandy after a minute, add up to 1 more tablespoon cold cream, a few drops at a time.
- Tip the dough onto a piece of plastic wrap and press it into a flat disk about 2–3 cm (1 inch) thick. Wrap tightly and chill for at least 45 minutes, or up to 2 days.
Kitchen note: If the dough looks streaky with butter, that’s good—those streaks create flakiness. Stop adding liquid as soon as it holds together when pressed; too much makes the crust tough.
2. Line the tartlet tins and blind bake
- When the dough is firm, remove it from the fridge and let it rest on the counter for about 5–10 minutes so it softens slightly.
- Lightly flour your work surface and rolling pin. Roll the dough to about 3 mm (1/8 inch) thickness, rotating and flouring lightly as needed to prevent sticking.
- Cut circles slightly larger than your tartlet tins (8–9 cm / 3–3.5 inches). Gently ease each circle into a tartlet tin, pressing the dough into the corners and up the sides without stretching it.
- Trim excess dough with a small knife, then prick the bottoms several times with a fork.
- Place the lined tins on a baking sheet and chill or freeze for 15–20 minutes while you heat the oven to 180°C / 350°F.
- Cut small squares of baking parchment to fit inside each tart shell, then fill them with pie weights, dry beans, or rice.
- Blind bake the shells for 12–14 minutes, until the edges just start to turn light golden.
- Carefully lift out the parchment and weights. Return the shells to the oven for another 6–8 minutes, until the centers look dry and the crust is an even pale gold.
- Let the tartlet shells cool completely on a rack. Leave them in their tins for now; they’re easier to fill this way.
Kitchen note: If the pastry slumps or shrinks, it was likely too warm going into the oven or not well-chilled. Next time, keep the lined tins in the freezer for a full 20 minutes before baking.
3. Cook the creamy lemon filling
- In a medium, heavy-bottomed saucepan (off the heat), whisk together the sugar, eggs, egg yolks, and salt until the mixture is smooth and slightly lightened.
- Whisk in the lemon juice and zest.
- Set the pan over low to medium-low heat. Cook, whisking constantly, until the mixture thickens enough to coat the back of a spoon and reaches about 75–80°C / 170–175°F. This usually takes 6–10 minutes depending on your stove.
- Once thickened, remove from the heat and immediately whisk in the butter pieces, a few at a time, until fully melted and the mixture is glossy.
- Whisk in the heavy cream until fully combined and silky.
- Strain the filling through a fine-mesh sieve into a clean bowl to catch any bits of cooked egg or zest.
Kitchen note: If you see steam but the filling hasn’t thickened after several minutes, your heat is too low. Increase it slightly and keep whisking—just avoid a full boil, which can curdle the eggs.
4. Fill and chill the tartlets
- Once the tart shells are completely cool, arrange them on the baking sheet.
- Pour or spoon the warm lemon cream into each shell, filling almost to the top. A small jug or piping bag makes this neater, but a spoon works fine.
- Tap the baking sheet gently on the counter to release any air bubbles and level the tops.
- Chill the filled tartlets, uncovered, for at least 2 hours, or until the filling is softly set and no longer wobbly in the center when you nudge the tin.
5. Whip the cream and garnish
- Just before serving, whip the cold heavy cream and powdered sugar together to soft or medium peaks.
- Carefully remove the tartlets from their tins.
- Pipe or spoon a small dollop of whipped cream on each tartlet. Add fresh berries or a very thin slice of lemon if you like.
Kitchen note: Add whipped cream shortly before serving. If it sits in the fridge for many hours, it can weep and soften the top of the tart.
What to Expect
The crust should be crisp and cookie-like rather than flaky—closer to a shortbread than a pie crust. It will have just enough tenderness to crumble gently when you bite it, while still holding up in your hand.
Inside, the creamy lemon filling sets to a soft custard. It slices cleanly but feels almost mousse-like on the tongue thanks to the butter and cream. Expect a balance of tart lemon with noticeable sweetness, not a mouth-puckering sour.
Flavor will shift slightly with your lemons and their freshness. Very tart lemons will give a sharper finish, while slightly older fruit can taste more mellow. Oven differences and pan color can also affect how dark and crisp the crust becomes; darker pans brown faster and may need a minute less.
Ways to Change It Up
1. A lighter, almost pudding-style version
Swap the heavy cream in the filling for 120 ml (1/2 cup) whole milk. The result is a slightly lighter custard that’s closer to a firm pudding. It will still slice, but the texture will be a bit softer and less rich.
You can also skip the whipped cream topping and dust the chilled tartlets with powdered sugar instead. This keeps things leaner and even faster to finish.
2. A less tart, kid-friendlier option
If your lemons are very sharp or you’re cooking for people who prefer gentle citrus, reduce the lemon juice to 100 ml (a scant 1/2 cup) and add 2–3 extra tablespoons sugar to the filling. The custard will taste more like lemon cream pie—still citrusy, but smooth and mellow.
For even less punch, omit the zest; that’s where much of the aromatic intensity lives.
3. A bolder, tangier citrus hit
For those who like dessert with real bite, keep the lemon juice at 120 ml (1/2 cup) and add an extra teaspoon of zest. You can reduce the cream slightly to 90 ml (3/8 cup) to push the texture a touch firmer and more curd-like.
Finishing with a torch-kissed meringue instead of whipped cream also emphasizes the contrast between sharp lemon and sweet topping. Use your preferred stable meringue recipe and pipe it over fully chilled tartlets.
4. A simple no-mixer version
If you don’t want to pull out a stand mixer, you can use a food processor for the dough or even make it entirely by hand. Rub the butter into the flour mixture with your fingertips and stir in the yolk/cream mixture with a fork.
The filling itself only needs a whisk and saucepan. This makes the whole recipe achievable in a basic rental or small kitchen.
Serving and Storage
Mini lemon tartlets work well at the end of a brunch, afternoon tea, or any meal where you want a small, bright dessert instead of something heavy. They sit nicely on dessert platters and can be picked up without a mess if the filling is fully chilled.
Serve them cold or cool, straight from the fridge or after 10–15 minutes at room temperature. Slightly warmer tartlets will taste a little more aromatic because the lemon comes forward as the fat softens.
Fresh berries, a few shreds of lemon zest, or very thin lemon slices make easy garnishes. For a fuller spread, they pair well with simple cookies or a plain sponge cake, and with non-citrus desserts like chocolate mousse to balance the menu.
Leftover tartlets keep, covered, in the fridge for up to 3 days. The crust will gradually soften but should still be pleasant. For best texture, store them without whipped cream on top and add that just before serving.
These tartlets are not ideal for freezing once filled, as the custard can separate as it thaws. However, the unfilled baked tartlet shells freeze well for up to a month in an airtight container; re-crisp them for 5 minutes at 160°C / 325°F before filling.

Cultural Context
Lemon tartlets draw on a long European tradition of fruit tarts baked in crisp pastry shells. The idea of a lemon-based tart, often called tarte au citron in French, highlights citrus imported into cooler climates and preserved as curd or custard. Individual tartlets adapt that concept into a more portable form.
Many modern versions are closely related to lemon curd tarts, which combine eggs, sugar, lemon, and butter into a thickened filling set inside pâte sucrée. For a concise overview of custard- and curd-filled tarts in European pastry, it’s useful to look at resources on classic tart-making, such as this discussion of custard tarts by the British Museum’s food history blog on custard tarts. For a broader look at lemon as a dessert flavor, the Metropolitan Museum of Art’s exploration of lemon trees in art shows how citrus has long been associated with luxury and brightness in European culture.
Common Questions and Troubleshooting
My filling stayed runny after chilling. What went wrong?
The most common cause is undercooking. The lemon mixture needs to reach about 75–80°C / 170–175°F and visibly thicken before you add the butter and cream. If it only warmed slightly, it won’t set. Next time, keep the pan over low to medium-low heat, whisk constantly, and watch for it to coat the back of a spoon.
The custard looks curdled or grainy. Can I fix it?
Slight curdling usually comes from the heat being too high or the mixture boiling. Immediately remove the pan from the heat and whisk vigorously, then strain through a fine-mesh sieve. Often, this smooths the custard enough to use. For severe curdling, you’ll need to start again and keep the heat lower.
My crust shrank down the sides of the tins. How do I prevent that?
Shrinkage happens when dough is stretched into the tins or not well-chilled. When lining, lift and gently press the dough into corners rather than pulling it. Make sure the shells are very cold—ideally frozen—before they go into the oven, and don’t skip the pie weights for the first bake.
Can I use bottled lemon juice instead of fresh?
Fresh juice gives the cleanest flavor, but in a pinch you can use bottled lemon juice, preferably one that is 100% juice without added flavors. Taste the filling before cooking; you may want a bit more zest or sugar to balance any slightly flat or harsh notes.
Can I make these tartlets ahead for a party?
Yes. You can bake the shells a day or two in advance and store them in an airtight container at room temperature. The filled tartlets can be chilled up to 24 hours before serving. Hold off on the whipped cream until close to serving time for the best texture.
Is there a way to make this recipe dairy-free?
You can experiment with full-fat coconut cream in place of heavy cream and a plant-based butter in the crust and filling, but the texture and flavor will change noticeably. The filling may set a bit more softly, and the crust may not be quite as crisp.
Conclusion
These lemon tartlets with creamy filling bring together a crisp, sweet crust and a smooth, tangy custard in neat, hand-held portions that work for both casual and more formal occasions. Once you’ve made them once or twice, the rhythm of chilling, baking, and whisking the filling becomes very manageable, even in a busy kitchen.
If you try them, feel free to leave a comment with how they turned out and any small tweaks you made to suit your taste or equipment. Those details help other home cooks judge how the recipe behaves in real-world kitchens.
Lemon Tartlets with Creamy Filling Made Simple
Equipment
- Medium mixing bowl
- Whisk
- Pastry cutter (optional)
- Rolling Pin
- 3-inch (8 cm) tartlet tins
- Baking sheet
- Parchment paper
- Pie weights, dry beans, or rice
- Cooling rack
- Fork
- Small knife
- Medium heavy-bottomed saucepan
- Fine-mesh sieve
Ingredients
For the sweet tartlet crust
- 160 g all-purpose flour
- 50 g powdered sugar
- 1/4 tsp fine sea salt
- 115 g unsalted butter cool and cut in small cubes
- 1 large egg yolk
- 1–2 tbsp cold heavy cream or milk as needed to bring the dough together
- 1/2 tsp finely grated lemon zest optional
For the creamy lemon filling
- 150 g granulated sugar
- 2 large eggs
- 2 large egg yolks
- 120 ml freshly squeezed lemon juice about 3–4 medium lemons
- 2 tsp finely grated lemon zest
- 120 ml heavy cream
- 60 g unsalted butter cut into small pieces
- 1/8 tsp fine sea salt
For topping (optional but recommended)
- 120 ml cold heavy cream
- 1 tbsp powdered sugar
- fresh berries or thin lemon slices optional, to garnish
Instructions
- In a medium bowl, whisk together the flour, powdered sugar, and salt until no lumps of sugar remain.
- Add the cool cubed butter. Rub the butter into the dry ingredients with your fingertips or a pastry cutter until the mixture looks like coarse crumbs with some pea-sized bits of butter.
- Whisk the egg yolk with 1 tablespoon of cold cream or milk, then drizzle it over the flour mixture. Add the lemon zest if using.
- Use a fork to toss everything together, then switch to your hands and gently press the mixture until it starts to clump. If it’s still dry and sandy after a minute, add up to 1 more tablespoon cold cream, a few drops at a time.
- Tip the dough onto a piece of plastic wrap and press it into a flat disk about 2–3 cm (1 inch) thick. Wrap tightly and chill for at least 45 minutes, or up to 2 days.
- When the dough is firm, remove it from the fridge and let it rest on the counter for about 5–10 minutes so it softens slightly.
- Lightly flour your work surface and rolling pin. Roll the dough to about 3 mm (1/8 inch) thickness, rotating and flouring lightly as needed to prevent sticking.
- Cut circles slightly larger than your tartlet tins (8–9 cm / 3–3.5 inches). Gently ease each circle into a tartlet tin, pressing the dough into the corners and up the sides without stretching it.
- Trim excess dough with a small knife, then prick the bottoms several times with a fork.
- Place the lined tins on a baking sheet and chill or freeze for 15–20 minutes while you heat the oven to 180°C / 350°F.
- Cut small squares of baking parchment to fit inside each tart shell, then fill them with pie weights, dry beans, or rice.
- Blind bake the shells for 12–14 minutes, until the edges just start to turn light golden.
- Carefully lift out the parchment and weights. Return the shells to the oven for another 6–8 minutes, until the centers look dry and the crust is an even pale gold.
- Let the tartlet shells cool completely on a rack. Leave them in their tins for now; they’re easier to fill this way.
- In a medium, heavy-bottomed saucepan (off the heat), whisk together the sugar, eggs, egg yolks, and salt until the mixture is smooth and slightly lightened.
- Whisk in the lemon juice and zest.
- Set the pan over low to medium-low heat. Cook, whisking constantly, until the mixture thickens enough to coat the back of a spoon and reaches about 75–80°C / 170–175°F (6–10 minutes).
- Once thickened, remove from the heat and immediately whisk in the butter pieces, a few at a time, until fully melted and the mixture is glossy.
- Whisk in the heavy cream until fully combined and silky.
- Strain the filling through a fine-mesh sieve into a clean bowl to catch any bits of cooked egg or zest.
- Once the tart shells are completely cool, arrange them on the baking sheet.
- Pour or spoon the warm lemon cream into each shell, filling almost to the top.
- Tap the baking sheet gently on the counter to release any air bubbles and level the tops.
- Chill the filled tartlets, uncovered, for at least 2 hours, or until the filling is softly set and no longer wobbly in the center when you nudge the tin.
- Just before serving, whip the cold heavy cream and powdered sugar together to soft or medium peaks.
- Carefully remove the tartlets from their tins.
- Pipe or spoon a small dollop of whipped cream on each tartlet. Add fresh berries or a very thin slice of lemon if you like.
Leave a Reply