
INTRODUCTION
If you’re after a reliable, weeknight-friendly way to get enchiladas on the table, this version focuses on simple steps, supermarket ingredients, and consistent results. You’ll find dishes like this at Mexican restaurants and family tables alike, typically served for dinner but welcome at potlucks and casual gatherings year-round.
The method here suits newer cooks who want guardrails and experienced home chefs who value repeatable structure. Expect soft corn tortillas that hold their shape, a savory chicken-and-onion filling, and a gently spiced red sauce with mild heat (you can push it spicier, or keep it mellow for kids).
The bake time is short, cleanup is reasonable, and the techniques—like briefly warming tortillas so they don’t crack—are the kind that pay off every single time. Below you’ll find timing windows, sensory checkpoints, and practical pivots to fit what’s in your pantry.
INGREDIENTS
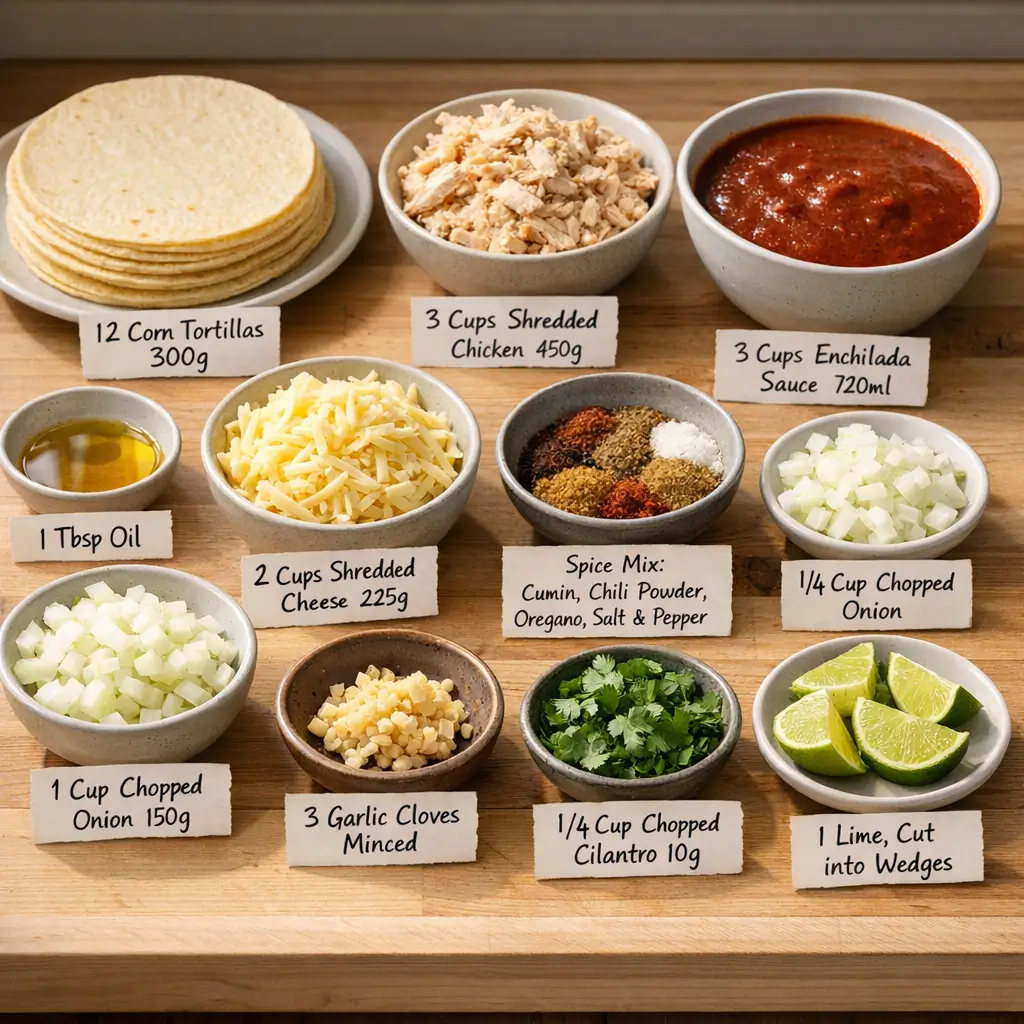
For a 9×13-inch (23×33 cm) pan; yields 12 enchiladas (4–6 servings)
- 12 small corn tortillas (6-inch; about 300 g) — structure and flavor. Flour tortillas work, but the texture is softer; use 8-inch and make 10 rolls instead.
- 3 cups (450 g) cooked shredded chicken — rotisserie or leftover roast works. For vegetarian, sub 2 1/2 cups (425 g) drained black beans or 2 cups (300 g) roasted vegetables.
- 3 cups (720 ml) red enchilada sauce — homemade or store-bought. If sauce is very salty, reduce added salt in the filling.
- 2 cups (8 oz/225 g) shredded melting cheese (Monterey Jack, Oaxaca, or a mild cheddar blend)
- 1 cup (150 g) chopped yellow onion, divided (3/4 cup for filling; 1/4 cup for topping)
- 3 garlic cloves, minced (about 1 Tbsp/9 g)
- 1 Tbsp (15 ml) neutral oil for sautéing the filling (plus more for tortillas; see notes below)
- 1 tsp (3 g) ground cumin
- 1 1/2 tsp (4 g) chili powder (American-style blend)
- 1 tsp (1 g) dried oregano (preferably Mexican oregano if available)
- 3/4 to 1 tsp (4–6 g) kosher salt, to taste
- 1/4 tsp (0.5 g) freshly ground black pepper
- 1/4 cup (10 g) chopped cilantro, stems and leaves (optional)
- 1 lime, cut into wedges (for finishing)
Optional for tortilla prep (choose one method below):
- Light pan-fry: 1/3 cup (80 ml) neutral oil
- Or brush-and-bake: 2 Tbsp (30 ml) neutral oil
To serve (optional):
- Mexican crema or sour cream; avocado slices; extra cilantro; crumbly cheese (cotija or queso fresco); lime wedges
STEP-BY-STEP INSTRUCTIONS
Preheat and prep the pan
- Heat oven to 375°F (190°C) with a rack in the center. Lightly oil or spray a 9×13-inch (23×33 cm) baking dish. Spoon 1/2 cup (120 ml) enchilada sauce into the dish and spread to coat the bottom. This prevents sticking and gives the first layer of tortillas something to sit on.
- Make the filling (5–7 minutes)
- Warm 1 Tbsp (15 ml) oil in a large skillet over medium heat. Add 3/4 cup (110 g) onion and a pinch of salt; cook, stirring, until translucent and lightly sweet, 2–3 minutes. Add garlic; cook just until fragrant, 30 seconds. Sprinkle in cumin, chili powder, oregano, black pepper, and 1/4 tsp salt; toast spices for 20–30 seconds to bloom.
- Add shredded chicken and 1/2 cup (120 ml) enchilada sauce to moisten. Stir until the chicken is evenly coated and steamy, 1–2 minutes. Taste; adjust salt. Off heat, fold in cilantro if using. The filling should be juicy but not saucy—think moist pulled chicken that holds together when scooped.
- Soften the tortillas (choose one; see tips)
- Light pan-fry (most flexible tortillas): Heat 1/3 cup (80 ml) oil in a medium skillet over medium heat until a corner of tortilla sizzles on contact. Working one at a time with tongs, slide a tortilla into the oil for 5–8 seconds per side—just until pliable, not crisp. Let excess oil drip back into the pan; stack on a paper-towel-lined plate and cover with a clean kitchen towel to keep warm. Safety note: this goes quickly; keep kids and pets away from the stove and do not walk away.
- Brush-and-bake (less oil, good batch method): Brush both sides of tortillas lightly with 2 Tbsp (30 ml) oil total. Place in a single layer on two sheet pans and warm at 350°F (175°C) for 3–5 minutes, just until flexible. Cover to retain heat.
- Microwave steam (fastest, softest): Wrap tortillas in a damp (not dripping) clean towel and microwave on high in 30–45 second bursts until hot and pliable, about 1–2 minutes total depending on your microwave. Keep covered.Tip: If tortillas crack when folded, they weren’t warm enough or became dry. Rewarm under the towel. Corn tortillas from different brands vary in moisture—plan a few extras in case of tearing.
- Set up the assembly line
- Arrange warmed tortillas, chicken filling, remaining sauce, and cheese within reach. Keep tortillas covered so they stay pliable. Have the prepared baking dish nearby.
- Fill and roll (6–10 minutes)
- For maximum flavor and fewer cracks, dip each tortilla into the warm sauce (a quick swipe on each side is enough), then add 2–3 Tbsp filling down the center. Sprinkle a pinch of cheese inside if you like. Roll snugly, place seam-side down in the sauced baking dish. Repeat, packing the rolls tightly but without squishing.
- If dipping in sauce feels messy, skip the dip: just roll the warmed tortillas with filling and rely on sauce underneath and on top. Both methods work; the dipped method yields slightly softer, more deeply flavored tortillas.
- Top and bake
- Pour the remaining sauce evenly over the rolls—aim to coat every tortilla without drowning them. Scatter the remaining cheese over the top. Bake at 375°F (190°C) for 18–22 minutes, until the sauce is bubbling around the edges and the cheese is melted. For browned spots, broil on high for 1–2 minutes, watching constantly to avoid scorching.
- Rest and finish
- Let the pan rest 5–10 minutes before serving. This helps the sauce thicken slightly and the rolls hold together when lifted. Top with the remaining 1/4 cup (40 g) chopped onion, more cilantro, crema, avocado, and lime juice to taste.
Timing variability notes:
- Ovens run hot or cool. Start checking at 18 minutes; add time until you see bubbling sauce and fully melted cheese. If your dish is glass, the edges may brown a bit faster than metal.
- If you used a lot of add-ins (beans, extra veg), the pan may need an extra 3–5 minutes to heat through.
Beginner safeguards:
- Do not overfill—too much filling makes rolling difficult and can cause blowouts. 2–3 Tbsp per tortilla is plenty.
- Keep your non-dominant hand clean or gloved while dipping tortillas in sauce; it’s easier to roll cleanly and keep your workspace under control.
- If the sauce is very thick (like a gravy), whisk in 2–3 Tbsp (30–45 ml) water to loosen before assembling.
WHAT TO EXPECT (enchiladas)
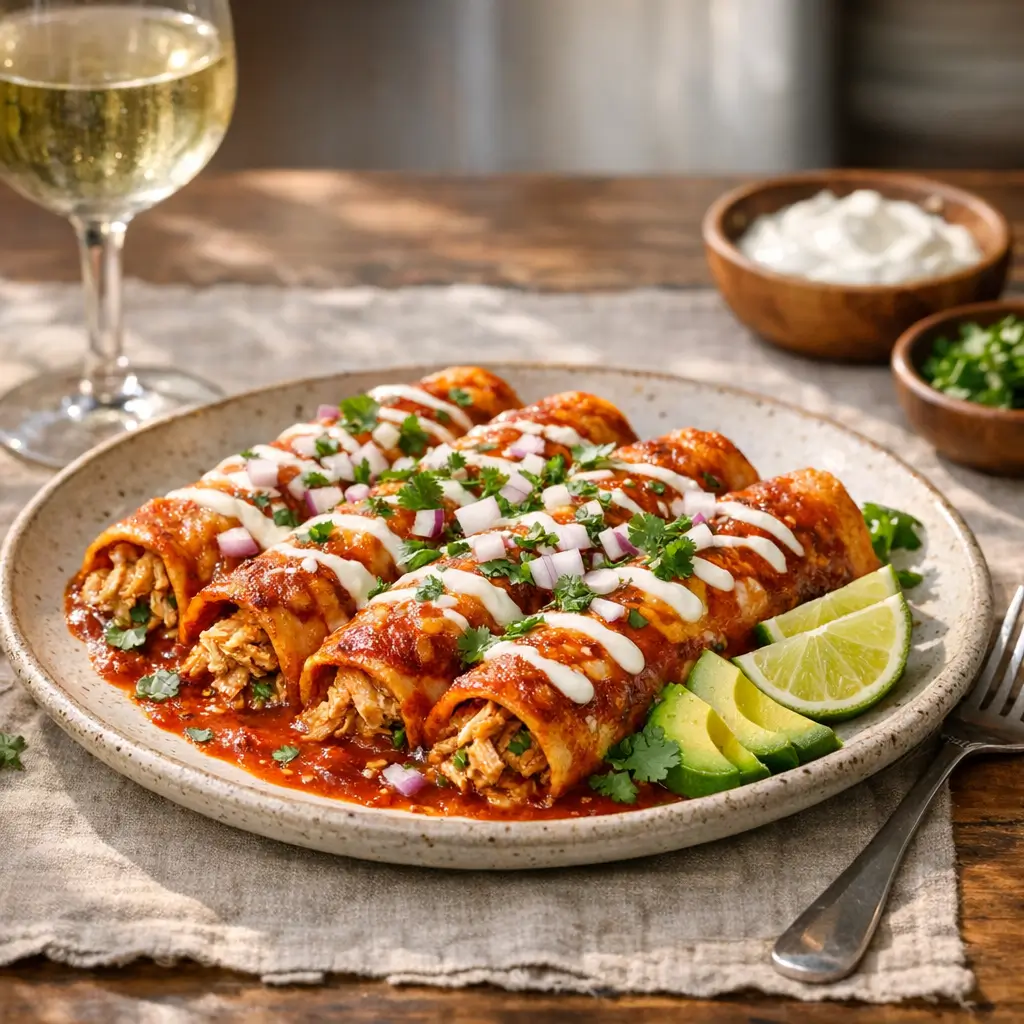
- Texture: The tortillas bake up tender with just a little chew; edges may crisp lightly where exposed. Inside, the chicken is juicy from a modest amount of sauce, and the top is blanketed with melted cheese. If you pan-fried the tortillas, expect slightly richer, silkier layers; the microwave method produces the softest bite.
- Flavor: Balanced and savory—a chili-forward red sauce (mild to medium heat depending on brand), sweet notes from sautéed onion, and creamy richness from the cheese. Lime and raw onion on top add brightness and crunch.
- Variability: Store-bought sauces vary widely. Some are saltier or hotter; taste yours first and adjust the salt in the filling accordingly. Cheese brand and moisture also affect browning: pre-shredded cheeses with anti-caking agents brown less quickly than cheese you grate yourself.
WAYS TO CHANGE IT UP
- Vegetarian or vegan
- Swap chicken for black beans (drained), pinto beans, or roasted vegetables (zucchini, bell pepper, mushrooms). For vegan, use a dairy-free cheese that melts well and verify your enchilada sauce contains no animal products. Trade-off: bean-and-veg fillings hold more moisture; go lighter on sauce to prevent sogginess.
- Spicier or milder
- Spicier: Stir 1–2 tsp minced chipotle in adobo into the filling, or add 1/2 tsp cayenne to the spices. You can also use a hot red enchilada sauce. Milder: Choose a mild sauce, swap chili powder for a smaller amount (1 tsp), and stick with Monterey Jack; skip the broil if browned spots worry younger eaters.
- Faster or simplified
- Use rotisserie chicken and pre-shredded cheese. Skip the onion sauté by tossing the chicken with 1/2 cup (120 ml) warm sauce and the dry spices. Microwave the tortillas under a damp towel. Trade-off: skipping the sauté sacrifices a little sweetness and depth from the cooked onion and toasted spices, but dinner moves about 10 minutes faster.
- Green or creamy twist
- Use salsa verde or a green enchilada sauce in place of red. Or whisk 1/3 cup (80 ml) Mexican crema into your red sauce for a creamier, milder bake. Trade-off: creamier sauces can mask some chili notes and brown less deeply.
- Add vegetables without extra pans
- Scatter 1–1 1/2 cups frozen corn kernels or finely diced bell pepper over the rolled enchiladas before saucing. They’ll steam in the oven. Trade-off: extra veg increases moisture; lean toward the lower end of the sauce amount to keep structure.
SERVING AND STORAGE
Serving
- Common pairings: shredded lettuce or cabbage, chopped onion, cilantro, sliced radishes, crema, and lime. On the side, consider Mexican-style red rice, pinto or black beans, or a simple cucumber salad to balance the richness.
- Portion guidance: For a family of four, plan on 2–3 enchiladas per adult and 1–2 for kids, depending on appetite and sides.
Storage
- Refrigerate leftovers, tightly covered, for up to 4 days. The tortillas continue to absorb sauce, so expect a softer texture on day 2.
- Freeze baked enchiladas in portions: cool completely, wrap well, and freeze for up to 2 months. For best texture, avoid freezing fresh avocado or crema—add after reheating.
Reheating
- Individual portions: microwave at 70–80% power in 45–60 second bursts until hot. Add a spoon of water or extra sauce if the edges look dry.
- Whole pan: cover with foil and reheat at 325°F (165°C) for 20–30 minutes until the center is hot and the sauce is bubbling. Uncover for the last few minutes if you want slight browning.
CULTURAL CONTEXT
Enchiladas are a Mexican dish built on corn tortillas rolled around a filling and sauced, with variations seen across regions and at home kitchens and restaurants. Corn, nixtamalization, and chili-based sauces predate European contact; rolled or folded tortillas with chiles appear in early accounts. Today, names often reflect the sauce or style—enchiladas rojas (red), verdes (green), suizas (with a creamy, Swiss-influenced sauce), and many others. Cheese, chicken, or bean fillings are common, and garnishes like raw onion, crema, and fresh herbs add contrast. This home-cook version draws on broadly used techniques—warming tortillas for flexibility, rolling with modest filling, and baking to heat through—without claiming a single canonical form.
COMMON QUESTIONS AND TROUBLESHOOTING
- My tortillas keep cracking. What am I doing wrong?
- They’re likely too cool or too dry. Rewarm under a damp towel or use the quick pan-fry method. Very dry or older tortillas are prone to splitting—keep a few extra on hand.
- The enchiladas came out soggy. How can I prevent that?
- Use just enough sauce to coat, not pool. If your sauce is thin, simmer it briefly to reduce, or whisk in 1–2 tsp cornstarch while it simmers to thicken. Lightly pan-frying tortillas adds a moisture barrier and helps retain structure.
- Can I use flour tortillas?
- Yes, but expect a softer, more casserole-like texture. Use 10 soft 8-inch tortillas, warm them gently, and bake closer to 15–18 minutes so they don’t over-soften.
- What cheese melts best?
- Monterey Jack, Oaxaca, or Chihuahua melt smoothly and taste mild. A cheddar blend works but can oil off if very sharp. Grating your own cheese helps it melt and brown more evenly.
- How do I make it ahead?
- Assemble up to the point of baking, cover, and refrigerate up to 24 hours. Add 5–10 minutes to bake time if going straight from fridge to oven. For longer storage, bake first, cool, and freeze.
- My sauce tastes too salty or too spicy. Any fix?
- If too salty, add unsalted tomato puree or a bit of water and simmer to balance. If too spicy, stir in a spoonful of crema or a small amount of sugar (start with 1/2 tsp) to round the heat.
- Can I double the recipe?
- Yes. Use two 9×13-inch pans or one deep roasting pan. Rotate pans halfway for even heating. Plan a little extra sauce to ensure full coverage.
CONCLUSION
If you try this, let me know how it went—what brand of tortillas you used, whether you dipped them in sauce or not, and any small tweaks that made the pan suit your table. Your notes help other home cooks make smart adjustments, too.
Leave a Reply