
If a fast, satisfying wrap with bright spices and a cool, herby finish sounds good tonight, you’re in the right place. This paneer tikka wrap brings grilled paneer, crisp vegetables, and a zesty chutney together in a soft flatbread—no specialty equipment required.
You’ll get the smoky, tangy notes you love from Indian street stalls with steps designed for a regular home kitchen. It’s ideal for weeknight dinners, school-night lunches, or a make-ahead picnic.
The marinade leans on yogurt, garlic, and pantry spices. Expect lightly charred edges on the paneer, a soft center, and a fresh snap from onions and peppers. If you’re new to paneer, this recipe is forgiving; if you cook it often, the tweaks below help you dial in heat and texture.
INGREDIENTS — Paneer Tikka Wrap
- Serves 2–4
- Active time: 25 minutes | Marinating: 20–60 minutes (longer if you prefer)
For the paneer tikka
- 400 g (14 oz) paneer, cut into 2–2.5 cm (¾–1 inch) cubes; pat very dry for better browning. If unavailable, use firm halloumi or extra-firm tofu (pressed) as a substitute.
- 120 g (½ cup) thick plain yogurt or Greek yogurt. Dairy-free yogurt works for a vegan version.
- 1½ tbsp lemon juice (22 ml)
- 1 tbsp ginger–garlic paste (about 15 g)
- 2 tsp Kashmiri chili powder for color and mild heat. Use 1½ tsp sweet paprika + ¼–½ tsp cayenne if needed.
- 1½ tsp ground coriander
- 1 tsp ground cumin
- 1 tsp garam masala
- ½ tsp ground turmeric
- 1 tsp kosher salt, plus more to taste
- 1 tbsp mustard oil or neutral oil. Mustard oil adds classic aroma; vegetable or canola oil works fine.
- 1 medium red onion (about 150 g / 5 oz), cut into petals or 2.5 cm (1-inch) pieces
- 1 medium bell pepper (about 150 g / 5 oz), any color, cut into 2.5 cm (1-inch) pieces
For the green chutney (makes about 180 ml / ¾ cup)
- 30 g (1 packed cup) cilantro leaves and tender stems, rinsed and dried
- 15 g (½ packed cup) mint leaves
- 1–2 small green chiles, to taste, chopped and deseeded for milder heat
- 2 tbsp lemon juice (30 ml)
- 2 tbsp plain yogurt (optional) for body
- ½ tsp kosher salt, plus more to taste
- 2–3 tbsp cold water, as needed to blend
Quick pickled onions (optional but great for bite)
- 1 small red onion, thinly sliced
- 2 tbsp apple cider vinegar or white vinegar (30 ml)
- ½ tsp sugar
- ¼ tsp kosher salt
To assemble
- 4 parathas, naans, or 8-inch flour tortillas. Tortillas are the easiest supermarket find in the U.S.; parathas give that flaky, street-style feel.
- 1–2 tbsp ghee or oil, for warming the breads
- Fresh cilantro and lime wedges, for finishing
- Chaat masala (optional) for a bright, tangy sprinkle

STEP-BY-STEP INSTRUCTIONS
- Prep the paneer and vegetables.
- Pat the paneer dry on all sides, then cut into even cubes. Dry surfaces brown better and are less likely to stick.
- Cut the onion and pepper into chunky pieces so they cook at the same pace as the paneer.
- Mix the marinade.
- In a medium bowl, whisk the yogurt, lemon juice, ginger–garlic paste, Kashmiri chili, coriander, cumin, garam masala, turmeric, salt, and oil until smooth. Taste a dot—it should be salty-tangy with a gentle kick.
- Marinate.
- Gently fold the paneer, onion, and pepper into the bowl, coating without breaking the cubes. Rest 20–60 minutes at room temperature, or cover and refrigerate up to overnight.
- If refrigerating overnight, bring the mixture to room temperature for 15–20 minutes before cooking so it sears instead of steaming.
- Make the green chutney.
- Blend cilantro, mint, chile(s), lemon juice, yogurt (if using), and salt with 2 tablespoons of cold water. Add a little more water until it’s spoonable but not runny. It should taste bright, fresh, and slightly salty to stand up to the bread.
- Quick-pickle the onions (optional but recommended).
- Toss the onion slices with vinegar, sugar, and salt in a small bowl. Leave at room temperature for at least 15 minutes, or refrigerate for up to a week.
- Choose your cooking method and cook the paneer.
- Broiler (most char, minimal fuss): Arrange a rack at the top position. Line a sheet pan with foil and set a lightly oiled rack on top. Thread paneer and vegetables onto soaked wooden skewers if you have them, or simply space them out on the rack. Broil on high for 4–6 minutes, flip, then broil 3–5 minutes more until the edges char in spots. Watch closely—broilers vary widely and this step goes from perfect to overdone quickly.
- Stovetop grill pan or skillet: Heat 1–2 teaspoons oil over medium-high. Add the paneer and vegetables in a single layer. Cook 2–3 minutes per side until browned with a few char marks, 6–8 minutes total. Don’t crowd the pan; work in batches if needed so you sear instead of steam.
- Air fryer: Preheat to 200°C/400°F. Brush the basket lightly with oil, add the mixture in a single layer, and cook 8–10 minutes, shaking halfway. Add 1–2 extra minutes for deeper browning if your model runs cool.
- Note: Paneer firms as it cools. Pull it off the heat when the center still feels bouncy, not stiff. Overcooked paneer turns squeaky and dry.
- Warm the breads.
- Brush parathas, naans, or tortillas lightly with ghee or oil and heat in a dry skillet over medium until pliable and spotty golden. Keep warm under a clean kitchen towel.
- Assemble the wraps.
- Spread 1–2 tablespoons of green chutney down the center of each warm flatbread. Add a row of paneer and vegetables, a small handful of pickled onions, and a few cilantro leaves. Finish with a squeeze of lime and a pinch of chaat masala if you like.
- Don’t overfill—too much filling makes rolling messy and leads to soggy spots.
- Roll and crisp (optional but recommended).
- Fold the bottom edge up, then roll tightly from one side to the other. For a crisp exterior, return each rolled wrap to the skillet seam-side down with a dab of ghee and cook 30–45 seconds per side.
Beginner safeguards and pacing notes
- Taste your marinade before adding the paneer; it’s easier to fix seasoning now.
- High heat gives color fast. Keep tongs ready and don’t walk away from the broiler.
- If using tofu, press it for 20 minutes first so it doesn’t weep into the marinade.
- For easy weeknights, marinate in the morning and cook in the evening—flavor improves with time.
WHAT TO EXPECT
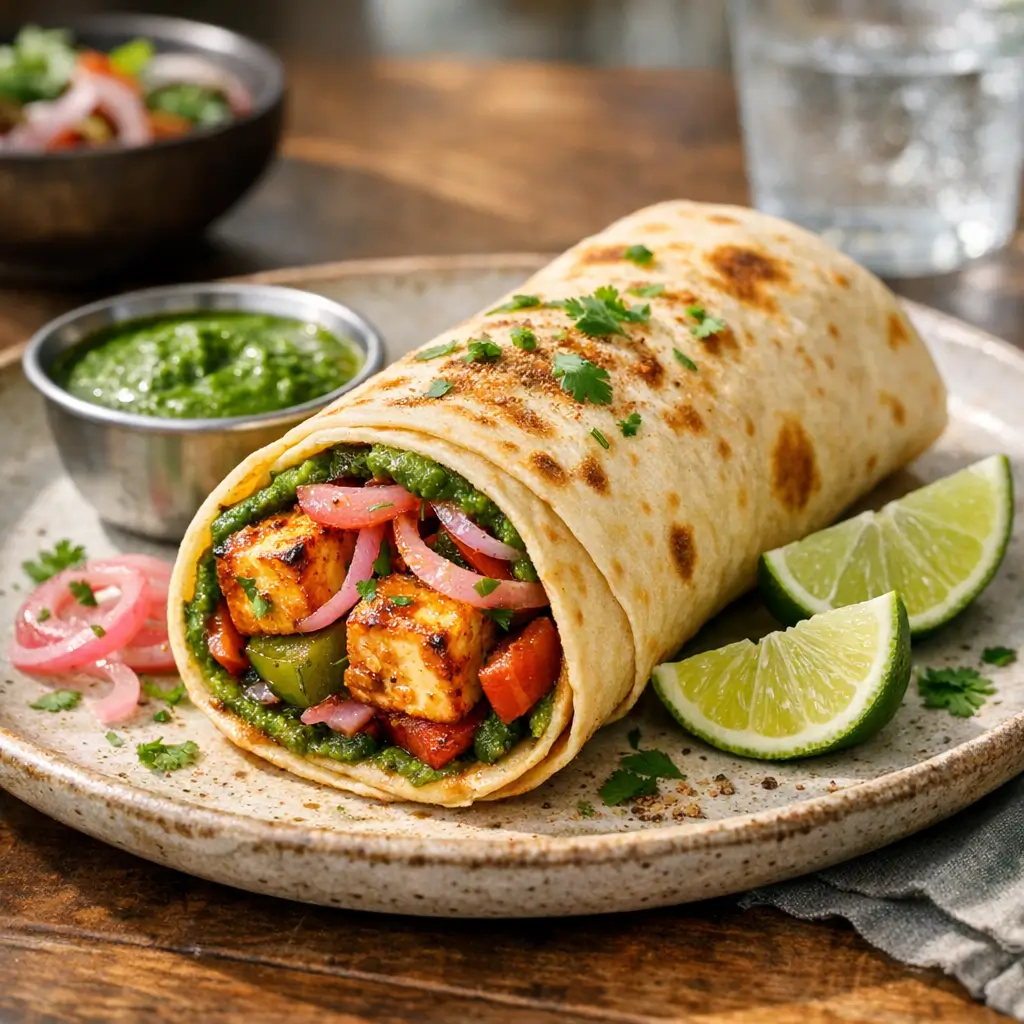
You’ll bite through a toasty, flexible flatbread into char-kissed paneer that’s soft at the center, with sweet peppers and onions for crunch.
The flavor leans savory-tangy from yogurt and lemon with gentle warmth from Kashmiri chili. Green chutney adds herbaceous brightness and a touch of heat.
Results vary based on tools. Broilers create the deepest char; stovetop offers more control; air fryers cook evenly but with less smoke flavor. Different paneer brands range from very soft to extra firm; softer ones need gentler flipping, firmer ones tolerate more browning.
WAYS TO CHANGE IT UP
- Vegetarian to vegan: Swap paneer for extra-firm tofu, pressed and patted dry. Use a dairy-free yogurt in the marinade and oil instead of ghee for the breads. Expect a slightly spongier bite and a little less richness.
- Spicier or milder: For more heat, add ½–1 tsp hot red chili powder or minced fresh chilies to the marinade, and keep the seeds. For milder wraps, reduce chiles, use only sweet paprika for color, and fold a spoon of yogurt into the chutney to mellow it.
- Faster, simplified version: Use store-bought green chutney and pre-cut peppers and onions. Cook everything on a single foil-lined sheet under the broiler for 8–10 minutes, flipping once. Tortillas make a quick stand-in for paratha when time is tight.
- Smokier profile: Add ½ tsp smoked paprika to the marinade or finish cooked paneer with a few drops of liquid smoke. Mustard oil (if you have it) boosts aroma without extra steps.
- Street-cart style egg layer: For a heartier wrap, quickly cook a thin omelet, lay the paratha on top to adhere, flip, then fill and roll. This mirrors a common street variation; it’s richer and extra filling.
SERVING AND STORAGE
Serve these warm right off the pan with extra chutney and lime wedges. A simple cucumber salad or salted yogurt (raita) balances the spices nicely.
For a fuller plate, pair with roasted potatoes, masala fries, or a crisp slaw. If packing for lunch, wrap each roll in parchment and foil to keep it tidy and warm longer.
Storage: Cooked paneer and vegetables keep 3 days in an airtight container in the refrigerator. Reheat gently in a skillet over medium-low heat until warmed through; avoid microwaving on high, which can make paneer rubbery.
Bread: Parathas and tortillas are best fresh, but leftover cooked wraps can be reheated in a skillet 1–2 minutes per side. Assembled wraps soften over time; keep sauce on the side for make-ahead lunches and assemble just before eating.
Chutney: Refrigerate up to 3 days in a sealed jar. If it dulls in color, stir in a squeeze of lemon right before serving.
CULTURAL CONTEXT
Street-style wraps filled with grilled kebabs and chutney are commonly known as kati (or kathi) rolls in Kolkata and beyond. Many accounts trace their origin to Nizam’s, a Kolkata restaurant that began serving skewered kebabs rolled in paratha to make them portable for busy diners in the mid-20th century. For a concise overview, see this background on the kati roll from Wikipedia.
Paneer tikka—the spiced, yogurt-marinated paneer at the heart of this wrap—draws on the tandoor-grilling tradition popular across northern India. The technique adapts well to home ovens and stovetop pans. Readers curious about the dish itself can skim the short entry on paneer tikka for additional context.
COMMON QUESTIONS AND TROUBLESHOOTING
- My paneer turned rubbery. What happened? Usually it’s overcooked or reheated too aggressively. Pull paneer when it’s just turning golden with a little char, and reheat gently in a skillet instead of a microwave.
- The marinade split and looks curdled. Is it ruined? Yogurt can look grainy after contact with acid and salt. It’s fine. Whisk in a teaspoon of oil to smooth it out, then proceed. The cooked result won’t taste split.
- Can I use tortillas instead of paratha? Yes. Flour tortillas are widely available and work well. Brush with a little ghee or oil while warming to mimic the richness and crisp edges of paratha.
- How long should I marinate? Even 20 minutes helps. One to four hours gives deeper flavor. Overnight is fine; bring the mixture to room temperature before cooking so it sears properly.
- Can I bake instead of broil? You can roast at 220°C/425°F for 12–15 minutes, then broil 1–2 minutes to brown the edges. Baking alone won’t give the same char.
- I don’t have Kashmiri chili powder. What’s the closest swap? Use sweet paprika for color and add a pinch of cayenne for heat, adjusting to taste.
- Is store-bought paneer okay? Absolutely. Some brands are softer, others firmer. If it crumbles while skewering, switch to a flat bake or skillet method instead of skewers.
- How do I keep wraps from getting soggy? Dry your paneer and vegetables well, avoid over-saucing, and crisp the rolled wrap briefly in a pan to seal. Pack chutney on the side for lunches if you need to hold them longer.
CONCLUSION
If you cook this, I’d love to hear how you adapted the heat, bread, or chutney to your kitchen. Leave a star rating and share what worked—or what you’d tweak next time—so other home cooks can benefit from your notes.
Leave a Reply