
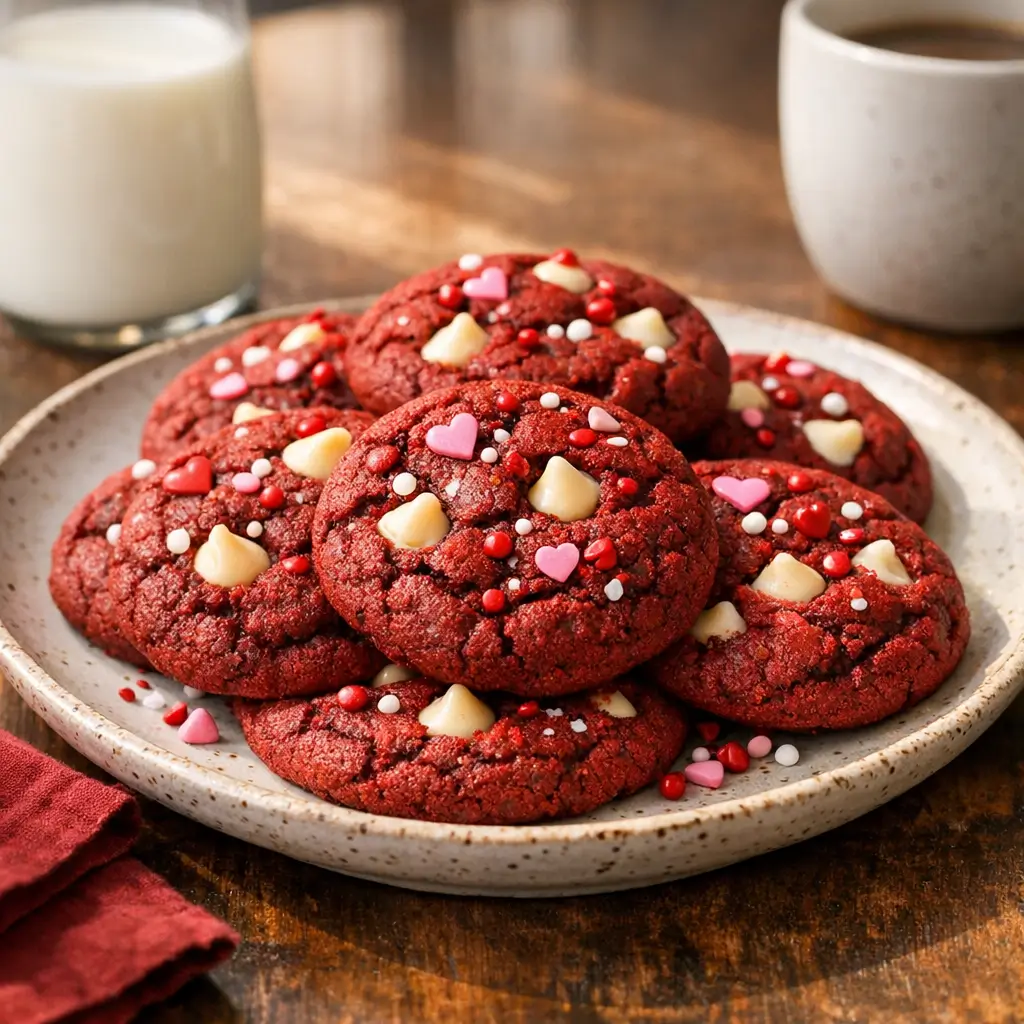
You’re here for an easy win: Red Velvet Valentine Cookies that look festive and taste like a bakery made them—without fussy decorating.
These cookies deliver soft centers, gently crisp edges, and a mellow cocoa flavor balanced by vanilla and creamy white chocolate.
Inspired by the red velvet cake flavors you see in American bakeries around Valentine’s Day, this small-batch cookie is ideal for busy home cooks and parents who want something special with minimal cleanup. Expect a dough that mixes quickly, chills briefly, and bakes in minutes. The result is tender rather than crunchy, pleasantly sweet, and perfect with a glass of milk or coffee. If you like classic chocolate chip cookies but want a February twist, this is for you.
INGREDIENTS—Red Velvet Valentine Cookies
- 1 1/4 cups (160 g) all-purpose flour — structure for the cookie.
- 2 tbsp + 1 tsp (12 g) unsweetened natural cocoa powder — gives the gentle cocoa note; use natural, not Dutch-processed.
- 1/2 tsp baking soda — lift; reacts with the dough’s acidity.
- 1/4 tsp fine salt — balances sweetness.
- 6 tbsp (85 g) unsalted butter, softened — creaming builds lightness.
- 1/2 cup packed (110 g) light or dark brown sugar — moisture and chew.
- 3 tbsp (38 g) granulated sugar — helps crisp the edges.
- 1 large egg, room temperature — binds and adds richness.
- 2 tsp milk or buttermilk — classic red velvet tang and tenderness. Buttermilk preferred; whole milk works in a pinch.
- 1 1/2 tsp pure vanilla extract — round, warm flavor.
- 1/2–3/4 tsp red gel food coloring — vibrant color with very little liquid. Liquid food coloring works but you’ll need more (start with 1–2 tsp); natural beet powder (about 1–2 tsp) yields a darker, muted red.
- 3/4 cup (135 g) white chocolate chips — creamy pockets to contrast the cocoa. Semi-sweet chips work too, or mix half and half.
- Optional: 1–2 tbsp Valentine sprinkles for tops. Add after baking so colors don’t bleed.
Yield: 12–14 medium cookies (or 10–12 bakery-size cookies if you scoop larger).

STEP-BY-STEP INSTRUCTIONS
-
Pre-mix the dry ingredients.
In a medium bowl, whisk flour, cocoa, baking soda, and salt until no streaks remain. This prevents pockets of cocoa from speckling your cookies later. -
Cream the butter and sugars.
In a large bowl with a hand mixer or stand mixer (paddle), beat softened butter, brown sugar, and granulated sugar on medium to medium-high until visibly lighter and fluffy, about 3 minutes. Scrape the bowl once halfway through to catch any butter on the sides. Proper creaming sets you up for thick, tender cookies. -
Add egg and vanilla.
Beat in the egg and vanilla on medium-high just until combined and creamy, about 45–60 seconds. Avoid overbeating here—too much air can make cookies bake up cakey. -
Color and bring the dough together.
Reduce mixer speed to low. Add about half the dry mixture, then the milk/buttermilk and red coloring. Mix briefly, then add the remaining dry ingredients. Stop as soon as a soft dough forms. The dough will look sticky and richly red. If the color looks lighter than you want, beat in a touch more gel coloring—go slowly; it’s potent. -
Fold in chips.
Stir in white chocolate chips on low just until dispersed. Overmixing at this stage toughens cookies. -
Chill the dough.
Cover and refrigerate for 60–90 minutes. Chilling firms butter, prevents excessive spread, and deepens color. If you go beyond 2 hours, let the dough sit at room temperature for 10–15 minutes so it’s scoopable. -
Preheat and prep.
Heat oven to 350°F (177°C). Line 2 baking sheets with parchment or silicone mats. Avoid greasing the pan—extra fat encourages spreading. -
Portion.
For 12–14 cookies, scoop 1 1/2 tablespoons dough (about 30–35 g) each and space 3 inches apart. For 10–12 bakery-size cookies, scoop a generous 2 tablespoons (40–45 g). A #40 or #30 scoop helps keep sizes even. -
Bake.
Bake one sheet at a time for 11–13 minutes (smaller scoops) or 12–14 minutes (larger scoops). Edges should look set and slightly darker; centers will look soft and a little puffy. That softness is good—cookies finish setting as they cool. If your cookies didn’t spread at all, gently tap the pan on the rack once or press the tops lightly with the back of a spoon in the last minute. -
Finish and cool.
While still warm, press a few extra chips into the tops for a polished look. If using sprinkles, add now. Cool on the sheet 5 minutes, then transfer to a rack to cool completely.
Beginner safeguard: Red gel can stain counters and hands. Work over parchment, use a spoon for the bottle, and wipe any drips promptly.
Timing notes: Ovens vary. If the first tray browns too fast on the bottom, double up your baking sheets or lower the rack one level for the next round.
WHAT TO EXPECT
- Texture: Soft and chewy centers with lightly crisp edges. They won’t be crunchy like shortbread.
- Flavor: Not a chocolate bomb—expect subtle cocoa, vanilla warmth, and a slight tang from buttermilk or milk.
- Color: Gel coloring gives the boldest red with minimal liquid. Natural alternatives (like beet powder) bake to a deeper, wine-red tone.
- Spread and thickness: Chilling affects height. Longer chill yields thicker cookies; a shorter chill spreads a bit more. Pan color matters, too—dark pans brown edges faster.
WAYS TO CHANGE IT UP
-
Vegetarian or vegan adapted
-
Use plant-based butter sticks, a flax egg (1 tbsp ground flax + 3 tbsp water, rested 5–10 minutes), and unsweetened plant milk. Choose dairy-free white chips. Expect slightly less spread and a softer set; bake toward the longer end of the range and cool completely before moving.
-
Spicier or milder
-
For a grown-up twist, add a pinch (1/8 tsp) of ground cinnamon and a tiny pinch of cayenne to the dry mix for a gentle warmth that complements cocoa. For milder flavor, reduce cocoa by 1 teaspoon and add an extra 1/4 teaspoon vanilla; color will skew brighter red.
-
Faster or simplified
-
Short on time? Chill just 30 minutes for a modest spread and bake closer to 11 minutes. Or use a red velvet cake mix: stir together 1 box mix, 2 eggs, and 1/3 cup neutral oil, then fold in chips. The mix version is sweeter and cake-ier, but it scratches the Valentine itch in under 30 minutes.
Trade-offs: Vegan swaps sacrifice a touch of chew. Extra spices shift the flavor away from classic red velvet. Cake-mix cookies are quick but less complex.
SERVING AND STORAGE
Serve these with cold milk, hot coffee, or black tea. The white chocolate makes them sweet enough to stand alone, but a simple cream cheese drizzle is a fun holiday touch: whisk 3 oz softened cream cheese with 1/2 cup powdered sugar and 1–2 tsp milk until pourable; drizzle over cooled cookies.
For gifts, slip into treat bags or tins with parchment between layers to protect the tops.
Storage: Keep in an airtight container at room temperature for 3–4 days. They stay soft thanks to brown sugar. For longer storage, freeze baked cookies up to 3 months. Thaw at room temperature or rewarm at 275°F (135°C) for 3–5 minutes. Unbaked dough balls freeze well for 2–3 months; bake from frozen, adding 1–2 minutes to the time.
Note on sprinkles: Some brands bleed color on contact with moisture. Add after baking and cooling to avoid streaks.
CULTURAL CONTEXT
Red velvet desserts sit at the intersection of cocoa science and American baking history. Early “velvet” cakes in the 19th century described a fine, tender crumb, and later versions took on a reddish hue when natural cocoa met acidic ingredients like buttermilk. For a concise background on how Valentine’s Day became associated with gifts and sweets in the U.S., the Library of Congress offers a brief history of February 14: read here.
For more on how red velvet became a modern icon (including debates about food coloring and the Waldorf-Astoria myth), this article from Smithsonian Magazine provides helpful context: Going Red Velvet for Valentine’s Day. These resources aren’t recipes; they’re background reading you can skim while your dough chills.
COMMON QUESTIONS AND TROUBLESHOOTING
-
My cookies look brown, not red—what happened?
-
A little cocoa goes a long way. Using Dutch-processed cocoa or too much cocoa muddies the color. Stick to natural cocoa and use gel coloring for the brightest red. Natural alternatives like beet powder produce a deeper, muted shade—that’s normal.
-
The dough is sticky. Did I do something wrong?
-
Sticky is expected before chilling. If it’s soupy, check your butter wasn’t melted and that you measured flour correctly (spoon-and-level or weigh). Chill longer until scoopable.
-
The cookies spread too much.
-
Likely causes: dough too warm, under-measured flour, or greased pan. Re-chill portioned dough 10–15 minutes, bake on parchment, and consider adding 1–2 teaspoons flour if your kitchen is very warm. High-fat butter brands and darker pans also increase spread.
-
The cookies didn’t spread at all.
-
Over-chilled dough can bake up puffy. While they’re hot, gently press the tops with a spoon, or shave 5–10 minutes off the chill next time.
-
Can I use Dutch-processed cocoa?
-
It will work texturally but shifts flavor and neutralizes the dough’s acidity, so color is less vibrant. If you use it, add a tiny extra splash of milk to keep the dough from drying out.
-
Can I skip the food coloring?
-
Yes. You’ll get light cocoa cookies with white chocolate chips. The flavor stays in the red velvet family thanks to cocoa, vanilla, and buttermilk notes.
-
How do I make them heart-shaped?
-
This is a drop-cookie dough, so it doesn’t hold sharp edges like a cut-out sugar cookie. For a hint of a heart, roll dough slightly larger and pinch the bottom into a point as you place it on the sheet, then press two dimples at the top. Expect soft edges, not precise shapes.
-
How should I store or reheat?
-
Airtight at room temperature for 3–4 days. To refresh, warm at 275°F for 3–5 minutes. Avoid microwaving with chips on top—they can scorch.
CONCLUSION
If you bake these, leave a comment with how they turned out and any tweaks you tried—chip swaps, natural dyes, or spice additions. Your notes help other home cooks decide how to approach the recipe, and they’re always appreciated.

Red Velvet Valentine Cookies with Bakery-Soft Centers
Equipment
- Medium mixing bowl
- Whisk
- Large mixing bowl
- Hand mixer or stand mixer (paddle attachment)
- Rubber spatula
- Baking sheets
- Parchment paper or silicone baking mats
- Cookie scoop (optional)
- Cooling rack
Ingredients
- 1 1/4 cups all-purpose flour
- 2 tbsp + 1 tsp unsweetened natural cocoa powder use natural, not Dutch-processed
- 1/2 tsp baking soda
- 1/4 tsp fine salt
- 6 tbsp unsalted butter softened
- 1/2 cup brown sugar packed (light or dark)
- 3 tbsp granulated sugar
- 1 large egg room temperature
- 2 tsp milk or buttermilk buttermilk preferred; whole milk works
- 1 1/2 tsp vanilla extract pure
- 1/2–3/4 tsp red gel food coloring add to desired color
- 3/4 cup white chocolate chips
- 1–2 tbsp Valentine sprinkles optional, for tops
Instructions
- In a medium bowl, whisk together the flour, cocoa powder, baking soda, and salt until evenly combined and no streaks remain.
- In a large bowl, beat the softened butter, brown sugar, and granulated sugar with a hand mixer (or stand mixer with paddle) on medium to medium-high until lighter and fluffy, about 3 minutes, scraping the bowl halfway through.
- Add the egg and vanilla extract and beat on medium-high just until combined and creamy (about 45–60 seconds), avoiding overbeating.
- Reduce mixer speed to low. Mix in about half the dry ingredients, then add the milk/buttermilk and red food coloring. Add the remaining dry ingredients and stop mixing as soon as a soft dough forms.
- Fold in the white chocolate chips on low speed or by hand just until evenly distributed.
- Cover and refrigerate the dough until firm, about 60–90 minutes (if chilled longer, let it sit at room temperature 10–15 minutes to make scooping easier).
- Preheat the oven to 350°F (177°C). Line two baking sheets with parchment paper or silicone mats.
- Scoop the dough into portions (about 1 1/2 tablespoons each for 12–14 cookies) and place on the prepared sheets, spacing cookies about 3 inches apart.
- Bake one sheet at a time until edges look set and centers are still soft, about 11–13 minutes (add 1–2 minutes for larger scoops).
- While warm, press a few extra chips into the tops and add sprinkles if using. Cool on the baking sheet for 5 minutes, then transfer to a rack to cool completely.
Leave a Reply