
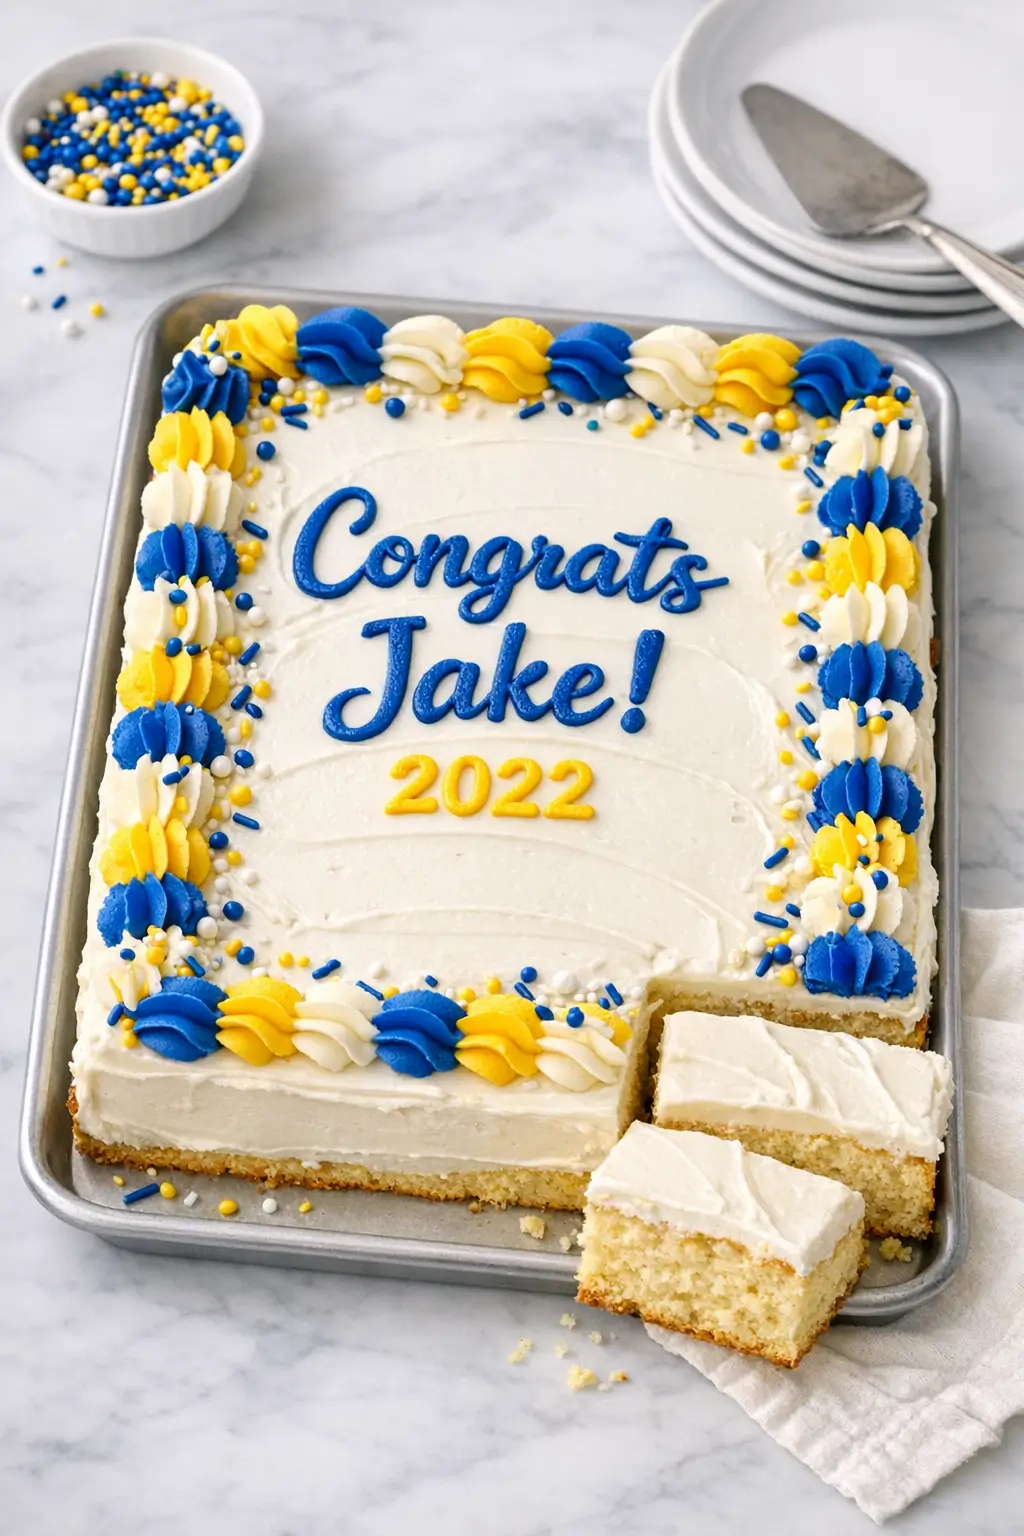
A graduation party usually comes with a long to‑do list, which is why an easy graduation party sheet cake in school colors earns its place on the menu. This version bakes in a standard 9×13-inch pan, feeds a small crowd, and decorates quickly with tinted buttercream and matching sprinkles. The flavor is a soft vanilla cake with creamy frosting—familiar and kid-friendly, but sturdy enough to slice and transport.
If you’re juggling guests and decorations, start by bringing your butter, eggs, and buttermilk to room temperature so the batter comes together smoothly. If time is tight on party day, plan to bake the cake the day before and decorate the chilled cake just before serving.
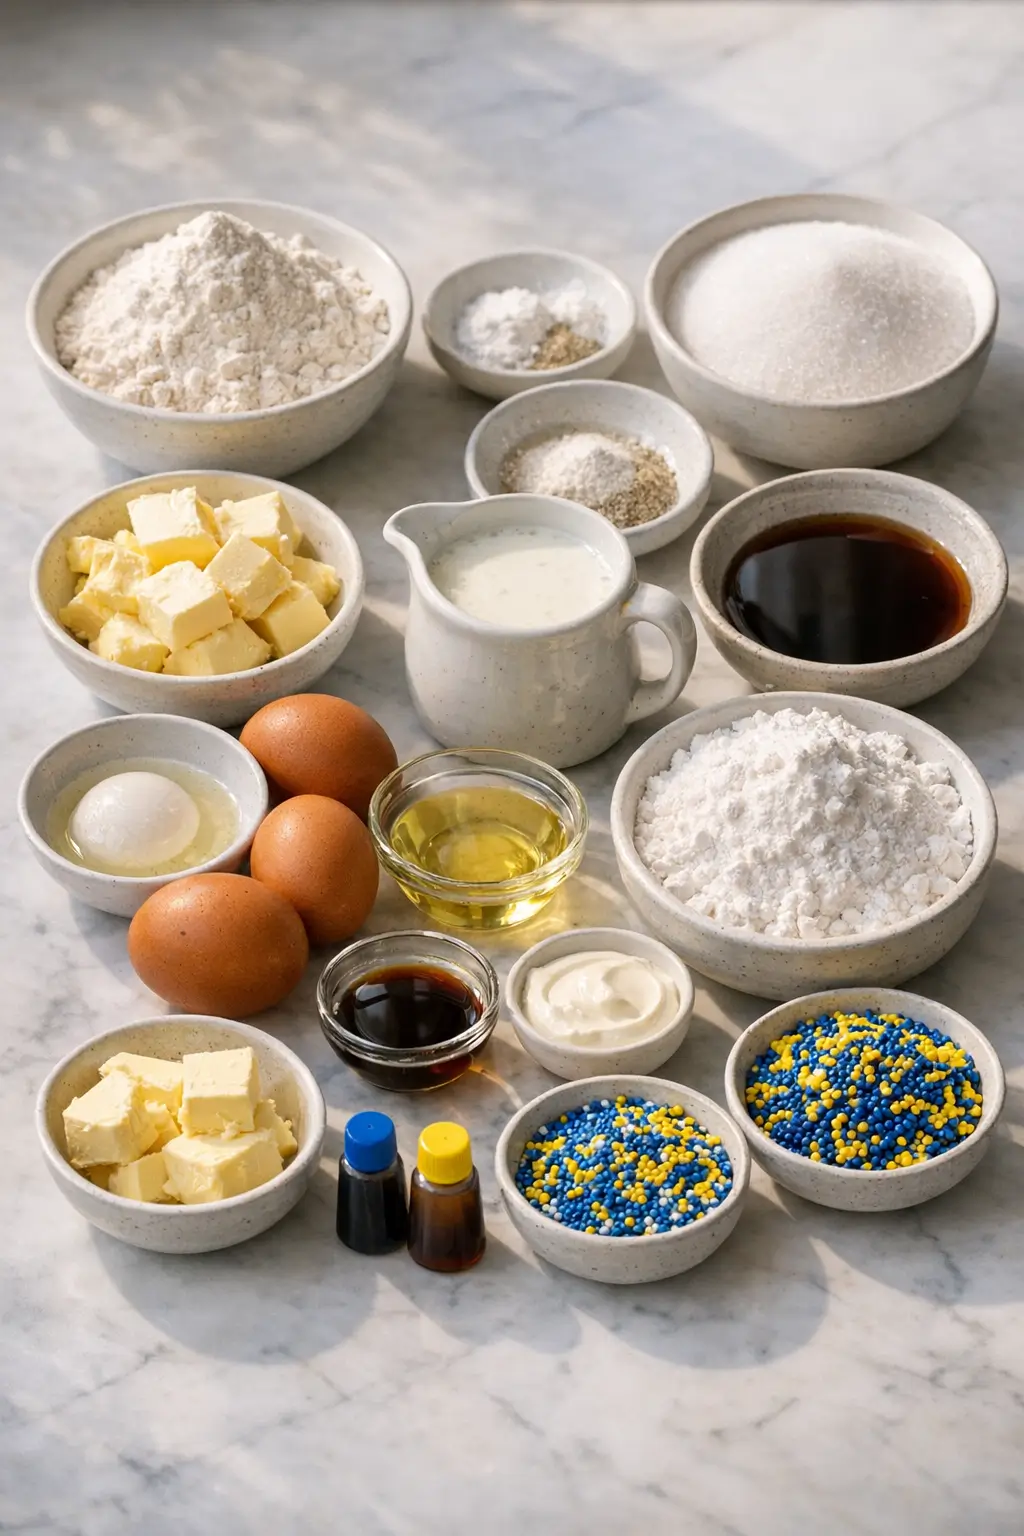
Ingredients
Makes one 9×13-inch sheet cake (about 15–18 servings)
For the vanilla sheet cake:
- 290 g (2 ⅓ cups) all-purpose flour, spooned and leveled – structure for the cake
- 300 g (1 ½ cups) granulated sugar – sweetness and browning
- 2 ½ tsp baking powder – lift
- ½ tsp baking soda – extra lift with buttermilk
- ¾ tsp fine sea salt – balances sweetness
- 170 g (¾ cup) unsalted butter, very soft but not melted – richness and tender crumb
- 60 ml (¼ cup) neutral oil (canola or sunflower) – keeps the cake moist
- 3 large eggs, room temperature – structure and richness
- 1 large egg white, room temperature – extra lightness without heaviness from yolk
- 240 ml (1 cup) buttermilk, room temperature – acidity and moisture
- 2 ½ tsp pure vanilla extract – primary flavor
For the vanilla buttercream frosting:
- 340 g (3 cups) powdered sugar, sifted – smooth sweetness
- 225 g (1 cup) unsalted butter, softened – base of the frosting
- 45–60 ml (3–4 Tbsp) heavy cream or whole milk – to loosen and fluff the frosting
- 2 tsp pure vanilla extract – flavor
- ¼ tsp fine sea salt – rounds out the sweetness
For school color decoration:
- Gel food coloring in 1–2 school colors – for tinting part of the frosting
- 60–90 g (½–¾ cup) sprinkles or nonpareils in school colors – quick decoration
- Optional: pre-made sugar letters or chocolate letters for the graduation year and name
Substitution notes:
- Buttermilk: Use 220 ml (⅞ cup) whole milk plus 20 ml (1 Tbsp + 1 tsp) white vinegar or lemon juice. Stir and rest 5–10 minutes before using.
- Gluten-free: A cup-for-cup gluten-free all-purpose blend that’s designed for baking can be used in the same weight as the flour, though the crumb may be a bit more delicate.
- Dairy-free: Use a neutral-tasting dairy-free butter stick and unsweetened non-dairy milk. The texture will be slightly different but still party-friendly.
Step-by-Step Instructions for Easy Graduation Party Sheet Cake in School Colors
- Preheat and prepare the pan.
- Heat oven to 350°F (175°C).
- Lightly grease a metal 9×13-inch baking pan with butter or nonstick spray, then line the bottom with parchment for easier removal.
- If using a glass pan, reduce the oven temperature by 25°F (about 10–15°C) and expect the cake to bake a few minutes longer.
- Combine dry ingredients.
- In a large mixing bowl, whisk together the flour, baking powder, baking soda, and salt until no streaks remain.
- Set aside; this ensures the leaveners are evenly distributed.
- Cream butter, oil, and sugar.
- In a stand mixer bowl (or a large bowl with a hand mixer), beat the softened butter and sugar on medium-high speed for 3–4 minutes until pale and fluffy.
- Scrape down the bowl, add the oil and vanilla, and beat again for 30–60 seconds until fully incorporated.
Kitchen note: If the butter is still cold, the mixture will look grainy instead of fluffy. Let it sit at room temperature for 10–15 minutes and continue beating; it should smooth out.
- Add the eggs gradually.
- Add the eggs one at a time, beating on medium speed for 20–30 seconds after each addition.
- Add the extra egg white last and mix just until combined.
- Scrape the bowl and beat once more for 15 seconds to ensure everything is mixed.
- Alternate dry ingredients and buttermilk.
- With the mixer on low speed, add about ⅓ of the dry mixture, then ½ of the buttermilk.
- Repeat with another ⅓ of the dry mixture, then the remaining buttermilk, and finish with the final ⅓ of the dry mixture.
- Mix only until each addition is just absorbed.
- Finish the batter by hand.
- Turn off the mixer and use a spatula to gently fold the batter from the bottom of the bowl up.
- Look for any pockets of flour and lightly fold them in.
- The batter should be smooth and thick but pourable.
Kitchen note: Overmixing at this stage can give you a tougher cake. Stop folding as soon as no dry flour is visible, even if a few small lumps remain.
- Bake the sheet cake.
- Pour the batter into the prepared pan and spread it evenly with an offset spatula, pushing it into the corners.
- Tap the pan gently on the counter a couple of times to release large air bubbles.
- Bake on the center rack for 25–32 minutes, rotating the pan once halfway if your oven bakes unevenly.
- The cake is done when the top springs back lightly when touched and a toothpick in the center comes out clean or with a few moist crumbs.
- Cool completely before frosting.
- Cool the cake in the pan on a wire rack for 20–30 minutes.
- If you plan to serve from the pan, let it cool completely in the pan (about 1–1½ hours).
- For cleaner slices or if decorating outside the pan, run a knife around the edges, invert onto a rack, peel off parchment, and cool fully.
- Make the vanilla buttercream.
- In a clean mixer bowl, beat the butter on medium-high for 2 minutes until light and creamy.
- Add half of the sifted powdered sugar and mix on low until incorporated, then increase to medium and beat for 1 minute.
- Add the remaining powdered sugar, vanilla, salt, and 3 Tbsp of cream or milk.
- Beat on medium-high for 2–3 minutes until fluffy, adding an extra tablespoon of cream if needed for a spreadable consistency.
- Tint part of the frosting with school colors.
- Reserve about ¼–⅓ of the frosting in a separate bowl for piping decorations.
- Leave the remaining frosting white or a neutral base color.
- To the reserved portion, add a tiny amount of gel food coloring in your school color(s), stirring well and adding more gradually until you reach the shade you like.
Kitchen note: Gel food colors are strong. Start with the tip of a toothpick’s worth, especially for deep colors like red, navy, or black, to avoid bitter flavors.
Frost the cooled cake.
- Spread the untinted buttercream evenly over the top of the cooled cake using an offset spatula.
- Create soft swirls or keep it smooth, depending on how you plan to decorate.
- If your kitchen is warm, chill the frosted cake for 10–15 minutes to firm up the surface before adding colored details.
Decorate in school colors.
- Transfer the tinted frosting to a piping bag fitted with a star or round tip (or use a zip-top bag with a small corner snipped off).
- Pipe a border around the edges of the sheet cake in one or two school colors.
- Add the graduate’s name and year in the center using more tinted frosting or pre-made sugar letters.
- Sprinkle school-colored sprinkles or nonpareils along the border or across part of the cake for a confetti effect, leaving some areas clean for easier slicing.
Chill briefly for neat slices.
- Refrigerate the decorated cake for 20–30 minutes before slicing.
- This helps the buttercream set slightly so the design stays sharp when you cut pieces.
Kitchen note: If you’re transporting the cake, chill it for at least 1 hour and keep it in a snug-fitting cake box or pan with a lid. Cold cake travels better and will soften back to serving temperature at the party.
What to Expect
This sheet cake bakes up with a soft, fine crumb that slices cleanly when fully cooled. The buttermilk helps keep it moist without feeling dense or heavy.
Flavor-wise, expect a classic vanilla profile: mildly buttery, just sweet enough, and designed to appeal to both kids and adults. The buttercream is smooth and rich, but the overall frosting layer is moderate rather than towering.
Pan material and oven calibration can shift baking time by several minutes. A darker metal pan may brown the edges faster, while glass tends to bake more slowly and may require a few extra minutes in the oven. Different brands of butter and vanilla will slightly change the flavor, but the cake remains forgiving.
Ways to Change It Up
- Simple chocolate version.
- Replace 30 g (¼ cup) of the flour with 30 g (¼ cup) of unsweetened cocoa powder and add an extra 1–2 Tbsp buttermilk if the batter seems thick.
- Keep the vanilla buttercream and school color decorations the same.
- The cake will be lightly chocolatey rather than very dark, which still lets the colors pop.
- More festive “confetti” look.
- Gently fold 60 g (⅓ cup) of school-colored jimmies (not nonpareils) into the finished batter right before spreading in the pan.
- Jimmies hold their shape better and bleed less color than nonpareils.
- You’ll get pops of color in every slice plus the decorated top.
- Vegan-friendly adjustment.
- Use a neutral plant-based milk soured with a little vinegar instead of buttermilk, and swap in dairy-free butter sticks and a neutral oil.
- For the eggs, use a commercial egg replacer or 3 Tbsp aquafaba (chickpea liquid) per egg, whipped lightly before mixing in.
- The texture will be slightly denser but still party-appropriate.
- Faster semi-homemade option.
- Use a boxed vanilla or yellow cake mix baked in a 9×13-inch pan according to package directions.
- Replace the mix’s water with milk and add an extra teaspoon of vanilla for more flavor.
- Pair it with the homemade buttercream and school color decorations for a big upgrade in taste without extra stress.
Serving and Storage
For a graduation party, cut the cake into 15 larger pieces (3×5 grid) for generous servings or 18–24 smaller squares for a dessert table with lots of options. A small offset spatula or thin knife makes it easier to lift pieces cleanly.
This cake is often served as part of a buffet with other nostalgic desserts, fruit platters, or cookies. It pairs nicely with fresh berries on the side or a scoop of vanilla ice cream if you have freezer space.
At room temperature (around 70°F/21°C), the frosted cake keeps well for up to 8 hours, covered loosely with foil or a lid. For longer storage, refrigerate the cake, well covered, for up to 3 days.
To serve from the fridge, let the cake sit at room temperature for 20–40 minutes so the buttercream softens slightly. Individual leftovers can be wrapped and frozen for up to 2 months; thaw slices, still wrapped, in the refrigerator overnight.
Cultural Context
Sheet cakes like this one are widely used for graduations in the United States because they’re easy to portion, transport, and decorate with school colors and messages. The format aligns with the broader tradition of American sheet cakes—single-layer cakes baked in rectangular pans and frosted on top—which are common for classroom treats, potlucks, and large celebrations.
School spirit decorations, such as colored frosting, sprinkles, and logos, mirror practices from other graduation foods and merchandise that emphasize institutional colors and mascots. For a broader overview of the style, see the general description of sheet cakes on this overview of sheet cakes. You can also explore how simple vanilla traybakes are used in school settings through resources on traditional school cake, such as this short history of school cake.
Common Questions and Troubleshooting
My cake domed a lot in the center. What happened?
A moderate dome is normal, but a high hump often means the oven was a bit hot or the pan was placed too close to the heating element. Next time, bake on the center rack and check your oven temperature with an oven thermometer. You can also trim a slight dome with a serrated knife once the cake has fully cooled.
The cake seems dry—how can I fix it?
Dryness usually comes from overbaking or measuring too much flour. Use a kitchen scale if possible and start checking for doneness a few minutes earlier than listed. If the cake is already baked and a bit dry, brush the top with 2–3 Tbsp of simple syrup (equal parts sugar and water, briefly simmered and cooled) before frosting to add a little moisture.
My colors looked dull after baking the confetti variation. Any tips?
Colors can fade slightly in the oven. Use gel colorings and vibrant jimmies for the batter, and keep sprinkles away from the sides of the pan where they can overbake. For the frosting decorations, deepen the gel color a shade or two more than you think you need, since it will look slightly lighter once spread.
The frosting is too stiff to pipe clean borders. What should I do?
Add 1 teaspoon of cream or milk at a time and beat briefly until the frosting loosens. If the buttercream has been in the fridge, let it sit at room temperature for 15–20 minutes, then rewhip until smooth.
Can I bake this cake ahead for a weekend party?
Yes. Bake the cake up to 2 days in advance, cool completely, wrap tightly in plastic, and store at room temperature or in the fridge if your kitchen is warm. Frost and decorate the day of the party for the freshest appearance, or frost up to a day ahead and add sprinkles and any delicate decorations closer to serving.
How do I avoid color bleeding from the sprinkles into the frosting?
Add sprinkles as close to serving as your schedule allows, ideally within a few hours. Jimmies tend to bleed less than nonpareils, especially on chilled buttercream. Avoid covering the cake tightly with plastic once decorated, since condensation can encourage colors to run.
Conclusion
This easy graduation party sheet cake is built for real celebration logistics: it uses everyday ingredients, holds up well on a buffet, and showcases school colors without requiring advanced cake skills. Once you’ve made it once, it becomes a flexible template for other milestone events.
If you bake this for a graduate in your life, consider leaving a comment or rating to share how it turned out. I’d especially like to hear which school colors you used and any small tweaks you made so other home bakers can benefit from your experience.

Easy Graduation Party Sheet Cake in School Colors
Equipment
- 9×13-inch metal baking pan
- Parchment paper
- Large mixing bowl
- Whisk
- Stand mixer or hand mixer
- Rubber spatula
- Offset spatula
- Wire rack
- Piping bag with star or round tip (optional)
Ingredients
For the vanilla sheet cake
- 290 g all-purpose flour spooned and leveled
- 300 g granulated sugar
- 2 1/2 tsp baking powder
- 1/2 tsp baking soda
- 3/4 tsp fine sea salt
- 170 g unsalted butter very soft but not melted
- 60 ml neutral oil canola or sunflower
- 3 large eggs room temperature
- 1 large egg white room temperature
- 240 ml buttermilk room temperature
- 2 1/2 tsp pure vanilla extract
For the vanilla buttercream frosting
- 340 g powdered sugar sifted
- 225 g unsalted butter softened
- 45–60 ml heavy cream or whole milk
- 2 tsp pure vanilla extract
- 1/4 tsp fine sea salt
For school color decoration
- 1–2 gel food coloring school colors, for tinting part of the frosting
- 60–90 g sprinkles or nonpareils in school colors
- pre-made sugar letters or chocolate letters optional, for the graduation year and name
Instructions
- Preheat oven to 350°F (175°C). Lightly grease a metal 9×13-inch baking pan, line the bottom with parchment, and grease again if desired. If using a glass pan, reduce oven temperature by 25°F (about 10–15°C) and expect a slightly longer bake.
- In a large bowl, whisk together the flour, baking powder, baking soda, and salt until evenly combined. Set aside.
- In a stand mixer bowl (or large bowl with a hand mixer), beat the very soft butter and sugar on medium-high for 3–4 minutes until pale and fluffy. Scrape down the bowl, add the oil and vanilla, and beat 30–60 seconds until incorporated.
- Add the eggs one at a time, beating on medium for 20–30 seconds after each addition. Add the egg white last and mix just until combined; scrape the bowl and beat about 15 seconds more.
- With the mixer on low, alternate adding the dry ingredients and buttermilk: add about 1/3 of the dry mix, then 1/2 the buttermilk; repeat with another 1/3 dry, remaining buttermilk, and finish with the last 1/3 dry. Mix only until each addition is just absorbed.
- Turn off the mixer and finish by hand with a spatula, folding from the bottom to ensure no flour pockets remain. Stop as soon as the batter is smooth and no dry flour is visible.
- Pour batter into the prepared pan and spread evenly (an offset spatula helps). Tap the pan gently on the counter to release large air bubbles. Bake on the center rack 25–32 minutes, rotating once halfway if needed, until the top springs back and a toothpick in the center comes out clean or with a few moist crumbs.
- Cool the cake in the pan on a wire rack 20–30 minutes. For serving from the pan, cool completely in the pan (about 1–1½ hours). For removing, run a knife around edges, invert onto a rack, peel parchment, and cool fully.
- Make the buttercream: in a clean mixer bowl, beat softened butter on medium-high for 2 minutes until light. Add half the sifted powdered sugar and mix on low to combine, then beat 1 minute on medium. Add remaining powdered sugar, vanilla, salt, and 3 Tbsp cream/milk; beat 2–3 minutes on medium-high until fluffy, adding up to 1 more Tbsp cream/milk if needed for a spreadable consistency.
- Reserve about 1/4–1/3 of the frosting for piping in a separate bowl. Tint the reserved portion with gel food coloring, starting with a tiny amount and adding gradually until you reach the desired school color(s).
- Frost the cooled cake: spread the untinted buttercream evenly over the top. If your kitchen is warm, chill the frosted cake 10–15 minutes to firm the surface before adding colored details.
- Decorate: transfer tinted frosting to a piping bag with a star or round tip (or a zip-top bag with a corner snipped). Pipe a border around the edges, add the graduate’s name/year with tinted frosting or pre-made letters, and add school-colored sprinkles along the border or across part of the cake.
- Chill the decorated cake 20–30 minutes for neat slices before serving. For transport, chill at least 1 hour and keep covered in a snug cake box or lidded pan.
Leave a Reply