
An easy taco dip layered with beans and salsa is the kind of appetizer that disappears before the main course hits the table. This version leans on pantry staples—refried beans, jarred salsa, and a few fresh toppings—so you can build a big, generous dip in under 20 minutes.
If you’re racing to get ready for a game night or a busy weeknight, start by softening the cream cheese and opening the cans and jars so assembly is smooth. If kids are in the kitchen, have them sprinkle the cheese and tomatoes while you handle the knife work and seasoning.
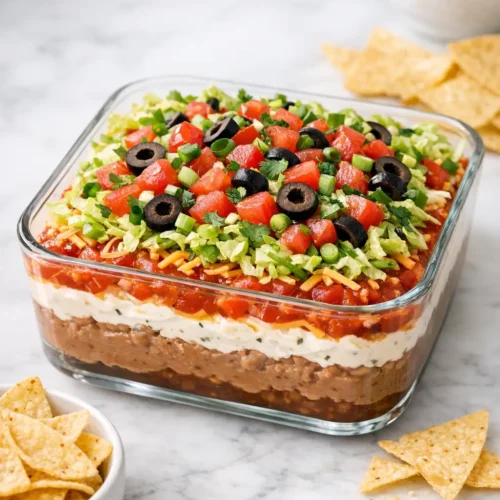
The flavors are familiar: creamy, gently spiced beans, cool tangy sour cream, bright salsa, and a crunchy, cheesy top layer. Expect a chilled, scoopable dip that’s hearty enough to count as a snacky dinner with chips and veggies on the side.
Ingredients
Serves 4 as an appetizer (or 2 very generously)
- 1 can (400 g / 14–16 oz) refried beans – pinto or black beans both work
- 120 g / 4 oz cream cheese, softened – for a rich, stable creamy layer
- 120 g / ½ cup sour cream – adds tang and loosens the cream cheese
- 2–3 Tbsp taco seasoning – use to taste, depending on brand saltiness
- 240 ml / 1 cup salsa – chunky, mild or medium; drain excess liquid if very runny
- 100 g / 1 cup shredded cheddar or Mexican blend cheese
- 60 g / ½ cup shredded lettuce – iceberg or romaine, finely shredded
- 1 medium tomato (about 120 g / 4 oz), diced and drained
- 30 g / ¼ cup sliced black olives – canned, drained
- 2–3 green onions, thinly sliced
- Fresh cilantro, a small handful, chopped (optional)
- Tortilla chips, for serving
Substitutions:
- Use plain Greek yogurt instead of sour cream for a bit more protein and a slightly tangier flavor.
- Swap cream cheese for an equal amount of extra sour cream for a lighter, looser dip (it will be softer and less defined in layers).
- Choose a store-bought pico de gallo instead of salsa if you prefer a fresher, chunkier tomato layer.
- If you’re salt-sensitive, start with 1½ Tbsp taco seasoning and add more only after tasting the cream layer.

Step-by-Step Instructions for Easy Taco Dip Layered with Beans and Salsa
Choose your dish.
A shallow 20 cm / 8-inch square baking dish or similar pie plate works well. The key is surface area: a wide, shallow dish gives more room for toppings and easier scooping.
Season the beans (optional but recommended).
Scrape the refried beans into a medium bowl. If they’re very thick, stir in 1–2 tablespoons of water or salsa until spreadable but still hefty. Taste a little; if your beans are very plain, add ½–1 teaspoon taco seasoning and a small pinch of salt.
Kitchen note: If the bean layer is too stiff, chips tend to snap when scooping. Aim for a soft, peanut-butter-like consistency so the dip scoops cleanly in one swipe.
Spread the bean base.
Using a spatula, spread the beans evenly over the bottom of your serving dish. Press them gently into the corners and level the surface so later layers sit flat.
Make the creamy taco layer.
In a clean bowl, combine the softened cream cheese and sour cream. Beat with a spoon or small whisk until completely smooth. Sprinkle in 2 tablespoons of taco seasoning and mix well. Taste and add up to 1 more tablespoon seasoning if you like it more intense.
Create the cream layer.
Dollop the cream mixture over the beans in several large spoonfuls to avoid dragging the base. Gently spread it from the center out toward the edges, keeping the bean layer in place. You should see two clear, distinct layers.
Add the salsa layer.
If your salsa is quite watery, pour it into a fine-mesh sieve and let excess liquid drain for a few minutes. Spoon the salsa over the cream layer and spread into an even layer. Leave a small border at the edge if your dish is very full to avoid spills when carrying it.
Kitchen note: Extra-wet salsa can slowly leak through the layers and make the beans watery. A quick drain in a sieve keeps the dip scoopable for hours.
Pile on the cheese.
Sprinkle the shredded cheese evenly over the salsa. This layer acts almost like a “net” that helps hold the toppings in place when dipping.
Add fresh, crunchy toppings.
Scatter the shredded lettuce over the cheese, then add the diced tomato (drain off any obvious juice first). Follow with black olives and sliced green onions. If using cilantro, sprinkle it over the top.
Chill briefly (or serve right away).
You can serve the dip immediately if everything started cold, but 20–30 minutes in the refrigerator helps the layers firm up slightly and the flavors mingle. Cover the dish loosely with plastic wrap if chilling.
Serve with sturdy chips.
Set the dish out with thick tortilla chips or scoop-shaped chips. Keep a spoon nearby so guests can serve a scoop onto their plate if the chip-to-dip ratio gets ambitious.
Kitchen note: For make-ahead prep, you can assemble through the cheese layer up to 24 hours in advance. Add lettuce, tomato, and other fresh toppings within 1–2 hours of serving so they stay crisp.
What to Expect
The finished dip is served chilled or cool, not hot, and should be easily scoopable but not runny. The beans form a soft, sturdy base, while the cream cheese and sour cream layer feels smooth and lightly tangy.
Salsa brings brightness and a bit of acidity, and the cheese lends mild saltiness and a stretchy texture if the dip sits out at room temperature for a while. Fresh toppings add crunch and freshness rather than acting as a salad.
Different brands of refried beans and salsa vary in thickness and salt. If your dip tastes flat, it usually needs a pinch of salt in the beans or a bit more taco seasoning in the cream layer. If it tastes too sharp, a little extra cheese or beans will mellow it.
Kitchen note: If you see liquid pooling at the edges after a while on the table, gently tilt the dish over the sink and drain off the excess or blot it with a paper towel. This keeps the top looking fresh for longer.
Ways to Change It Up
Vegetarian and vegan versions.
Most canned refried beans are vegetarian, but check labels since some use lard. For a vegetarian version, use vegetarian beans and keep the rest as written. To make it vegan, choose vegan refried beans and swap the cream cheese and sour cream for plant-based versions. A shredded dairy-free cheese can replace the cheddar, or you can skip the cheese and add more olives and green onions for extra flavor.
Spicier dip.
Use a hot salsa and a “hot” taco seasoning blend, then add sliced jalapeños on top. A drizzle of hot sauce over the cheese layer boosts heat without changing the texture. When increasing spice, leave the sour cream layer as written so it can still cool things down a little.
Milder, kid-friendly version.
Stick with mild salsa and reduce the taco seasoning in the cream layer to 1–1½ tablespoons. You can also omit the green onions if sharp onion flavor is an issue, and rely on tomato, cheese, and lettuce for familiar, gentle flavors.
Faster, simplified version.
If you’re short on time, skip the separate cream mixture and just use sour cream alone. Layer beans, salsa, sour cream, cheese, and a quick sprinkle of tomatoes and olives. It’s less rich without the cream cheese but comes together in about 5 minutes.
Add guacamole or avocado.
For a more filling dip, spread a layer of guacamole on top of the beans and under the cream layer, or dot diced avocado over the top with the tomato. If making this ahead, press a piece of plastic wrap directly on the guacamole layer or brush diced avocado with a little lime juice to slow browning.
Serving and Storage
Set the dip out chilled with a big bowl of tortilla chips. It also works well with sliced bell peppers, cucumber rounds, or jicama sticks if you want some crunch that isn’t all chips.
This style of layered taco dip is common at casual gatherings, potlucks, and game-day spreads. You can build it in a clear glass dish so the layers are visible, or make individual portions in small jars or glasses for easier serving.
Leftovers keep well, covered, in the refrigerator for up to 2 days. The lettuce will soften, and the tomato may release some liquid, but the flavors stay pleasant. For the best texture, scrape off very wilted lettuce before serving again. Serve leftovers chilled; this dip is not designed to be reheated.

Kitchen note: If you know you’ll want leftovers for lunch, assemble part of the dip without lettuce and tomato and keep those in a separate container. Add them fresh to only the portion you’re serving right away.
Cultural Context
Layered taco dips like this one are part of a broader family of Tex-Mex–inspired bean dips that became popular in the United States in the late 20th century. They borrow ingredients commonly used in Tex-Mex cooking—refried beans, salsa, cheese, sour cream—and rearrange them into a shareable cold appetizer.
The well-known “seven-layer dip” is a close relative, typically adding guacamole and olives, and has roots in American party food from the 1980s. You can read more about the evolution of layered Tex-Mex dips in this overview of seven-layer dip on this encyclopedia-style reference.
Refried beans and salsa themselves have deeper histories in Mexican and borderlands cuisines. For more on the development of Tex-Mex cooking as a distinct style, the article on Tex-Mex cuisine from the Texas State Historical Association offers useful background.
Common Questions and Troubleshooting
Why are my chips breaking in the dip?
The bean layer is probably too thick. Next time, thin the beans with a spoonful or two of water or salsa before layering. For a quick fix, you can gently stir just the top of the bean layer with a fork to loosen it, or serve a small spoon alongside for scooping.
My dip turned watery—what went wrong?
Salsa and tomatoes release liquid as they sit. Draining both before layering helps a lot. Very thin sour cream can also contribute, so use a thicker brand if possible. If liquid appears, carefully tilt the dish and pour off what you can rather than stirring it back in.
Can I make this taco dip a day ahead?
Yes, but stop after the cheese layer. Cover tightly and refrigerate up to 24 hours. Add lettuce, tomato, olives, and green onion within a couple of hours of serving so they stay crisp and bright.
Can I use homemade beans instead of canned refried beans?
You can mash cooked pinto or black beans with a little oil or butter and a splash of cooking liquid until smooth and spreadable. Season them well with salt and a pinch of cumin or chili powder so the base doesn’t taste flat.
Is it safe to leave this out at room temperature during a party?
Try to keep the dip out for no longer than 2 hours at typical room temperature. After that, return it to the fridge. If the room is very warm, aim for closer to 1½ hours.
Can I adjust this for a smaller crowd?
Yes. Halve all the ingredients and build the dip in a smaller dish such as a 15 cm / 6-inch pie plate. Keep the layering order the same so it still scoops well.
Conclusion
This easy taco dip layered with beans and salsa is designed for busy home cooks who need a reliable, low-effort appetizer. Once your beans, cream layer, and salsa are in place, the rest is simple assembly and a few fresh toppings.
Use the recipe as a template, adjusting spice level, toppings, and richness to match your family’s tastes and what you have on hand. If you try a variation—extra spicy, vegetarian, or jarred individually—share what worked for you in the comments so other readers can benefit. Ratings and feedback also help fine-tune future versions for real home kitchens.
Easy Taco Dip Layered with Beans and Salsa
Equipment
- Shallow 8-inch (20 cm) square dish or pie plate
- Medium Bowl
- Spatula
- Spoon or small whisk
- Fine-mesh sieve (optional, for draining salsa)
Ingredients
- 1 can refried beans 400 g / 14–16 oz; pinto or black; thin with 1–2 tbsp water or salsa if very thick (optional)
- 120 g cream cheese softened (4 oz)
- 120 g sour cream 1/2 cup
- 2–3 Tbsp taco seasoning to taste
- 240 ml salsa 1 cup; drain excess liquid if very runny
- 100 g shredded cheddar or Mexican blend cheese about 1 cup
- 60 g shredded lettuce 1/2 cup; iceberg or romaine, finely shredded
- 1 medium tomato diced and drained (about 120 g / 4 oz)
- 30 g sliced black olives 1/4 cup; canned, drained
- 2–3 green onions thinly sliced
- fresh cilantro small handful, chopped (optional)
- tortilla chips for serving
Instructions
- Choose your dish: Use a shallow 20 cm / 8-inch square baking dish or similar pie plate for maximum surface area and easy scooping.
- Season the beans (optional): Scrape refried beans into a bowl. If very thick, stir in 1–2 tablespoons water or salsa until spreadable but still hefty. Taste and add 1/2–1 teaspoon taco seasoning and a pinch of salt if needed.
- Spread the bean base: Use a spatula to spread beans evenly in the bottom of the serving dish and level the surface.
- Make the creamy taco layer: In a clean bowl, mix softened cream cheese and sour cream until smooth. Add about 2 tablespoons taco seasoning, mix, then taste and add up to 1 more tablespoon if desired.
- Create the cream layer: Dollop the cream mixture over the beans and gently spread from the center outward to keep layers distinct.
- Add the salsa layer: If salsa is watery, drain briefly in a fine-mesh sieve. Spoon over the cream layer and spread evenly.
- Pile on the cheese: Sprinkle shredded cheese evenly over the salsa.
- Add fresh toppings: Scatter lettuce, then add drained diced tomato, black olives, and sliced green onions. Sprinkle cilantro on top if using.
- Chill briefly (optional): Refrigerate 20–30 minutes to help layers firm up and flavors mingle; cover loosely if chilling.
- Serve: Serve with sturdy tortilla chips (thick or scoop-shaped). Keep a spoon nearby for easy serving.
Leave a Reply