
A flourless chocolate cake for Passover should do three things well: honor the no-flour, no-leavening rules, satisfy the chocolate lovers at the table, and slice into photo-pretty wedges that look right at home on Pinterest.
If you’re balancing work, kids, and Seder prep, start this dessert first: it bakes in one pan and actually benefits from cooling time while you tackle mains and sides. If you have a tiny kitchen, clear one counter space for melting the chocolate and cracking eggs—that’s where 90% of the work happens.
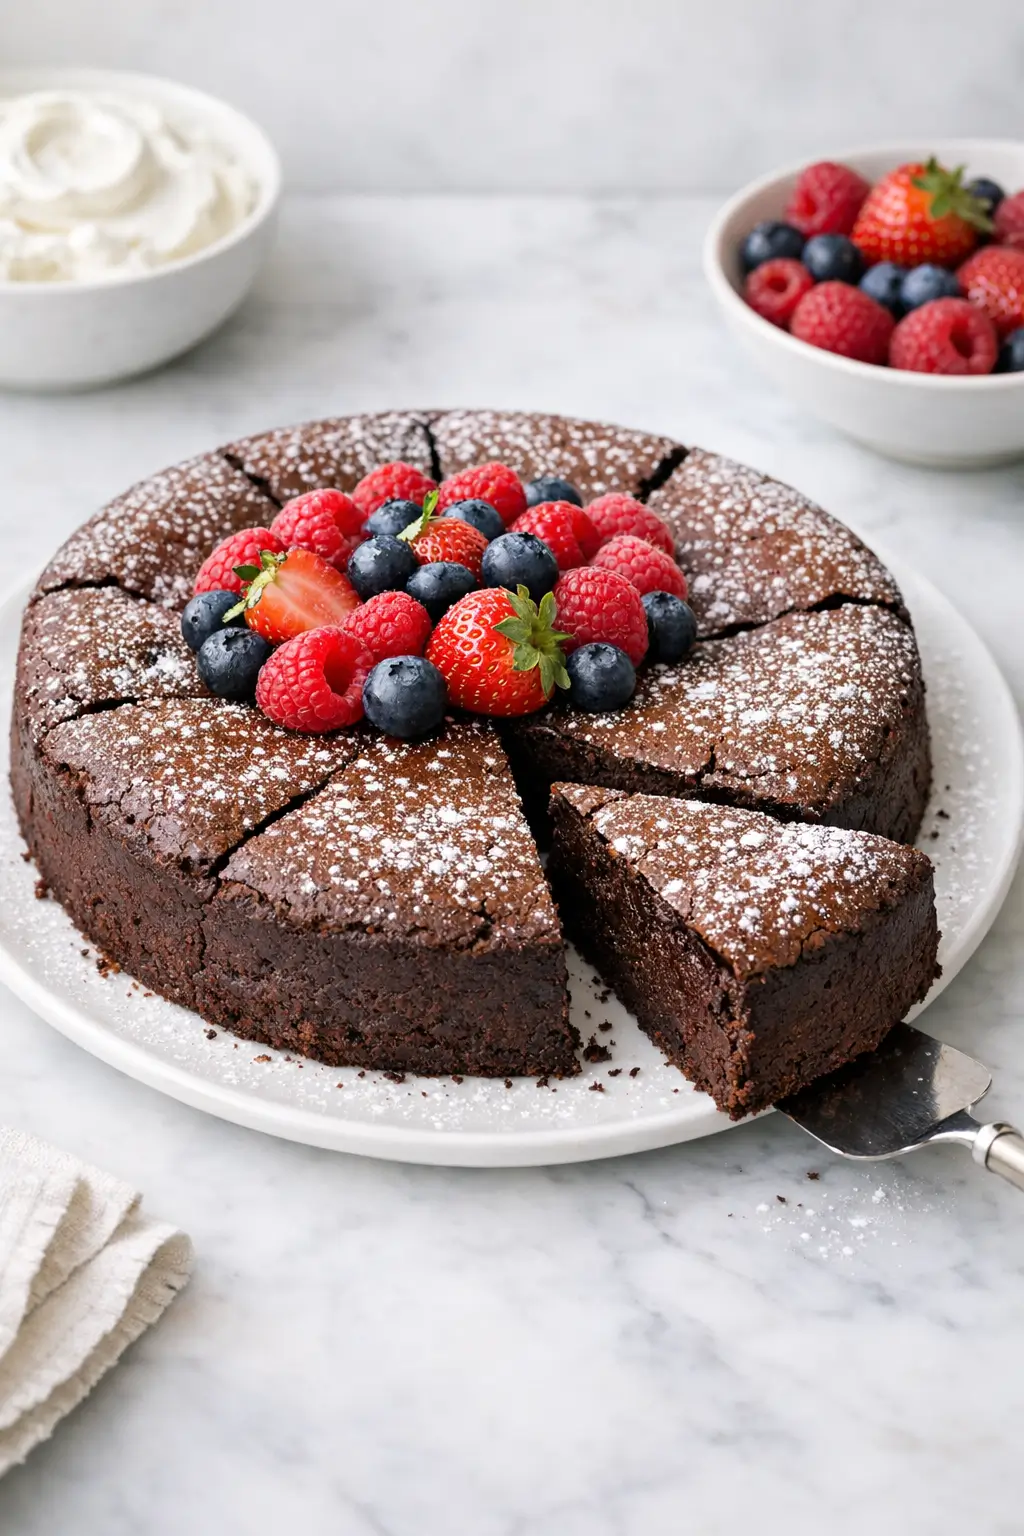
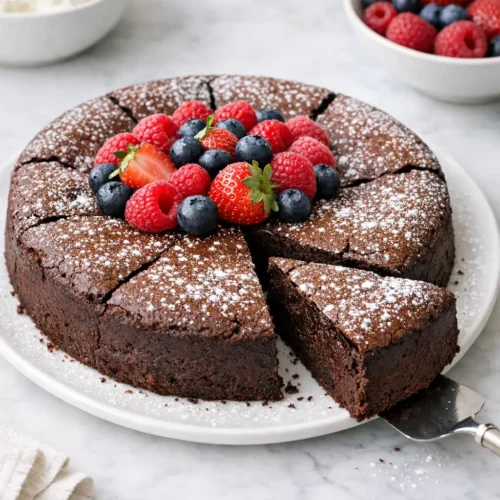
This flourless chocolate cake is dense and fudgy at the center with a delicate, crackly top and clean edges for easy decorating. It leans bittersweet, not sugary, and pairs well with whipped cream and fresh berries, so it fits naturally into a spring Passover menu.
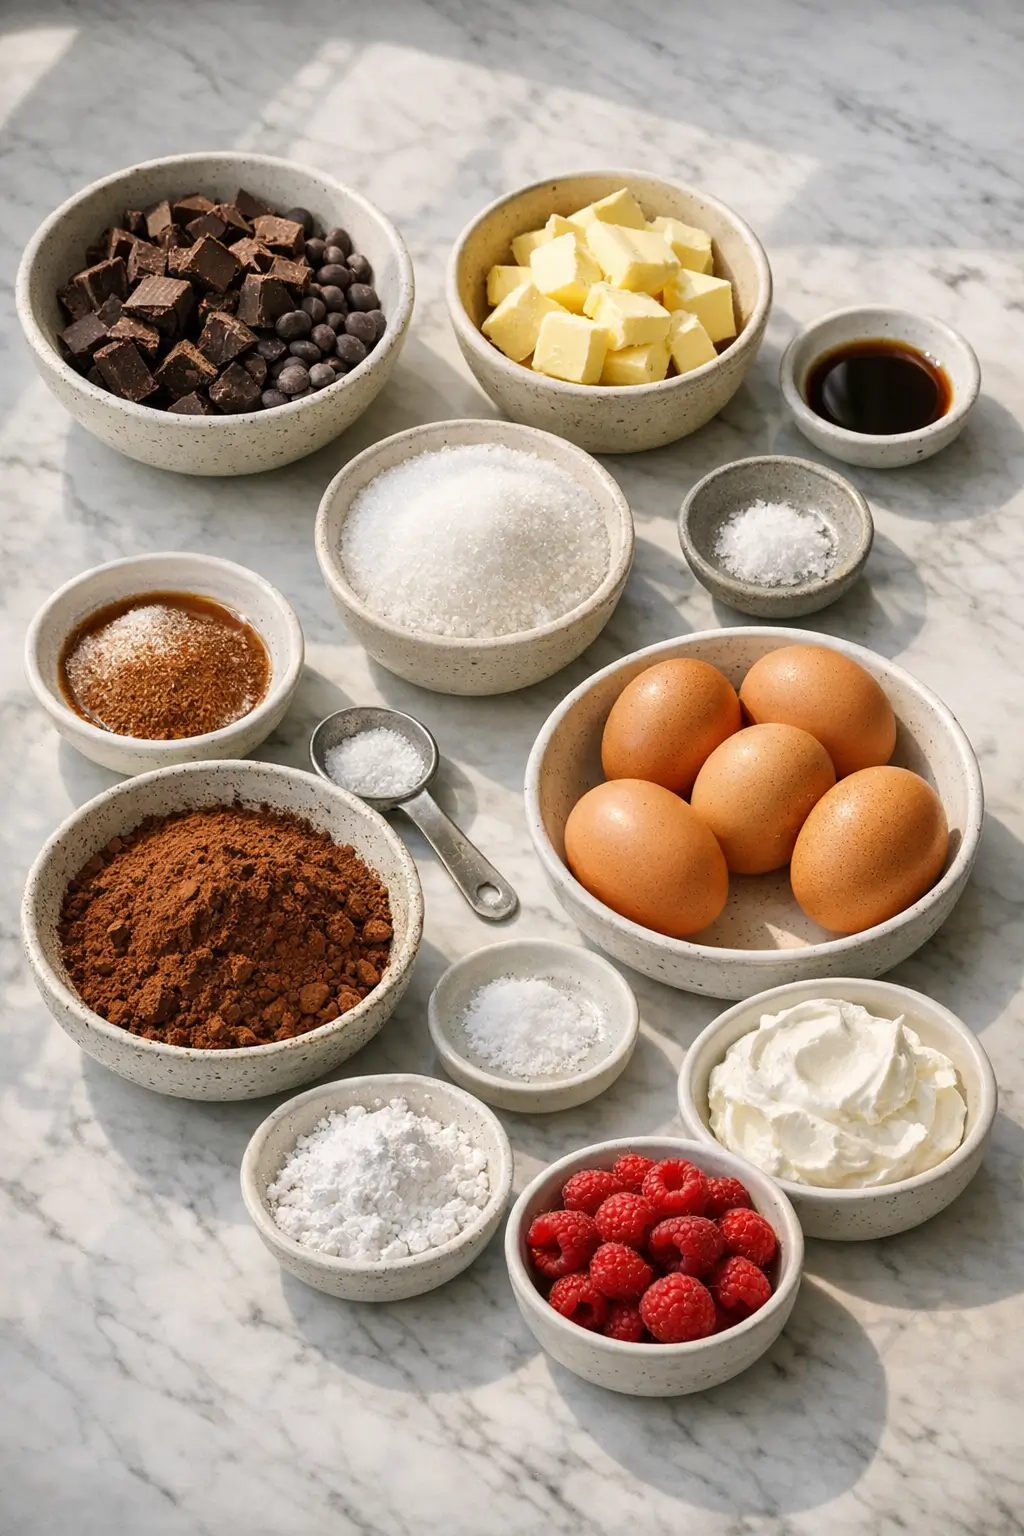
Ingredients
Serves 8–10 (in a 9-inch / 23 cm springform pan)
For the cake
- 225 g / 8 oz semisweet or bittersweet chocolate (about 1 1/3 cups chips or chopped bars, 55–70% cacao) – the main flavor, so use one you like eating
- 170 g / 12 Tbsp unsalted butter (or non-dairy margarine for a pareve cake) – gives richness and a silky texture
- 150 g / 3/4 cup granulated sugar – for sweetness and structure
- 1/4 tsp fine sea salt – sharpens the chocolate flavor
- 1 tsp vanilla extract – optional but rounds out the flavor; use Passover-certified if needed
- 5 large eggs, at room temperature – provide all the lift and structure instead of flour or leavening
- 60 g / 3/4 cup unsweetened cocoa powder (natural or Dutch-process), sifted – deepens the chocolate flavor and makes the cake extra fudgy
For finishing (choose one or mix-and-match)
- Cocoa powder, for dusting
- Icing sugar / powdered sugar, for dusting (ensure it’s Passover-approved if using)
- Fresh berries (raspberries, strawberries, or sliced berries of choice)
- Lightly sweetened whipped cream or whipped non-dairy topping, for serving
Kitchen note: Room-temperature eggs are important here. Cold eggs can make the chocolate mixture seize or turn grainy and will be harder to incorporate smoothly.
Step-by-Step Instructions for Flourless Chocolate Cake
- Prepare the pan and oven.
- Preheat the oven to 175°C / 350°F.
- Line the bottom of a 9-inch (23 cm) springform pan with parchment paper.
- Grease the sides and the parchment with butter or non-dairy margarine.
- For easy release without using flour, you can dust the sides lightly with cocoa powder, then tap out any excess.
- Melt the chocolate and butter gently.
- Place the chopped chocolate and butter in a heatproof bowl.
- Set the bowl over a small pot of barely simmering water (the bowl should not touch the water) or melt in short 20–30 second bursts in the microwave, stirring each time.
- Stir until just melted and smooth, then remove from the heat and let cool for 3–5 minutes so it’s warm but not hot.
- Build the chocolate base.
- Whisk in the sugar and salt until the mixture looks thick and glossy.
- Whisk in the vanilla, if using.
- The mixture will look slightly granular at this point; that smooths out once the eggs are added and the cake bakes.
- Add the eggs one at a time.
- Crack the room-temperature eggs into a separate bowl to check for shells.
- Whisk the eggs into the chocolate mixture one at a time, mixing just until blended before adding the next.
- By the last egg, the batter should be shiny, a bit looser, and uniform.
- Incorporate the cocoa powder.
- Sift the cocoa powder directly over the bowl to avoid lumps.
- Switch to a silicone spatula and fold the cocoa in gently until no dry streaks remain.
- The batter will be thick, like a loose brownie batter.
Kitchen note: If you see stubborn cocoa lumps, don’t overmix the whole bowl. Press the lumps against the side of the bowl with your spatula to break them up, then fold again.
- Bake the cake.
- Scrape the batter into the prepared pan and smooth the top.
- Tap the pan firmly on the counter 2–3 times to pop any large air bubbles.
- Bake for 22–28 minutes, depending on your oven.
- The edges should look set and slightly puffed, and the top may have a thin, crackly crust. A toothpick inserted about 2 cm (3/4 inch) from the edge should come out mostly clean, while one in the center should have a few moist, fudgy crumbs.
- Cool slowly for best texture.
- Place the pan on a cooling rack and let the cake cool in the pan for at least 20–30 minutes.
- Run a thin knife around the edge to loosen, then release the springform sides.
- Let cool completely to room temperature before transferring to a serving plate.
- Chill for tidy slices (optional but recommended).
- For clean, Pinterest-ready wedges, chill the cake (well wrapped) for at least 1–2 hours or up to 2 days.
- Before slicing, dip a sharp knife in hot water, wipe it dry, and cut, wiping the blade between slices.
- Finish and decorate.
- Just before serving, dust the top lightly with cocoa or powdered sugar.
- Garnish with a ring of fresh berries around the edge, a small mound of berries in the center, or both.
- Serve slices plain, with whipped cream, or with a scoop of vanilla ice cream or sorbet.
Kitchen note: If you’re serving this after a large Seder meal, keep your slices modest. This cake is rich; thin wedges go a long way and leave room for coffee and conversation.
What to Expect
This flourless chocolate cake bakes into a low, dense layer—closer to a truffle or soft brownie than a tall sponge.
The center should be moist and fudgy, especially if you pull it from the oven while there’s still a slight wobble in the middle.
The top forms a delicate, papery crust that may crack as it cools. That’s normal and actually gives you a nice surface to dust with cocoa and sugar.
Flavor-wise, you’ll taste deep chocolate first, with just enough sweetness to balance any bitterness from the cocoa.
If you use semisweet chocolate, the flavor will be softer and more family-friendly. Bittersweet pushes the cake into a darker, more intense direction.
Different chocolates and cocoa brands have varying levels of cocoa butter and acidity, so you might notice small changes in sweetness and firmness from one batch to the next.
Oven behavior also matters. A hotter oven or darker pan can give you a drier edge and slightly more rise, while a lighter pan and a gentle oven yield a very even, creamy interior.
Kitchen note: If you consistently get a dry cake, reduce the bake time by 3–5 minutes next time or tent loosely with foil for the last 5 minutes to protect the top.
Ways to Change It Up
A base recipe like this adapts well to different needs at the Seder table.
Here are a few variations that keep the core method consistent while changing flavor or timing.
1. Dairy-free / Pareve Version
- Replace the butter 1:1 with a good-quality non-dairy margarine or plant-based butter that’s certified kosher for Passover.
- Use non-dairy whipped topping or coconut whipped cream for serving.
- Keep an eye on the edges as margarine-based cakes can brown a bit faster.
Expectation: You’ll get the same fudgy center with a slightly different aftertaste depending on the margarine brand, but most guests will not notice once the cake is topped with berries.
2. Nutty Almond Crunch Topping
- After pouring the batter into the pan, scatter 30–40 g / about 1/3 cup sliced almonds over the surface.
- Bake as directed. The almonds toast in the oven and give texture and a visual frame for your slices.
Expectation: This adds crunch and a subtle almond aroma while staying within typical Passover guidelines (no flour, no leavening). Skip this if you’re serving someone with nut allergies.
3. Extra-Rich Ganache Glaze
- Warm 120 ml / 1/2 cup heavy cream (or canned full-fat coconut milk) until steaming.
- Pour over 115 g / 4 oz chopped chocolate, let sit 2–3 minutes, then whisk smooth.
- Once the cake is completely cool, pour the ganache over the center and nudge it toward the edges for a smooth, glossy finish.
Expectation: This turns the cake into a full-on torte, ideal if you want a more polished, Pinterest-style look. It does make the dessert richer, so cut smaller slices.
4. Faster, Weeknight-Style Version
If you’re short on time before a weeknight holiday meal:
- Skip the chilling step and serve the cake just cooled to room temperature; the slices will be a bit softer but still hold.
- Instead of fruit and ganache, finish with a simple cocoa dusting and a bowl of store-bought whipped topping or sorbet on the side.
Trade-off: You gain time and lose a bit of precision in the slices, but the flavor and texture remain satisfying.
Serving and Storage
This cake is especially welcome at the end of a long Passover Seder because you can slice thin wedges that still feel indulgent.
Serve the cake at cool room temperature for the best flavor; cold from the fridge the texture will be firmer and more truffle-like, warmer it will be softer and a bit gooier.
It pairs well with fresh berries, citrus segments, or a bright side dessert like Mango Sticky Rice Made Easy: Creamy, Foolproof Dessert if you’re building a broader dessert table.
A basic whipped cream (or coconut whipped cream) lightly sweetened with sugar and a pinch of salt balances the intensity of the chocolate.
Leftover slices keep well, which is helpful if you’re stretching the cake across multiple days of the holiday.
- Room temperature: Keep tightly covered up to 1 day in a cool kitchen.
- Refrigerator: Wrap the whole cake or individual slices well and store for up to 5 days.
- Freezer: Freeze well-wrapped slices or the whole cake (without fresh fruit) for up to 2 months. Thaw overnight in the fridge, then bring to room temperature before serving.
For reheating, avoid the microwave if you want to preserve the crackly top.
Instead, let chilled slices sit at room temperature 30–45 minutes, or warm very briefly in a low oven (120°C / 250°F) for 5–7 minutes.
Kitchen note: If you’ve topped the cake with fresh berries, remove them before freezing. Add fresh fruit only after thawing so it stays bright and juicy instead of icy and mushy.
Cultural Context
Flourless chocolate cake shows up on many restaurant menus, but it also fits naturally into holiday tables where flour and leavening are restricted.
Passover, which commemorates the Israelites’ exodus from Egypt, includes dietary rules that avoid leavened grain products during the holiday.
Desserts like this flourless cake align with those guidelines because they rely on eggs and chocolate for structure instead of wheat-based flour or baking powder.
Historically, flourless chocolate cakes have connections to Italian tortes such as torta caprese and other regional chocolate custard cakes, where ground nuts or eggs provide body instead of flour.
If you’re interested in the broader history of this style of dessert, the entry on flourless chocolate cake in this overview of the cake’s development is a useful starting point.
For background on how Passover food customs developed, especially the focus on unleavened bread and flourless dishes, the Jewish Museum London offers a concise explanation in its Passover food traditions guide.
Common Questions and Troubleshooting
My flourless chocolate cake sank in the middle. Did I mess it up?
A gentle sink in the center is completely normal. These cakes puff as the eggs expand in the heat and naturally settle as they cool.
If the middle is dramatically sunken and wet, it may be slightly underbaked. Next time, bake 3–5 minutes longer and check again near the center with a toothpick for moist crumbs rather than liquid batter.
The texture turned out dry and crumbly. How can I fix that?
Dryness usually comes from overbaking or an oven that runs hot.
Use an oven thermometer if possible, start checking the cake a few minutes early, and pull it when the edges are set but the center still looks softly matte and just barely wobbly.
Serving with whipped cream, a scoop of ice cream, or even a drizzle of warm coffee or orange syrup over each slice can help rescue a slightly dry cake.
Can I make this flourless chocolate cake ahead for Passover?
Yes—this dessert is very make-ahead friendly, which can be a lifesaver around the Seder.
Bake the cake up to 2 days in advance, cool completely, then wrap tightly and refrigerate.
Bring to room temperature before serving and add any cocoa, powdered sugar, or fruit toppings the day you plan to slice.
Is this recipe gluten-free and kosher for Passover?
The cake contains no wheat flour and no baking powder or baking soda, so it is naturally gluten-free as written.
To align with Passover practices, choose chocolate, cocoa, vanilla, butter or margarine, and any toppings that are certified kosher for Passover according to your community’s standards.
Always check labels, especially on cocoa and powdered sugar, which may be processed with starches.
Can I add flavorings like espresso or orange without breaking Passover rules?
Many flourless chocolate cake recipes use espresso powder or citrus zest to deepen flavor.
You can incorporate 1–2 tsp instant espresso powder with the cocoa or 1–2 tsp finely grated orange zest with the sugar, as long as the products themselves are acceptable for your Passover kitchen.
Orange zest especially plays well with the cake’s richness and doesn’t change the texture.
Conclusion
A flourless chocolate cake for Passover doesn’t need special flours or complicated layers to feel festive.
With good chocolate, a handful of pantry ingredients, and careful timing in the oven, you get a dessert that respects the holiday rules, delivers deep chocolate flavor, and looks polished on the Seder table and on social feeds.
If you make this, I’d love to hear how it fits into your holiday—leave a comment with what you served alongside it, or any tweaks you made to suit your family’s tastes.
Sharing your adjustments helps other home cooks plan their own Passover desserts with more confidence.
Flourless Chocolate Cake for Passover That Shines
Equipment
- 9-inch (23 cm) springform pan
- Parchment paper
- Heatproof bowl
- Small pot (for double boiler) or microwave
- Whisk
- Silicone spatula
- Fine-mesh sieve (for sifting cocoa)
- Cooling rack
Ingredients
For the cake
- 225 g semisweet or bittersweet chocolate (55–70% cacao) about 8 oz; about 1 1/3 cups chips or chopped bars
- 170 g unsalted butter or non-dairy margarine for a pareve cake (12 Tbsp / 6 oz)
- 150 g granulated sugar 3/4 cup
- 1/4 tsp fine sea salt
- 1 tsp vanilla extract optional
- 5 large eggs room temperature
- 60 g unsweetened cocoa powder sifted (3/4 cup)
For finishing (optional)
- cocoa powder for dusting
- powdered sugar for dusting (Passover-approved if needed)
- fresh berries for serving
- lightly sweetened whipped cream or whipped non-dairy topping, for serving
Instructions
- Prepare the pan and oven: Preheat the oven to 175°C / 350°F. Line the bottom of a 9-inch (23 cm) springform pan with parchment paper. Grease the sides and parchment with butter or non-dairy margarine. For easy release without flour, dust the sides lightly with cocoa powder and tap out the excess.
- Melt the chocolate and butter gently: Place chocolate and butter in a heatproof bowl. Set over barely simmering water (bowl not touching water) or microwave in 20–30 second bursts, stirring each time. Stir until just melted and smooth, then cool 3–5 minutes so it’s warm but not hot.
- Build the chocolate base: Whisk in the sugar and salt until thick and glossy. Whisk in vanilla (if using). The mixture may look slightly granular.
- Add the eggs one at a time: Crack eggs into a separate bowl to check for shells. Whisk eggs into the chocolate mixture one at a time, mixing just until blended before adding the next, until the batter is shiny and uniform.
- Incorporate the cocoa powder: Sift cocoa powder over the bowl, then fold gently with a silicone spatula until no dry streaks remain. If lumps persist, press them against the bowl with the spatula and fold again.
- Bake the cake: Scrape batter into the prepared pan and smooth the top. Tap the pan firmly 2–3 times to pop large air bubbles. Bake 22–28 minutes, until edges are set and slightly puffed and the top is thin and crackly; a toothpick 2 cm (3/4 inch) from the edge should come out mostly clean, and the center should have a few moist crumbs.
- Cool slowly for best texture: Cool on a rack in the pan for at least 20–30 minutes. Run a thin knife around the edge, release the springform sides, and cool completely to room temperature before transferring.
- Chill for tidy slices (optional but recommended): Wrap well and chill 1–2 hours (or up to 2 days). For clean slices, dip a sharp knife in hot water, wipe dry, and wipe between cuts.
- Finish and decorate: Just before serving, dust with cocoa and/or powdered sugar and garnish with fresh berries. Serve plain or with whipped cream (or non-dairy topping), and optionally ice cream or sorbet.
Leave a Reply