
Hot chocolate mix in a jar is one of those projects that straddles cooking and crafting in a very forgiving way. You stir together a simple pantry cocoa mix, layer it into jars, and end up with something that feels thoughtful without taking over your weekend.
If you’re staring down a busy weeknight, start by pulling out all your jars and measuring spoons before you even open the cocoa. For anyone working in a small kitchen, mix the dry ingredients in one large bowl first so you only have one thing to wipe out.
This version leans on unsweetened cocoa, dry milk, and brown sugar for a cozy, not-too-bitter cup that only needs hot water or milk. It’s ideal for beginner cooks, kids who want to help, and anyone building a small stash of affordable, giftable treats.
Ingredients
This recipe makes about 4 cups of mix, enough for roughly 10–12 mugs of hot chocolate (about 1/3 cup mix per 8 oz / 240 ml liquid). That comfortably fills one 1-quart (1 liter) jar, or two pint (500 ml) jars.
Dry mix:
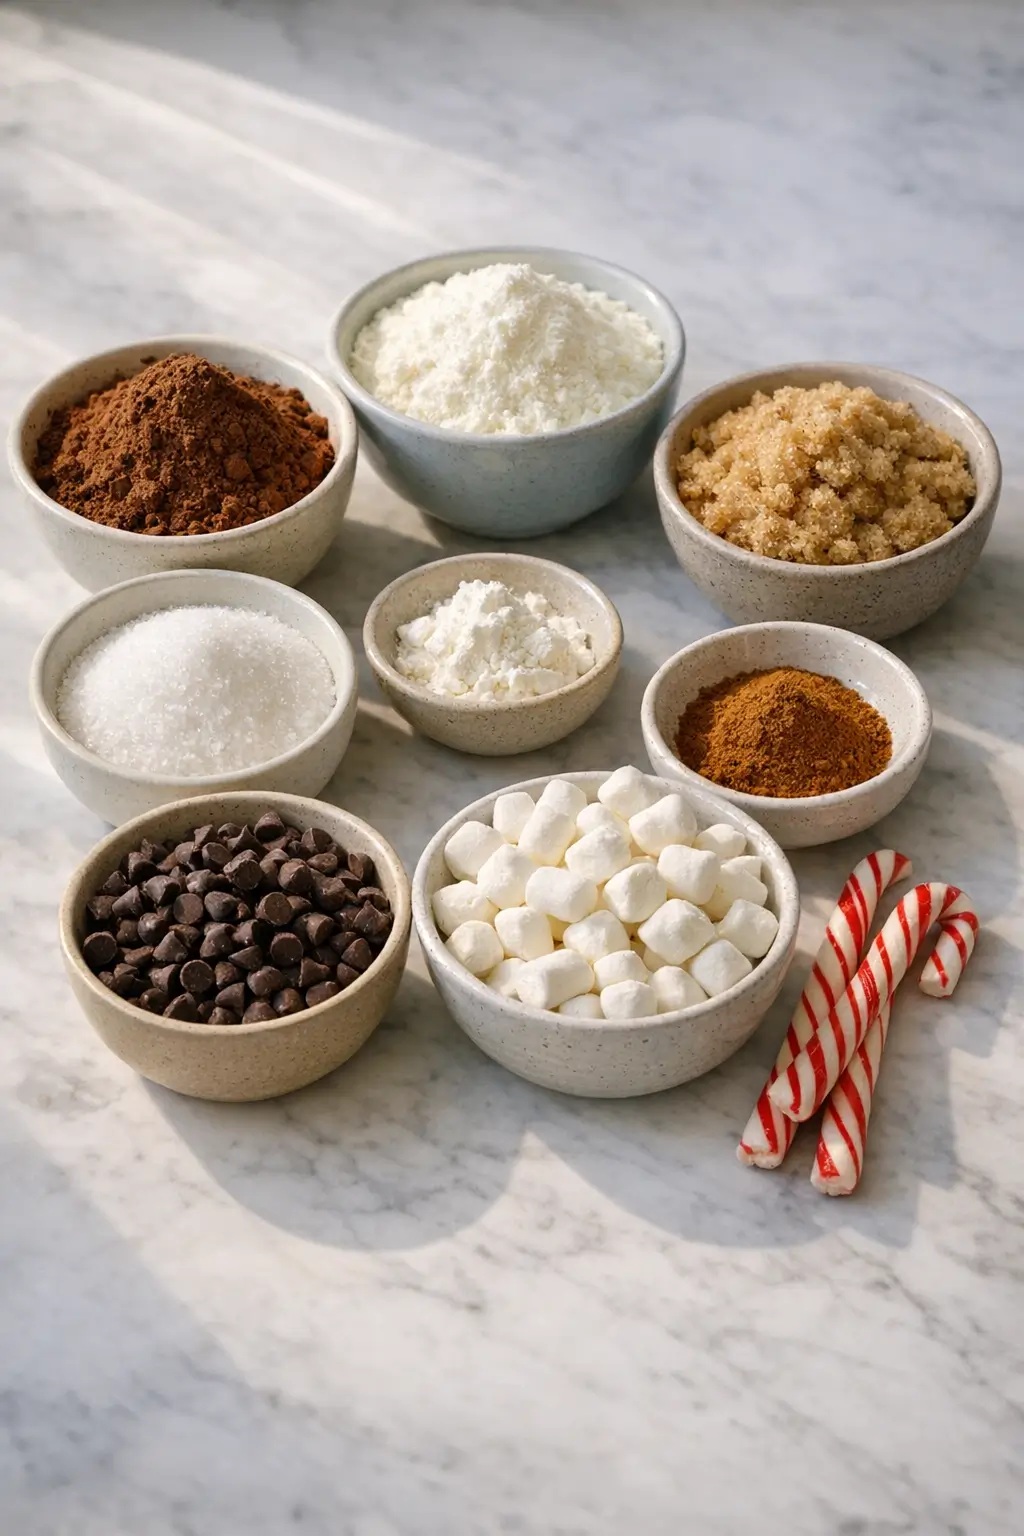
- 200 g (about 2 cups) unsweetened cocoa powder, natural or Dutch-process – base chocolate flavor
- 250 g (about 2 cups loosely packed) nonfat dry milk powder – makes the mix creamy with just hot water
- 150 g (about 3/4 cup) light brown sugar, gently packed – sweetness with a slight molasses note
- 100 g (about 1/2 cup) granulated sugar – balances the brown sugar and helps the mix dissolve
- 1/2 tsp fine sea salt – sharpens the chocolate flavor
- 1 tsp cornstarch – optional, gently thickens the drink and helps keep the mix free-flowing
- 1 tsp ground cinnamon – optional, warm background spice
For layering and decorating the jars:
- 80–100 g (about 1/2 cup) mini chocolate chips – extra richness and visual contrast in the jar
- 30–40 g (about 1 cup) mini marshmallows or dehydrated marshmallow bits – classic hot chocolate topping
- 1–2 peppermint sticks or mini candy canes per jar – optional, adds a hint of peppermint when stirred into the drink
To serve one mug:
- 80–240 ml (1/3–1 cup) hot water, milk, or non-dairy milk per serving – adjust for richness
Substitution notes:
- Dry milk powder: Use whole milk powder for a richer drink, or a coconut milk powder for a dairy-light version if you cannot use cow’s milk.
- Sugar: Swap light brown sugar for dark brown sugar for a deeper caramel note, or use all granulated sugar if that’s what you have.
- Cocoa: Dark (Dutch-process) cocoa will taste more intense and slightly less sharp than natural cocoa.
- Cornstarch: You can omit it entirely; the drink will be a bit thinner but still comforting.
Kitchen note: If you plan to mail these jars, skip large marshmallows on top. Dehydrated marshmallow bits or leaving space and packing marshmallows separately hold up much better in transit.
Step-by-Step Instructions for Hot Chocolate Mix in a Jar
Measure and sift the dry base.
In a large mixing bowl, sift together the cocoa powder, dry milk powder, brown sugar, granulated sugar, salt, and cornstarch, breaking up any visible lumps with the back of a spoon.If you don’t own a sifter, whisk the mixture thoroughly, scraping the sides and bottom of the bowl, until everything looks even and powdery.
Taste a tiny sample of the mix.
Dip a clean, dry spoon into the mixture, taste a few grains, and check for balance.You are tasting for sweetness and chocolate intensity, not for texture.
If it seems a bit bitter for your crowd, add 1–2 tablespoons more sugar; if it tastes too sweet, whisk in another tablespoon of cocoa powder.Stir in optional flavorings.
Whisk in the ground cinnamon or any dry spices you plan to use.
Make sure there are no visible streaks of spice; they tend to clump otherwise.
At this point, you can also stir in mini chocolate chips if you prefer them distributed throughout the mix instead of layered.Prepare the jars.
Wash and dry your jars and lids thoroughly.
Let them air-dry until there is no visible moisture inside—this is important, because even a few droplets can encourage clumping.
A funnel (or a piece of parchment rolled into a cone) makes filling easier and neater.Layer the mix for a visual gift.
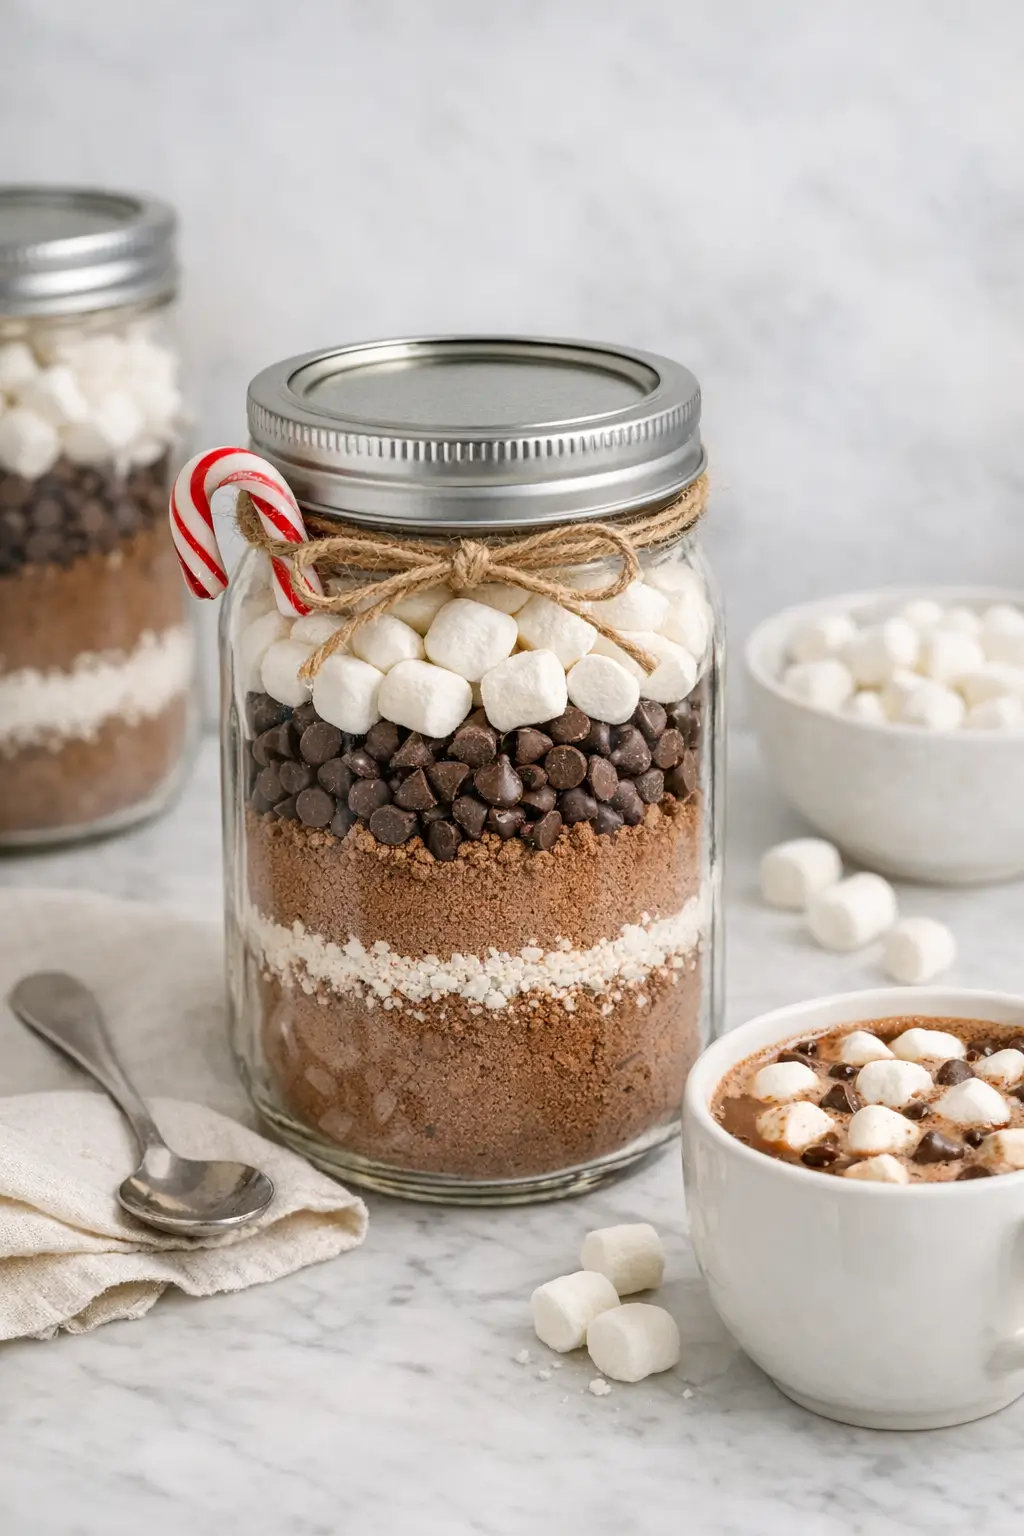
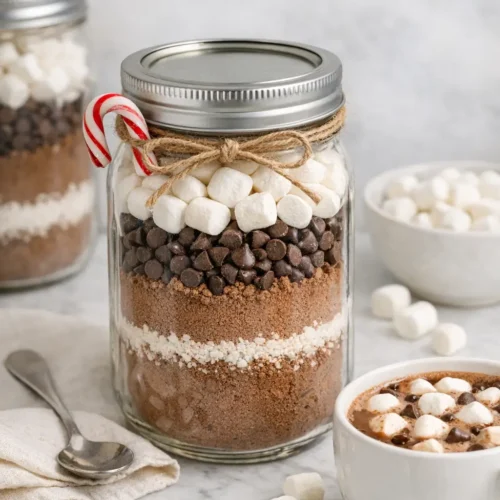
For a layered look, spoon roughly half of the hot chocolate mix into each jar, gently tapping the jar on the counter to level the surface.
Add a layer of mini chocolate chips, then the remaining hot chocolate mix.
Finish with marshmallows on top, leaving at least 1 cm (about 1/2 inch) of headspace so you can close the lid without compressing everything.
Kitchen note: Don’t pack the layers too firmly. A light tap is enough to settle the mix; if you slam the jar on the counter repeatedly, the sugars and cocoa can compact into a hard plug that’s difficult to scoop.
Seal and label.
Wipe the rims with a clean, dry cloth, then screw the lids on until fingertip-tight.
Label each jar with the contents and the date.
On a tag or sticker, include simple directions, such as: “Stir mix to combine. Add 1/3 cup mix to 1 cup (240 ml) hot water or milk. Stir until dissolved; top with marshmallows.”Add decorative touches.
If you like, cut a piece of fabric, parchment, or kraft paper slightly larger than the lid and secure it under the ring with twine or ribbon.
Tuck a small candy cane, cinnamon stick, or mini whisk into the bow for a functional decoration.
Keep decorations away from the jar’s mouth so the lid remains easy to open.How to prepare a mug at home.
To make a mug, pour 1 cup (240 ml) of hot water or milk into a heat-proof mug.
Whisk in 1/3 cup (about 40 g) of the mix until smooth and no dry powder remains on the surface.
Taste and adjust by adding a spoonful more mix for a stronger drink, or more hot liquid to soften the flavor.
Kitchen note: If the drink looks slightly grainy on top, it usually means the cocoa hasn’t fully hydrated. Keep whisking for 20–30 seconds, or briefly return it to the pan over low heat and whisk until glossy.
What to Expect
This mix makes a medium-thick, creamy hot chocolate that sits between a light cocoa and the very dense European-style drinking chocolate.
The texture will feel smooth rather than syrupy, especially if you use water or low-fat milk.
Flavor-wise, expect a balanced sweetness with enough cocoa to taste like chocolate instead of sugar.
Brown sugar and salt round out the edges, so the drink tastes fuller even if you don’t top it with whipped cream.
Different cocoas and milk powders change the character slightly.
A dark Dutch-process cocoa will taste deep and almost brownie-like, while natural cocoa will feel a bit brighter and more cocoa-forward.
Whole milk powder gives more body than nonfat, and plant-based milks can add their own flavors, like oat’s natural sweetness or coconut’s richness.
Kitchen note: Brands of dry milk vary a lot in how well they dissolve. If your first mug seems a little chalky, try whisking the mix with a splash of hot water to form a paste, then add the rest of the hot liquid.
Ways to Change It Up
1. Dairy-light or vegan-friendly version
To make the jar suitable for people who avoid dairy, swap the dry milk powder for coconut milk powder or a favorite dairy-free creamer, and clearly label the jar with serving instructions that call for hot water or plant milk.
Skip conventional marshmallows, which usually contain gelatin, and look for vegan marshmallows or omit them.
The drink will taste slightly less “classic diner” and more like a richer, slightly coconut-forward cocoa.
2. Peppermint or spiced hot chocolate
For a peppermint variation, add 1–2 tbsp finely crushed peppermint candy to the dry mix and top each jar with a mini candy cane.
Alternatively, focus on warm spices by increasing the cinnamon to 2 tsp and adding a pinch of nutmeg or ground ginger.
Peppermint leans very wintry and can become intense, so keep the amount modest; spices add more subtle warmth and work year-round.
3. Faster, ultra-simple mix
If you’re short on time or ingredients, combine 1 1/2 cups (300 g) sugar, 1 cup (100 g) unsweetened cocoa powder, and 1 tsp fine salt.
Skip the dry milk entirely and tell recipients to stir 2–3 tbsp of mix into 1 cup (240 ml) of hot milk.
This version is very pantry-friendly and lower in volume, but because all the richness comes from the milk they use, flavor will vary more between households.
4. Extra-dark or kid-sweeter jars
For an extra-dark batch, increase cocoa powder by 2–3 tbsp and reduce sugar slightly.
Label it clearly so recipients know it’s less sweet.
For a jar aimed at very young kids or anyone with a sweeter tooth, leave the recipe as written and consider adding a layer of white chocolate chips on top for visual appeal and extra sweetness.
Serving and Storage
These jars are typically given around winter holidays or as cold-weather thank-you gifts.
They make sense for teachers, neighbors, delivery drivers, or anyone who might appreciate an easy, shelf-stable treat they can use on their own schedule.
Serve the prepared hot chocolate in sturdy mugs, topped with marshmallows, whipped cream, or a dusting of extra cocoa.
A small cookie, biscotti, or slice of simple cake makes the mug feel more like a full dessert.
If you’re assembling a larger gift basket, pair the jar with items like shortbread, a small bag of candied nuts, or a jarred dessert sauce.
Store the sealed jars in a cool, dry cupboard away from direct light.
For best flavor, aim to use the mix within 3 months, although the dry ingredients themselves are generally safe longer if kept airtight and dry.
Once a jar is opened, advise recipients to reseal it tightly after each use.
For reheating prepared hot chocolate, warm it gently on the stovetop over low heat or in short microwave bursts, stirring between each burst.
Avoid boiling; that can cause a slightly grainy texture and a “cooked” milk flavor.
Cultural Context
Drinking chocolate has a long history reaching back to Mesoamerican cultures, where cacao was prepared as a bitter, spiced beverage rather than a sweet treat.
Over centuries, European adaptation shifted it toward the sweetened hot chocolate that’s familiar in many homes today.
Modern hot chocolate mix in a jar is part of a broader trend of “gifts from the kitchen,” where shelf-stable mixes are assembled at home and gifted for convenience and connection.
For a historical overview of chocolate’s journey from cacao bean to European cup, this article from the National Museum of American History offers a concise background: history of chocolate as a drink.
For additional context on how chocolate evolved across cultures, the Fine Cacao and Chocolate Institute provides accessible educational pieces, such as this one on chocolate history: global history of chocolate.
Common Questions and Troubleshooting
My mix clumped in the jar. Is it ruined?
Usually the clumps are just cocoa and sugar pressed together.
Shake the jar firmly, breaking up lumps with a clean spoon if needed.
Next time, make sure the jar and measuring tools are completely dry and avoid packing the layers tightly.
The hot chocolate tastes too weak. What should I adjust?
First, stir the mug well to ensure you didn’t leave any mix at the bottom.
If it still tastes mild, whisk in an extra tablespoon or two of mix, or reduce the amount of hot liquid slightly next time.
For a whole batch of mix that seems underpowered, whisk in 2–3 tablespoons more cocoa powder.
Can I cut down the sugar?
You can reduce the total sugar by about one-third without affecting texture much.
Expect the drink to taste more bitter and cocoa-forward; some people will prefer this, especially if they add whipped cream or sweet marshmallows on top.
If you go much lower than that, the mix may taste flat—add a small pinch more salt and a bit of vanilla extract to the mug to help compensate.
How long does the mix stay good?
For best flavor, aim to use homemade hot chocolate mix within 3 months.
Check the “best by” dates on your cocoa and milk powder; if those are nearing expiration, shorten the suggested gifting window.
Always store jars in a cool, dry place, and discard the mix if you notice off smells, discoloration, or signs of moisture.
Can I use water instead of milk?
Yes.
Because this mix includes dry milk powder, water still produces a creamy drink.
Using dairy or plant milk simply adds extra richness and can highlight different flavors.
Is this safe for people with allergies?
The basic version contains dairy and may include soy from certain chocolate chips.
If you adapt the recipe with coconut milk powder or dairy-free creamers, clearly label the jar, including what you used and the fact that it was prepared in a home kitchen that may contain common allergens.
Kitchen note: When gifting to a classroom, office, or anyone with known allergies, it’s better to keep toppings (like marshmallows and candy) in a separate, clearly labeled bag, so each person can decide what works for them.
Conclusion
Homemade hot chocolate mix in a jar is one of those rare projects that works just as well for last-minute gifting as it does for stocking your own pantry.
With a few pantry ingredients and clean jars, you can create several gifts in under an hour, each with clear instructions and a personal touch.
If you try this version, I’d appreciate hearing how it went in your kitchen—what cocoa you used, how you layered the jars, and any flavor twists you added.
Feel free to leave a comment and rating, and share any tweaks that made the mix better suited to your household or the people you’re gifting it to.
Giftable Hot Chocolate Mix in a Jar Guide
Equipment
- Large mixing bowl
- Sifter (optional)
- Whisk
- Measuring cups and spoons
- Spoon
- Funnel (optional)
- Jars with lids (1-quart or two pint jars)
Ingredients
Dry mix
- 200 g unsweetened cocoa powder (natural or Dutch-process)
- 250 g nonfat dry milk powder
- 150 g light brown sugar gently packed
- 100 g granulated sugar
- 1/2 tsp fine sea salt
- 1 tsp cornstarch optional
- 1 tsp ground cinnamon optional
For layering and decorating the jars
- 80–100 g mini chocolate chips
- 30–40 g mini marshmallows or dehydrated marshmallow bits
- 1–2 peppermint sticks or mini candy canes per jar (optional)
To serve (per mug)
- 1/3 cup hot chocolate mix about 40 g
- 1 cup hot water, milk, or non-dairy milk 240 ml; adjust for richness
Instructions
- Measure and sift the dry base. In a large mixing bowl, sift together the cocoa powder, dry milk powder, brown sugar, granulated sugar, salt, and cornstarch, breaking up any visible lumps with the back of a spoon. If you don’t own a sifter, whisk thoroughly, scraping the sides and bottom, until everything looks even and powdery.
- Taste a tiny sample of the mix. Dip a clean, dry spoon into the mixture and taste a few grains for sweetness and chocolate intensity. If it seems bitter, add 1–2 tablespoons more sugar; if too sweet, whisk in another tablespoon of cocoa powder.
- Stir in optional flavorings. Whisk in the ground cinnamon or any dry spices you plan to use, making sure there are no streaks. You can also stir in mini chocolate chips now if you prefer them distributed instead of layered.
- Prepare the jars. Wash and dry jars and lids thoroughly, then let them air-dry until there is no visible moisture inside. Use a funnel (or parchment rolled into a cone) to make filling easier.
- Layer the mix for a visual gift. Spoon roughly half of the hot chocolate mix into each jar and tap lightly to level. Add a layer of mini chocolate chips, then the remaining mix. Finish with marshmallows on top, leaving at least 1 cm (about 1/2 inch) of headspace so the lid closes without compressing the toppings.
- Seal and label. Wipe jar rims with a clean, dry cloth and screw on lids until fingertip-tight. Label with contents/date and include directions (e.g., “Stir mix to combine. Add 1/3 cup mix to 1 cup (240 ml) hot water or milk. Stir until dissolved; top with marshmallows.”).
- Add decorative touches (optional). Cover the lid with fabric, parchment, or kraft paper and secure with twine or ribbon. Tuck in a small candy cane, cinnamon stick, or mini whisk, keeping decorations away from the jar’s mouth so it stays easy to open.
- How to prepare a mug at home. Pour 1 cup (240 ml) hot water or milk into a heat-proof mug. Whisk in 1/3 cup (about 40 g) of the mix until smooth and no dry powder remains. Adjust with more mix for a stronger drink or more hot liquid to soften the flavor.
Leave a Reply