
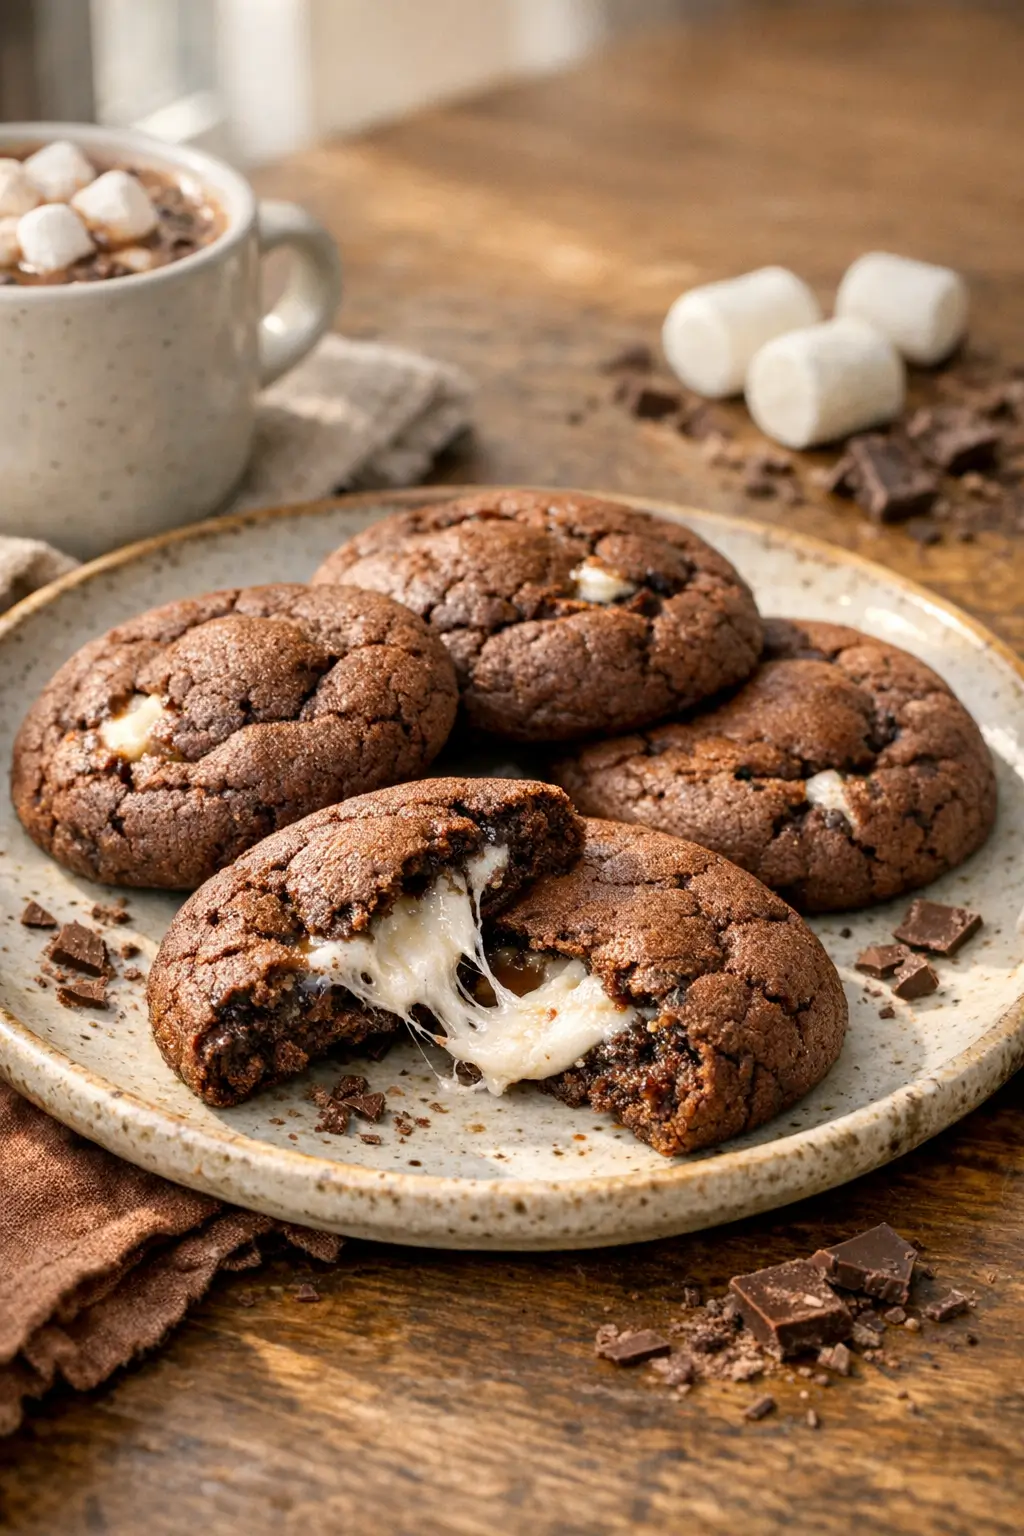
These Hot Cocoa Marshmallow‑Stuffed Cookies bring the mug-of-cocoa experience into a soft, chewy cookie with a molten marshmallow pocket inside. The dough uses real hot cocoa mix for that familiar nostalgic flavor, supported by cocoa powder for depth. Expect a brownie-like chew and pockets of sweetness, not a crisp shortbread. If you’re new to filled cookies, this recipe walks you through the few spots that need attention.
Short on time? Freeze the marshmallows now so they’re firm by the time the oven heats. Working in a small kitchen? Portion the dough with a scoop and chill it on a single baking sheet to keep things tidy. These cookies fit winter dessert boards, snow-day bakes, and kid-approved after-dinner treats.
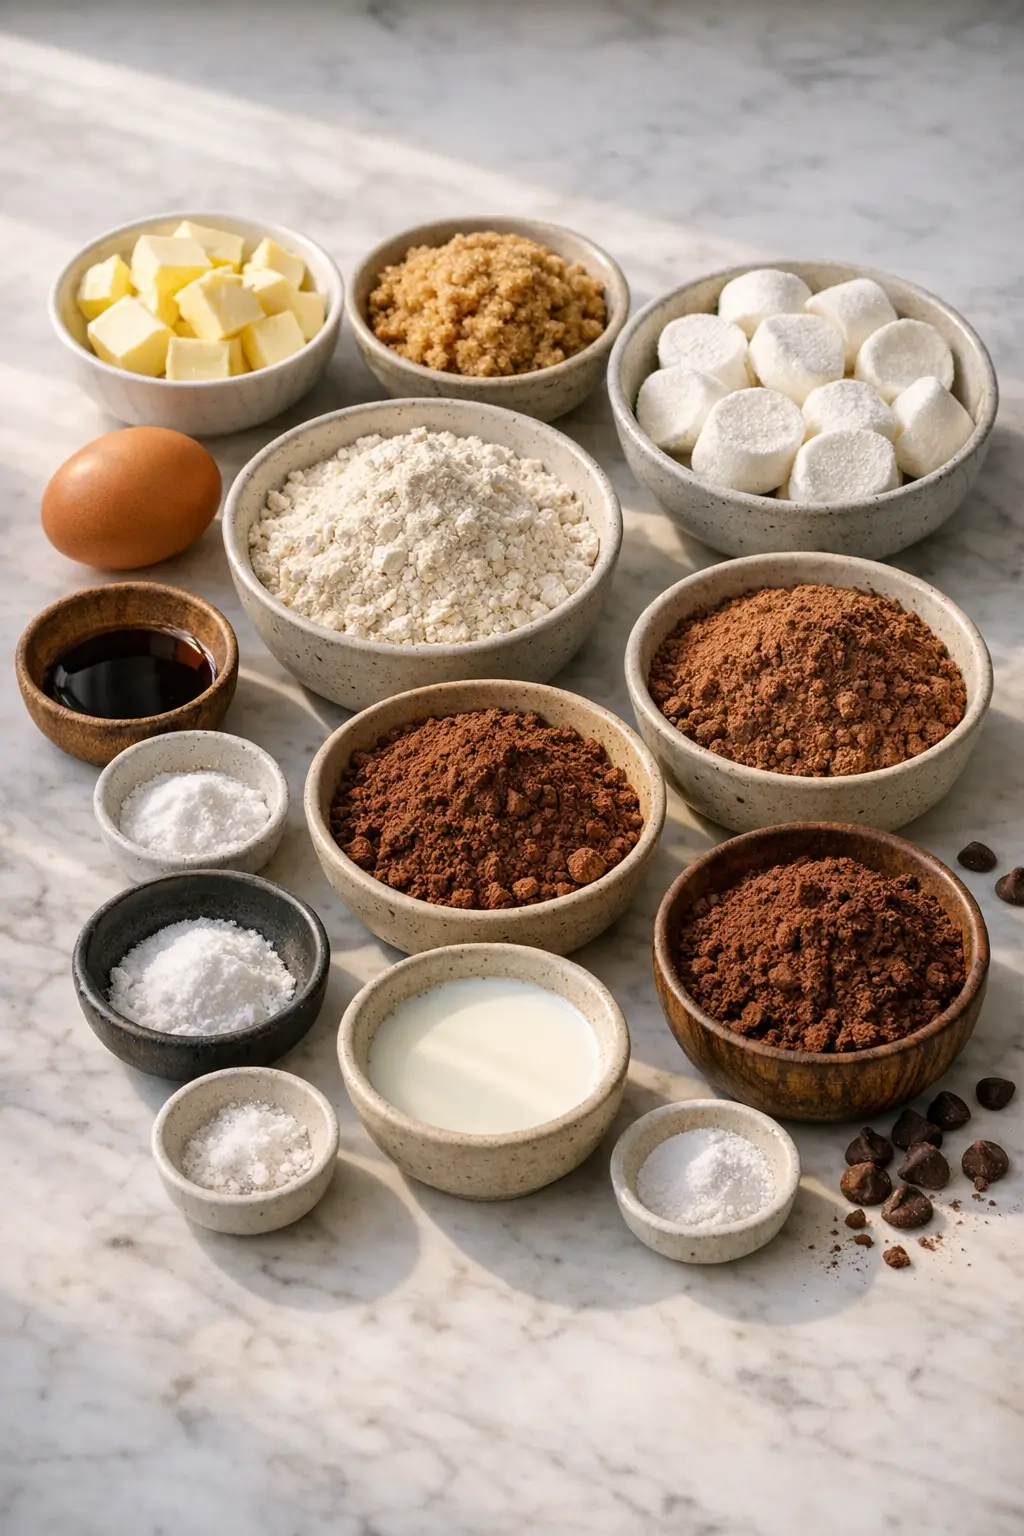
Ingredients
- 1/2 cup (113 g) unsalted butter, softened — for tenderness and flavor
- 1/2 cup (100 g) granulated sugar — sweetness and spread
- 1/2 cup (100 g) packed light brown sugar — moisture and chew
- 1 large egg — binds and enriches
- 1 teaspoon vanilla extract — rounds out chocolate notes
- 1 1/2 cups (188 g) all-purpose flour — structure
- 1/3 cup (27 g) natural unsweetened cocoa powder — chocolate backbone
- 1/4 cup (40 g) hot cocoa mix (no mini marshmallows) — signature hot cocoa flavor
- 1 teaspoon baking soda — lift
- 1/8 teaspoon fine salt — balances sweetness
- 2 teaspoons (10 ml) milk (dairy or non-dairy) — softens the dough
- 12 large marshmallows, halved crosswise and frozen 20–30 minutes — for gooey centers
Substitutions:
- Use Dutch-process cocoa for a slightly darker color; cookies may spread a touch less.
- If using salted butter, reduce added salt to a small pinch.
- For smaller cookies, use mini marshmallows: pack 5–6 minis per cookie center.
Kitchen note: Hot cocoa mix varies by brand. Weigh the 40 g for accuracy, and avoid mixes with dehydrated marshmallows (they create hard bits and throw off moisture).
Step-by-Step Instructions for Hot Cocoa Marshmallow-Stuffed Cookies
- Cream the butter and sugars. In a mixing bowl, beat butter, granulated sugar, and brown sugar on medium-high until lighter in color and fluffy, 2–3 minutes. Scrape the bowl once to ensure even aeration.
- Add egg and vanilla. Beat on medium just until smooth. Overbeating here can cause excess spread later.
- Combine dry ingredients. In a separate bowl, whisk flour, cocoa powder, hot cocoa mix, baking soda, and salt until the color looks uniform with no streaks of pale flour remaining. This prevents pockets of leavener.
- Bring the dough together. Add dry ingredients to the wet in two additions, mixing on low until just combined. Add the milk and beat 5–10 seconds to hydrate. The dough will be thick and slightly sticky.
- Chill for strength. Cover and refrigerate until firm enough to handle, at least 2 hours and up to 48 hours. Chilling reduces spread and lets the cocoa hydrate for fuller flavor. If you’re in a hurry, 60–90 minutes will work, but shaping is easier with a colder dough.
- Prep for stuffing. Line 2 baking sheets with parchment. Preheat the oven to 350°F (175°C). Halve the frozen marshmallows crosswise if you haven’t already; keep them in the freezer until the moment of assembly.
- Portion the dough. Scoop 12 equal portions (about 30 g or a heaping tablespoon each). Work with 3–4 at a time, keeping the rest chilled.
- Wrap the marshmallow. Flatten one portion into a 2 1/2-inch (6 cm) disk. Place a frozen marshmallow half in the center, cut side up. Fold the dough up and over to fully encase it, pinching seams shut. Roll gently into a ball, then place seam-side down on the baking sheet, spacing 2 1/2 inches (6 cm) apart.
- Bake. Bake one sheet at a time for 10–12 minutes. Look for set edges, a slightly domed top, and a soft center that still looks a bit underdone. If you see a small marshmallow leak, that’s normal; it will set as it cools.
- Optional tidy-up. Right out of the oven, use a round cutter or upside-down glass to corral any uneven edges with a gentle swirl for neat circles.
- Cool. Let cookies cool on the sheet for 10 minutes to finish setting, then transfer to a rack. The marshmallow pocket firms from molten to stretchy as it cools; at 30–40 minutes, the centers will be pull-apart gooey.
Kitchen note: Marshmallows expand fast. Freezing them, fully sealing seams, and baking seam-side down keep the filling inside. If one bursts, press the soft edges back toward the center with a spoon while hot.
What to Expect
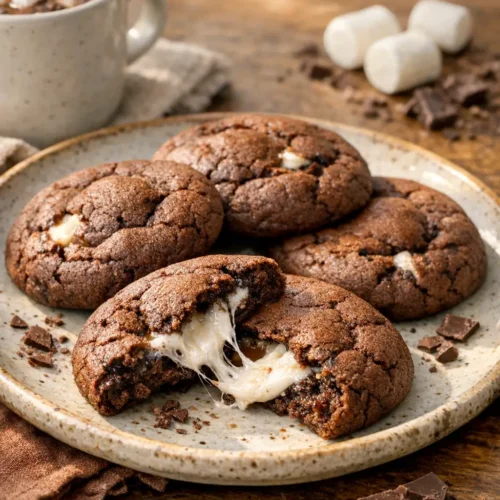
- Texture: edges set with a soft, brownie-like chew through the middle. The marshmallow forms a glossy, stretchy pocket rather than a dry crumb. After a day, the chew deepens and the interior stays soft.
- Flavor: classic hot cocoa profile from the mix—sweeter and milkier—backed by the rounder bitterness of cocoa powder. Not intensely dark; more like the cocoa you sip.
- Variability: different hot cocoa mixes change sweetness and salt. Pans conduct heat differently; light-colored aluminum gives gentler bottoms, while dark nonstick browns faster. If using Dutch-process cocoa, expect a touch less spread and a slightly smoother, deeper chocolate note.
Ways to Change It Up
- Make it vegetarian/vegan: use a plant-based butter that performs well in baking, a flax egg (1 tablespoon ground flax + 2 1/2 tablespoons water, rested 10 minutes), and vegan marshmallows. Check that your hot cocoa mix is dairy-free; otherwise swap with a nondairy cocoa mix. Cookies will spread a little less and be slightly cakier.
- Dial the heat up or down: for a warmly spiced take, whisk 1/2 teaspoon cinnamon and a tiny pinch of cayenne into the dry ingredients (inspired by Mexican chocolate-style cocoa). For milder sweetness, replace 2 tablespoons of granulated sugar with additional hot cocoa mix, then reduce the milk to 1 teaspoon.
- Speed version (no chill): reduce flour to 1 1/3 cups (170 g) and chill only 30 minutes. The cookies will bake flatter with a thinner ring around the marshmallow. Good when you need dessert in under an hour.
- Bigger bakery cookies: portion at 55–60 g each and stuff with a whole large marshmallow. Bake 12–14 minutes. The centers will be extra molten but more prone to minor leaks.
Serving and Storage
Serve slightly warm for maximum stretch. The marshmallow pocket is most dramatic 20–40 minutes out of the oven, when the cookie is set but still soft.
Pair these with a mug of milk or coffee, or build a small dessert board with sliced fruit and something bright for contrast. For a festive spread, add a second cookie style like Red Velvet Valentine Cookies with Bakery-Soft Centers and a simple dipped treat such as Valentine’s Chocolate-Covered Strawberries Busy Cooks Can Nail.
Storage: once fully cool, keep cookies in an airtight container at room temperature up to 3 days. Because marshmallow tops or leaks can stick, place parchment between layers. For longer storage, freeze baked cookies in a single layer until firm, then bag for up to 2 months. Thaw at room temperature 30–45 minutes.
Reheating: warm a cookie in the microwave for 8–10 seconds for a gooey pocket again. Overheating will dissolve the marshmallow into the crumb.
Kitchen note: Don’t stack or wrap these while even slightly warm—the marshmallow will glue cookies together. Wait until they’re cool to the touch, then layer with parchment.
Cultural Context
The appeal of “hot cocoa in cookie form” connects to a long history of drinking chocolate. In 18th‑century Britain and elsewhere in Europe, hot chocolate was a social beverage served in specialized houses and domestic settings. For a concise overview of that era, the British Museum explores chocolate’s popularity and the evolving habit of mixing milk with cocoa in their feature, The 18th‑century chocolate champions.
In the United States, chocolate pots became part of domestic life. The Smithsonian’s National Museum of American History holds an 18th‑century copper chocolate pot and notes how such vessels were used to keep chocolate suspended and ready for serving. See the collection record here: Copper Chocolate Pot. While our cookies use modern hot cocoa mix, the idea of cocoa as a cozy, shareable treat has centuries of precedent.
Common Questions and Troubleshooting
- My cookies spread too much. Why? The dough was likely too warm or your butter too soft. Next time, chill the dough a full 2 hours and bake on a cool, light-colored sheet. If it happens again, reduce the milk to 1 teaspoon. You can also chill shaped balls 15 minutes before baking.
- A few cookies leaked marshmallow. Is that bad? Not at all. It happens when a seam opens or a marshmallow sits too close to the surface. Press any soft overflow back toward the center right after baking. For the next tray, be sure the marshmallow is fully encased and marshmallow halves are well frozen at assembly.
- Can I use mini marshmallows in the center? Yes—pack 5–6 minis for each cookie. Minis melt faster, so aim for 9–10 minutes of bake time. Keep them frozen before stuffing. The result is a more uniform pocket and fewer leaks.
- What hot cocoa mix works best? Any plain mix without dehydrated marshmallows. If your mix is very sweet, start with 35 g instead of 40 g and taste a baked tester before finishing the batch.
- How do I keep the centers soft after a day? Store in an airtight container with a small piece of bread or a slice of apple for a few hours (then remove); the ambient moisture helps. For more cookie tenderness tips, see the soft-crumb notes in our Red Velvet Valentine Cookies with Bakery-Soft Centers.
- Can I make the dough ahead? Yes—cover and refrigerate up to 48 hours. For longer storage, scoop dough balls and freeze solid; thaw in the fridge just until pliable, then stuff and bake.
- How do I double the batch? Multiply all ingredients by two and bake in batches. If your oven runs hot or you use dark pans, reduce temperature to 340°F (171°C) for consistent bottoms.
Conclusion
These cookies deliver the cozy flavor of hot cocoa in a format that travels well, bakes reliably, and rewards a little attention to detail. If you make a batch, leave a comment with what brand of hot cocoa mix you used and whether you went with marshmallow halves or whole centers. Your notes help other home bakers dial in their own ideal texture and sweetness.
Hot Cocoa Marshmallow-Stuffed Cookies, Gooey Centers Fast
Equipment
- Mixing bowl
- Hand mixer or stand mixer
- Whisk
- Baking sheets
- Parchment paper
- Cookie scoop (optional)
- Cooling rack
Ingredients
- 1/2 cup unsalted butter softened (113 g)
- 1/2 cup granulated sugar (100 g)
- 1/2 cup light brown sugar packed (100 g)
- 1 large egg
- 1 tsp vanilla extract
- 1 1/2 cups all-purpose flour (188 g)
- 1/3 cup natural unsweetened cocoa powder (27 g)
- 1/4 cup hot cocoa mix no mini marshmallows (40 g)
- 1 tsp baking soda
- 1/8 tsp fine salt
- 2 tsp milk dairy or non-dairy (10 ml)
- 12 large marshmallows halved crosswise and frozen 20–30 minutes
Instructions
- Cream the butter and sugars. In a mixing bowl, beat butter, granulated sugar, and brown sugar on medium-high until lighter in color and fluffy, 2–3 minutes. Scrape the bowl once to ensure even aeration.
- Add egg and vanilla. Beat on medium just until smooth. Overbeating here can cause excess spread later.
- Combine dry ingredients. In a separate bowl, whisk flour, cocoa powder, hot cocoa mix, baking soda, and salt until the color looks uniform with no streaks of pale flour remaining.
- Bring the dough together. Add dry ingredients to the wet in two additions, mixing on low until just combined. Add the milk and beat 5–10 seconds to hydrate. The dough will be thick and slightly sticky.
- Chill for strength. Cover and refrigerate until firm enough to handle, at least 2 hours and up to 48 hours (60–90 minutes works in a hurry, but shaping is easier colder).
- Prep for stuffing. Line 2 baking sheets with parchment. Preheat the oven to 350°F (175°C). Halve the frozen marshmallows crosswise if you haven’t already; keep them in the freezer until assembly.
- Portion the dough. Scoop 12 equal portions (about 30 g or a heaping tablespoon each). Work with 3–4 at a time, keeping the rest chilled.
- Wrap the marshmallow. Flatten one portion into a 2 1/2-inch (6 cm) disk. Place a frozen marshmallow half in the center, cut side up. Fold dough up and over to fully encase it, pinch seams shut, roll into a ball, and place seam-side down on the baking sheet, spacing 2 1/2 inches (6 cm) apart.
- Bake. Bake one sheet at a time for 10–12 minutes, until edges are set and the center is still soft and slightly underdone-looking. Small marshmallow leaks are normal and will set as the cookies cool.
- Optional tidy-up. Right out of the oven, use a round cutter or upside-down glass to gently swirl around the cookie edges for neat circles.
- Cool. Let cookies cool on the sheet for 10 minutes, then transfer to a rack. The marshmallow pocket firms from molten to stretchy as it cools; at 30–40 minutes, the centers will be pull-apart gooey.
Leave a Reply