
Japanese cream sandwich, often called a cream sando, is one of those desserts that looks fussy but is very manageable at home. Soft milk bread, lightly sweetened whipped cream, and fresh fruit stack into clean layers that chill in the fridge while you get on with the rest of dinner. If you’ve had Japanese fruit sandwiches from a bakery or konbini, this version aims for that same fluffy, not-too-sweet balance.
If it’s a busy weeknight, start by chilling your mixing bowl and cream; that way the filling whips fast when you’re ready. Sharing a small kitchen or wrangling kids nearby, cut the fruit first and tuck it in the fridge so the actual sandwich assembly stays calm and quick.
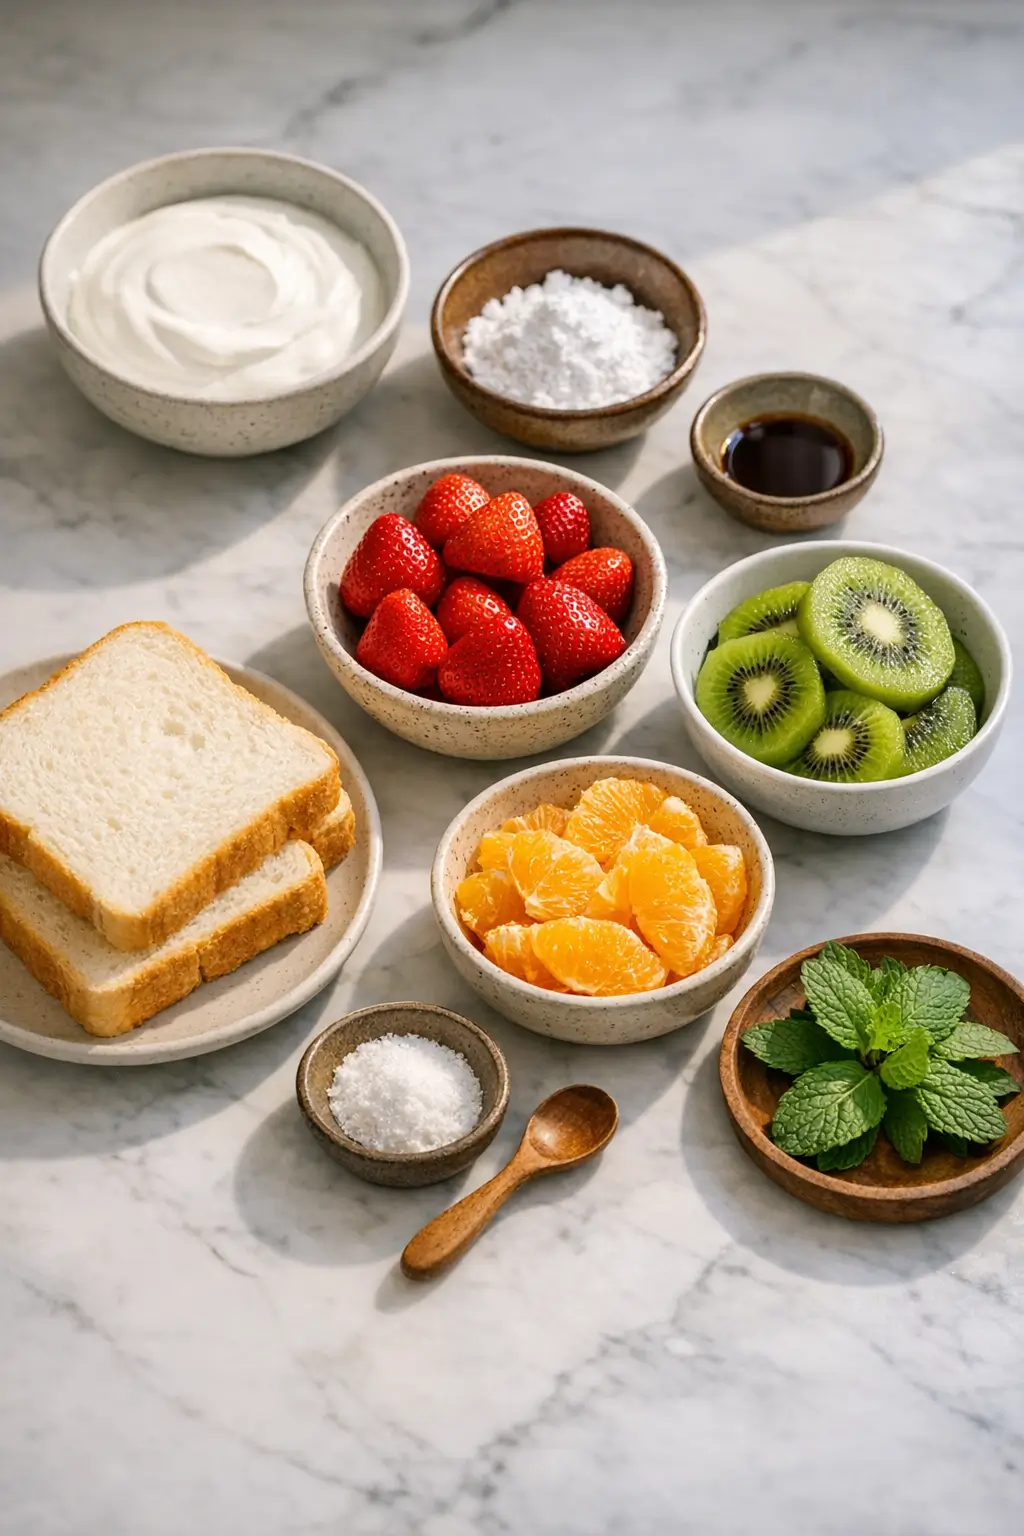
Ingredients
Serves 2–3 (makes 2 generously stuffed sandwiches, 4 triangle halves)
For the cream filling
- 240 ml (1 cup) cold heavy whipping cream (36–40% fat)
- 20 g (2 1/2 Tbsp) powdered sugar (or 15 g / 1 1/4 Tbsp fine granulated sugar)
- 1/2 tsp vanilla extract, optional, for aroma
For the sandwiches
- 4 slices shokupan (Japanese milk bread), about 1.5–2 cm (5/8–3/4 inch) thick; crusts on or off
- 6–8 medium strawberries, hulled and patted very dry
- 1 kiwi, peeled and sliced into thick rounds, patted dry
- 1/2 small navel orange, peeled and segmented, membranes removed if possible, patted dry
Substitutions and notes
- Bread: If you can’t find shokupan, use the softest thick-cut white sandwich bread or brioche you can find. Avoid sourdough or very chewy crusts, which compete with the cream.
- Cream: Dairy-free whipping cream (from soy or coconut) works if it’s formulated to whip. The texture will be slightly firmer.
- Fruit: Use what’s in season—mango, grapes (halved and seeded), blueberries, or banana slices all work. Just keep pieces fairly uniform so the sandwich slices cleanly.
Kitchen note: Water is the enemy here. Any moisture left on the fruit will thin the cream and make the bread soggy, so really take the time to pat everything dry with paper towels.
Step-by-Step Instructions for Japanese cream sandwich
-
Chill your tools and prep the fruit
Place a medium mixing bowl and whisk (or mixer beaters) in the fridge for at least 10–15 minutes. Colder equipment gives you better control over the cream. Wash, hull, and dry the strawberries thoroughly, then slice a few in half lengthwise if you want a clear cross-section. Peel and slice the kiwi into thick rounds and pat dry. Segment the orange, removing as much membrane as is reasonable, and blot dry. -
Trim the bread (optional but typical)
Lay the bread slices on a cutting board. Using a sharp bread knife, trim off crusts in thin strips so you’re left with neat squares. This is standard for Japanese cream sandwiches and helps them slice cleanly, but you can keep the crusts if you like a bit of chew. -
Whip the cream to medium-firm peaks
Pour the cold cream into the chilled bowl. Add the powdered sugar and vanilla, if using. Start whisking or mixing on low, then move to medium speed once it begins to thicken. You’re aiming for medium to medium-firm peaks: when you lift the whisk, the cream should hold a peak that gently folds over at the tip. Stop before it looks grainy or clumpy.
Kitchen note: Overwhipped cream turns stiff and can start to look curdled. If you overshoot slightly, gently fold in 1–2 teaspoons of extra liquid cream by hand to loosen it.
-
Plan your cut before you add fruit
Decide how you’ll slice each sandwich: diagonally into triangles or straight down for rectangles. Lightly mark that line with the back of a knife on the bread. This helps you arrange the fruit so you get a pretty cross-section right where you cut. -
Spread the base layer of cream
Place two bread slices in front of you. Using an offset spatula or the back of a spoon, spread a generous, even layer of whipped cream (about 1 cm / 3/8 inch thick) over each. Go right up to the edges so the corners don’t collapse later. -
Arrange the fruit for clean slices
On each cream-covered slice, arrange strawberries, kiwi slices, and orange segments in a single layer along the imaginary cut line, with the cut sides of strawberries facing the direction you’ll slice. Nestle fruit snugly together so there aren’t big gaps. This alignment is what gives you that classic photo-ready interior. -
Cover fruit with more cream
Spoon more whipped cream over the fruit, using the spatula to gently press it down and around, filling any gaps. Aim to fully encase the fruit, with a total cream thickness around 1.5–2 cm (5/8–3/4 inch). Smooth the surface so the top bread slice sits flat. -
Close and wrap the sandwiches tightly
Place the remaining bread slices on top, gently pressing to help the cream adhere without squishing out the sides. Wrap each sandwich very tightly in plastic wrap, keeping the wrap flush against the surfaces to hold the shape. Note or mark the cutting direction directly on the wrap with a marker or a tiny piece of tape. -
Chill to set the structure
Transfer the wrapped sandwiches to the refrigerator and chill for at least 1–2 hours. The cream firms up, the fruit relaxes slightly, and the bread gently absorbs a bit of moisture, giving that pillowy, unified texture. -
Slice with a hot, clean knife
When ready to serve, fill a tall glass or jug with very hot tap water. Unwrap one sandwich, then dip a long, sharp knife (a chef’s knife or carving knife) into the hot water and wipe it dry. Slice in one confident motion along your planned line, without sawing. Clean and rewarm the blade between cuts for the sharpest edges. -
Serve chilled
Arrange the cut pieces cut-side up on a plate. Serve immediately while the cream is cold and the bread still feels airy. These are at their best within a few hours of slicing.
Kitchen note: If your kitchen is warm, keep the sandwiches in the fridge until the moment you slice and serve. Warm air softens the cream quickly and makes the layers slump.
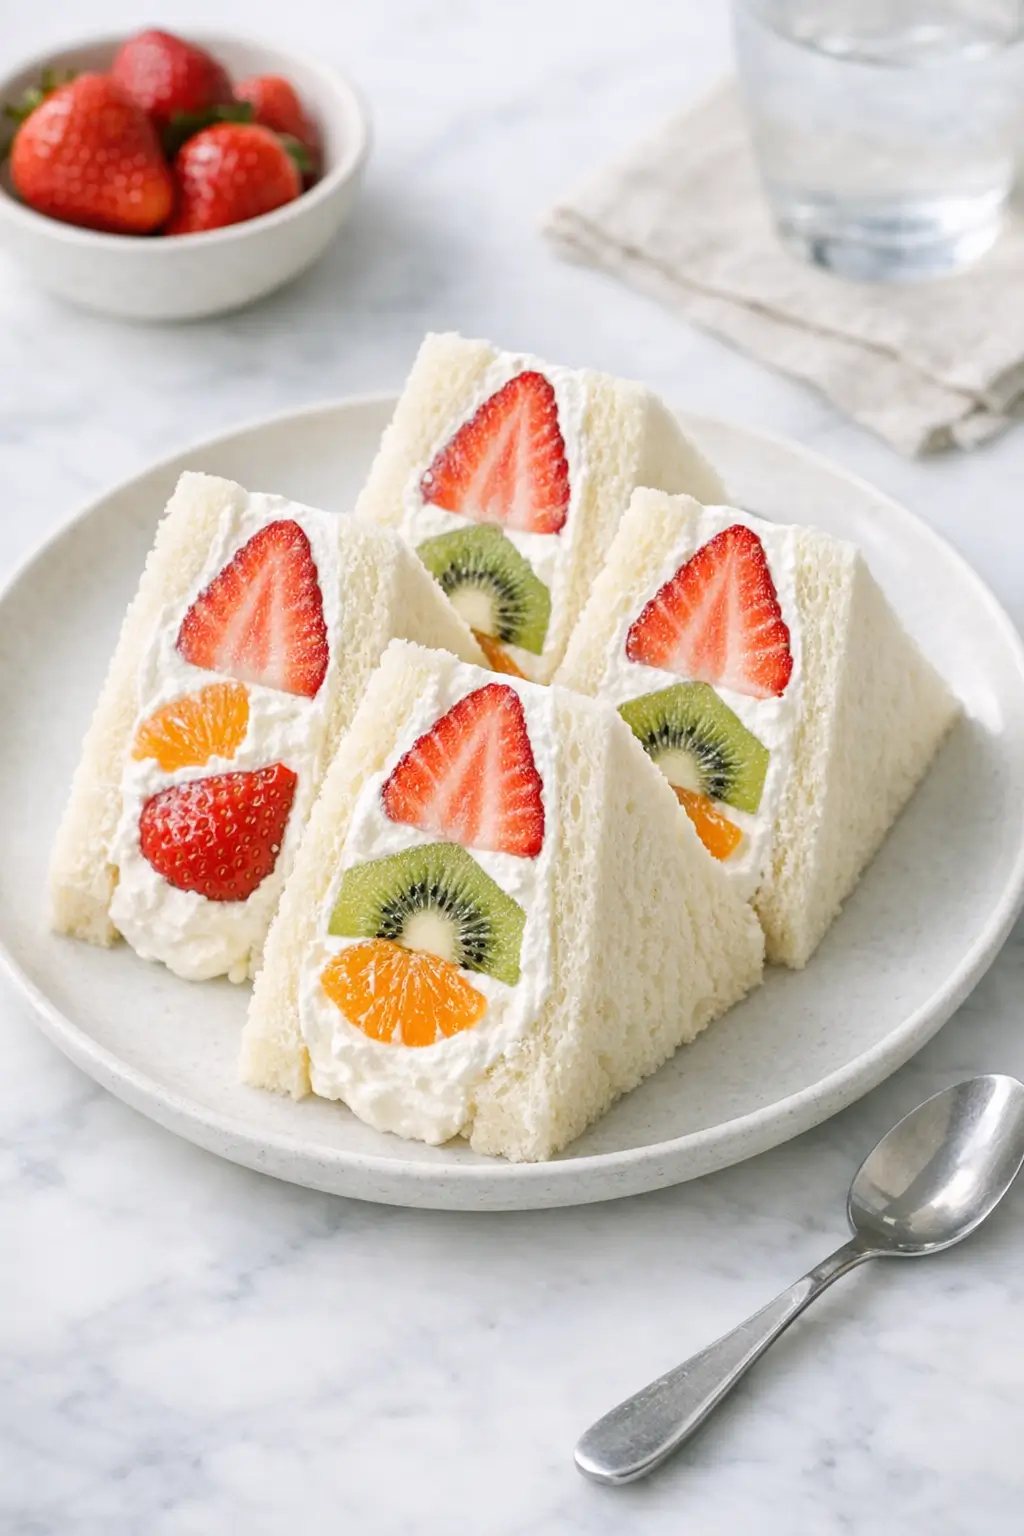
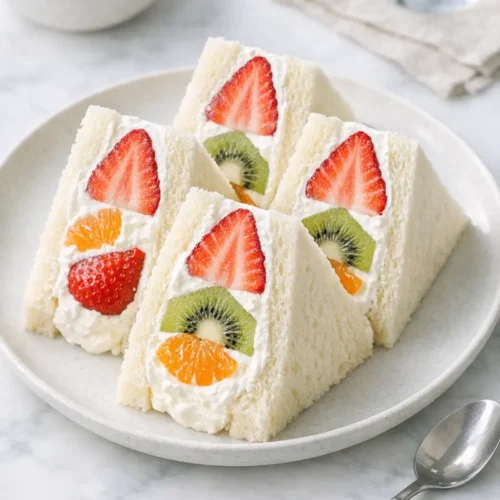
What to Expect
The finished Japanese cream sandwich should feel light and cloudlike rather than heavy. The bread is soft enough to compress slightly when you pick it up but bounces back without feeling gummy.
The cream tastes mildly sweet with a clean dairy flavor, closer to whipped cream on shortcake than frosting. Fruit brings most of the flavor: strawberries add acidity, kiwi brings a tart note, and orange gives a gentle perfume.
Different breads and creams will change the result. A very rich brioche or high-fat cream will feel more dessert-like and dense, while grocery-store sandwich bread and standard whipping cream skew toward a snack you could comfortably eat in the afternoon.
Kitchen note: If the bread feels wet or the cream seems loose, the fruit likely wasn’t dried enough or the sandwiches sat too long at room temperature. Next time, dry fruit more thoroughly and keep chilling time steady.
Ways to Change It Up
-
All-cream or chocolate-stuffed version
For something closer to some convenience-store sandos, skip the fruit and fill with a thicker layer of cream alone, or fold in a few tablespoons of finely chopped chocolate or mini chocolate chips. This shifts the balance from refreshing to indulgent but keeps the same basic method. -
Vegan or dairy-free cream sandwich
Use a plant-based whipping cream that is labeled as whippable, and choose a soft vegan bread. Flavor the cream with a bit of vanilla and a tiny pinch of salt to round it out. The texture will be slightly firmer and less airy, but the visual effect is very similar. -
Extra-fruity, lighter-cream version
To make the sandwiches feel less rich, increase the amount of fruit and slightly reduce the cream layer. Use about 1 1/2 cups mixed fruit and spread a thinner base of cream, just enough to glue everything together. The trade-off is a more delicate structure that may not slice quite as sharply. -
Quick, simplified version for busy nights
If you’re short on time, use store-bought stabilized whipped topping instead of whipping cream yourself. It won’t taste quite as fresh and dairy-forward, but it holds its shape well and skips the whipping step. Chill for 30–40 minutes instead of a full 2 hours.
Serving and Storage
Japanese cream sandwiches are typically served chilled as a snack or dessert, often alongside tea or coffee. At home, they also work well as a light finish after a savory meal, especially something spicy or rich like Quick Thai Basil Chicken with Saucy Heat and Crunch or Pork Egg Roll in a Bowl, Weeknight One‑Pan Magic.
Serve the sandwiches within a couple of hours of slicing for the cleanest look. If you want to prepare ahead, assemble and chill them whole, then slice right before serving.
Leftover sandwiches can be stored, tightly wrapped, in the refrigerator for up to 24 hours. After that, the bread absorbs too much moisture and the fruit softens. Avoid freezing; thawed cream develops a grainy texture and weeps liquid.
Kitchen note: If the sandwiches have been in the fridge overnight, let them sit at room temperature for 5–10 minutes before serving. This takes the chill off the bread and softens the cream just enough without fully warming the fruit.
Cultural Context
Cream-filled sandwiches in Japan are part of a broader world of sweet breads and confections you’ll see in bakeries and convenience stores. Fruit-filled cream sandos share elements with other wagashi and modern sweets, combining softness, subtle sweetness, and visual appeal. They are often sold alongside savory sandwiches and onigiri as a ready-to-eat treat.
Wagashi in general includes many sweets built around textures and gentle flavors, such as mochi-based monaka or bean-filled buns. For a broader overview of Japanese confections and how they fit into tea culture, the Japan Society offers helpful background through its resources on wagashi and seasonal sweets: traditional Japanese confections and tea culture. For more context on modern Japanese sweet breads, this overview of Japanese bakeries and bread culture from Japan-Guide explains how Western-style loaves like shokupan became everyday staples.
Common Questions and Troubleshooting
My cream slipped and the fruit shifted when I sliced. What happened?
Usually the cream wasn’t chilled long enough, or the fruit pieces were too large and heavy. Next time, chill at least 1–2 hours, keep fruit pieces modest in size, and make sure they’re snugly packed along the cut line.
The bread went soggy. Can I fix it?
Once the bread is fully soggy, there’s no way to reverse it. For future batches, dry the fruit more aggressively, avoid very juicy fruit on the outside edges, and don’t store the sandwiches longer than about 24 hours.
Can I make these with canned fruit?
Yes, but drain and dry it thoroughly. Canned mandarins or peaches can work if you press them between paper towels to remove as much syrup as possible. Expect a slightly softer texture and sweeter overall flavor.
What if I don’t have shokupan?
Use the softest, squishiest white bread you can find, cut thick. Some grocery-store “Texas toast” style loaves work, but avoid those with strong flavors or lots of seeds. Brioche is a good alternative if you like a richer finish.
Can I flavor the cream differently?
You can add a teaspoon of citrus zest, a splash of rum, or a small pinch of matcha powder. Keep additions light so the cream still whips well and doesn’t become bitter or overly strong.
How far in advance can I assemble them for a party?
Assemble up to 6–8 hours ahead, keep the sandwiches wrapped and unsliced in the fridge, then slice right before serving. This gives you good structure without risking sogginess.
Conclusion
Japanese cream sandwiches slot neatly into a busy home cook’s rhythm: quick active prep, hands-off chilling, and a dessert that feels special without requiring an oven. Once you’ve done the method once or twice, it becomes mostly about choosing fruit and arranging it neatly.
If you make this version, I’d love to hear what combinations of fruit and bread you tried, and how long you chilled them before slicing. Share your tweaks, questions, or results in the comments so other readers can benefit from your experiments too.
Japanese Cream Sandwich with Fluffy Fruit Filling
Equipment
- Medium mixing bowl
- Whisk or hand mixer
- Cutting board
- Bread knife
- Offset spatula or spoon
- Plastic wrap
- Long sharp knife (chef’s knife or carving knife)
- Tall glass or jug (for hot water)
Ingredients
- 240 ml heavy whipping cream cold (36–40% fat)
- 20 g powdered sugar
- 1/2 tsp vanilla extract optional
- 4 slices shokupan (Japanese milk bread) about 1.5–2 cm (5/8–3/4 inch) thick; crusts on or off
- 6–8 strawberries medium, hulled and patted very dry
- 1 kiwi peeled and sliced into thick rounds, patted dry
- 1/2 navel orange small; peeled and segmented, membranes removed if possible, patted dry
Instructions
- Chill your tools and prep the fruit: Place a medium mixing bowl and whisk (or mixer beaters) in the fridge for at least 10–15 minutes. Wash, hull, and dry the strawberries thoroughly (slice a few in half lengthwise if you want a clear cross-section). Peel and slice the kiwi into thick rounds and pat dry. Segment the orange, removing as much membrane as is reasonable, and blot dry.
- Trim the bread (optional but typical): Lay the bread slices on a cutting board. Using a sharp bread knife, trim off crusts in thin strips so you’re left with neat squares (or leave crusts on if preferred).
- Whip the cream to medium-firm peaks: Pour the cold cream into the chilled bowl. Add powdered sugar and vanilla (if using). Start whisking on low, then move to medium as it thickens. Stop at medium to medium-firm peaks (the peak gently folds at the tip), before it turns grainy.
- Plan your cut before you add fruit: Decide whether to slice diagonally into triangles or straight down for rectangles. Lightly mark the cutting line on the bread with the back of a knife so you can align the fruit for a neat cross-section.
- Spread the base layer of cream: Place two bread slices in front of you. Spread a generous, even layer of whipped cream (about 1 cm / 3/8 inch thick) over each, going all the way to the edges.
- Arrange the fruit for clean slices: On each cream-covered slice, arrange strawberries, kiwi, and orange in a single layer along the imaginary cut line, keeping strawberry cut sides facing the direction you’ll slice. Nestle fruit snugly to avoid gaps.
- Cover fruit with more cream: Spoon more whipped cream over the fruit, gently pressing down and filling gaps. Fully encase the fruit and smooth the top so the bread sits flat (aim for total cream thickness about 1.5–2 cm / 5/8–3/4 inch).
- Close and wrap the sandwiches tightly: Top with the remaining bread slices and press gently to adhere without squeezing out the filling. Wrap each sandwich very tightly in plastic wrap and mark the cutting direction on the wrap.
- Chill to set: Refrigerate the wrapped sandwiches for at least 1–2 hours so the cream firms and the layers set.
- Slice with a hot, clean knife: Fill a tall glass or jug with very hot tap water. Unwrap one sandwich, dip a long sharp knife in hot water, wipe dry, and slice in one confident motion along the marked line. Rewarm and wipe the blade between cuts.
- Serve chilled: Arrange pieces cut-side up and serve immediately. For the cleanest look, slice right before serving.
Leave a Reply