
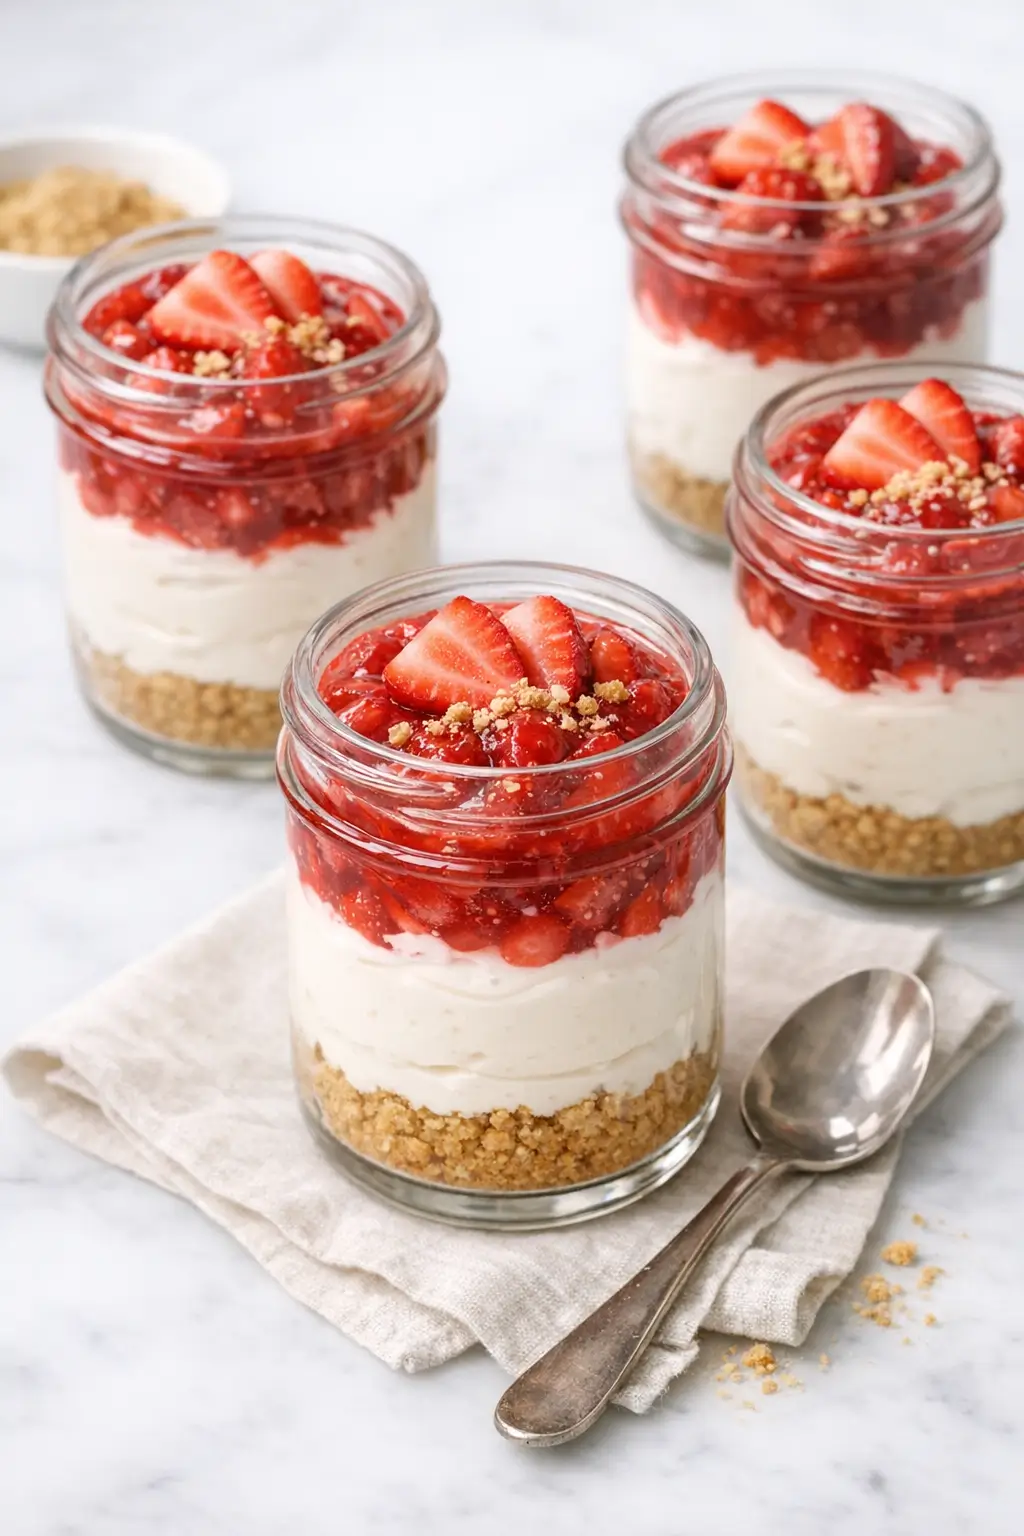
On a hot or hectic night, no bake strawberry cheesecake jars give you something creamy and sweet without turning on the oven. You get all the familiar flavors of cheesecake—tangy cream cheese, buttery graham crumbs, and juicy strawberries—in a tidy individual portion.
If you’re racing in from work or activities, start by softening the cream cheese and crushing your graham crackers so the jars assemble quickly. If kids are swirling around the kitchen, keep the strawberry layer on the back burner and stir it yourself; hot sugary fruit splatters easily.
These jars work well for casual dinners, cookouts, or summer birthdays, and they’re friendly for newer cooks because the texture is very forgiving. Expect a light, mousse-like filling rather than a dense slice of baked cheesecake.
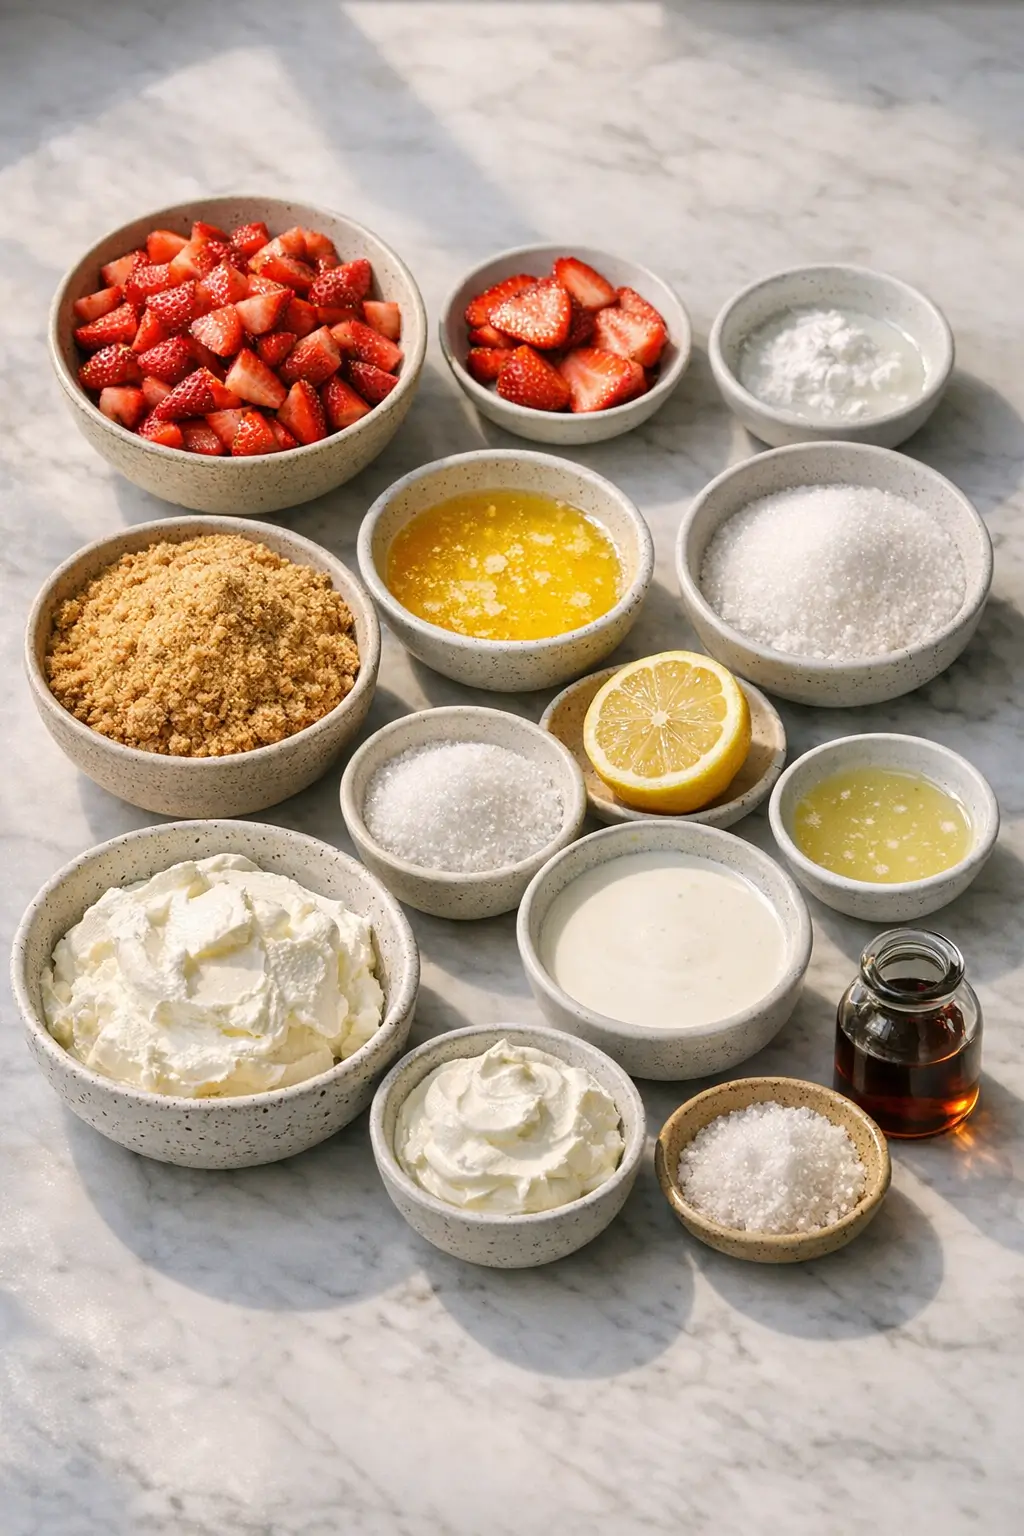
Ingredients
Yield: 4 jars (about 8 oz / 240 ml each)
For the strawberry layer
- 250 g / 2 cups chopped fresh strawberries, divided (see method)
- 25 g / 2 tbsp granulated sugar (or to taste)
- 2 tsp fresh lemon juice
- 5 g / 1 tsp cornstarch mixed with 30 ml / 2 tbsp cold water (slurry, for thickening)
For the crumb base
- 100 g / 1 cup graham cracker crumbs
- 30 g / 2 tbsp granulated sugar
- 60 g / 4 tbsp / 55 ml unsalted butter, melted and slightly cooled
- Optional: pinch of fine salt to sharpen the flavor
For the cheesecake filling
- 225 g / 8 oz full‑fat cream cheese, softened to cool room temperature
- 120 g / 1 cup cold heavy whipping cream
- 60 g / 1/4 cup sour cream or plain Greek yogurt (adds tang)
- 70 g / 1/3 cup granulated sugar (or 60 g / 1/2 cup powdered sugar for a smoother texture)
- 1 tsp pure vanilla extract
- 2 tsp fresh lemon juice
- Optional garnish: a few extra sliced strawberries and finely crushed graham crumbs
Kitchen note: Cream cheese that’s still cold in the center will stay lumpy no matter how long you beat it. It should feel pliable and slightly cool, not chilled and firm.
Step-by-Step Instructions for No Bake Strawberry Cheesecake Jars
Make the strawberry topping.
Add 1 1/2 cups of the chopped strawberries (reserve the remaining 1/2 cup for layering), sugar, and lemon juice to a small saucepan.
Stir over medium heat until the strawberries start to release juice, 2–3 minutes.Thicken the strawberries.
Stir the cornstarch slurry again so it’s smooth, then drizzle it into the bubbling strawberries while stirring.
Cook 1–2 minutes more, until the liquid turns glossy and lightly thickened.
The mixture should coat the back of a spoon but still spoon easily.Cool the strawberry mixture.
Scrape the topping into a shallow bowl to cool faster.
Let it come to room temperature, then chill briefly if you have time.
It should be cool before it touches the cheesecake layer so the cream doesn’t melt.
Kitchen note: If the strawberry layer looks too thick once cooled, whisk in 1–2 teaspoons of water to loosen it slightly; it will firm more in the fridge.
Prepare the crumb base.
In a medium bowl, combine graham cracker crumbs, sugar, and salt if using.
Pour in the melted butter and mix with a fork until all crumbs are evenly moistened and the mixture holds together when squeezed in your hand.Press crumbs into the jars.
Divide the crumb mixture evenly among 4 clean jars (about 3–4 tablespoons per jar).
Press down gently with the back of a spoon or a small glass to create a firm but not rock‑hard base.
Set the jars aside.Beat the cream cheese.
In a mixing bowl, beat the softened cream cheese with an electric hand mixer on medium speed until completely smooth and fluffy, about 1–2 minutes.
Scrape down the sides of the bowl once or twice.Add sugar, vanilla, and lemon.
Sprinkle in the sugar (or powdered sugar), vanilla, and lemon juice.
Mix again until the sugar dissolves and the mixture looks glossy and creamy, 1–2 minutes more.Blend in sour cream or yogurt.
Add the sour cream or Greek yogurt and mix just until combined and silky.
The mixture should look like a thick, smooth frosting.Whip the cream separately.
In another clean bowl, whip the cold heavy cream to medium‑stiff peaks.
When you lift the beaters, the cream should hold a peak that just barely folds over at the tip.Fold whipped cream into the cheesecake base.
Add about one‑third of the whipped cream to the cream cheese mixture and stir it in to lighten.
Gently fold in the remaining cream with a spatula, scraping the bottom of the bowl so no heavy streaks remain.
Kitchen note: If you beat the whipped cream directly into the cream cheese, the mixture can deflate or turn grainy. Folding keeps the filling light and mousse‑like.
Assemble the first layers.
Spoon or pipe a layer of cheesecake filling over the crumb base in each jar, using about 1/4–1/3 cup per layer depending on your jar size.
Gently tap the jars on the counter to settle the filling and remove large air pockets.Add fresh strawberries.
Sprinkle a layer of the reserved chopped fresh strawberries over the filling in each jar.
This adds a juicy, uncooked bite that contrasts nicely with the jammy topping.Top with strawberry compote.
Spoon a layer of the cooled strawberry topping over the fresh berries.
You can leave the jars with one set of layers or repeat filling and topping if your jars are taller and you have extra.Chill to set.
Cover each jar with a lid or plastic wrap and refrigerate at least 2 hours, or up to 24 hours.
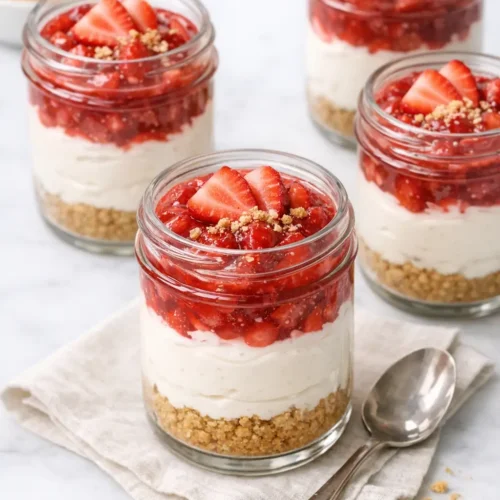
The crumbs will hydrate slightly, and the filling will firm up enough to eat with a spoon while still creamy.Garnish and serve.
Just before serving, add a few thin strawberry slices and a pinch of extra graham crumbs on top if you like.
Serve the jars well chilled.
What to Expect
The crumb base will be pleasantly crunchy on day one and will soften to a more cake‑like texture after a day in the fridge.
It should still have a bit of structure when you dig in with a spoon.
The filling tastes tangy and lightly sweet, closer to a whipped cheesecake mousse than a dense bakery slice.
You’ll notice a gentle lemon note, but the main flavors are cream cheese and strawberries.
Strawberry layers will vary depending on the fruit.
Very ripe berries give a more vivid color and stronger aroma, while off‑season berries may benefit from an extra teaspoon of sugar or a squeeze more lemon.
Kitchen note: If your kitchen is very warm, the jars may soften faster at room temperature. Keep them chilled until the moment you serve, especially if they’ll sit out on a dessert table.
Ways to Change It Up
1. Simple vegetarian/vegan adaptation
Use a plant‑based cream cheese and a dairy‑free whipping cream alternative, and swap the butter for melted coconut oil in the crumb base.
Choose graham crackers that are made without honey if you want a fully vegan dessert.
The filling will be slightly softer, so longer chilling (4–6 hours) helps it hold.
2. Extra‑strawberry and less sweet
Increase the strawberries in the saucepan to 3 cups and reduce the sugar by a tablespoon or two.
Skip the extra sprinkle of sugar in the crumb base and use the lower end of the sugar range in the filling.
This version leans into tart, fresh fruit flavor with a gentler sweetness.
3. Faster, simplified version
Instead of making the cooked strawberry layer, toss sliced strawberries with a tablespoon of sugar and a teaspoon of lemon juice, then let them sit until juicy.
Layer the crumbs, cheesecake filling, and the macerated berries.
This saves a saucepan and a cooling step, though the fruit layer will be looser and may bleed more color into the cream.
4. Milder, kid‑friendly jars
Omit the lemon juice in the filling and use the full amount of sugar.
Keep the strawberry layer fairly sweet and soft.
The result reads like a strawberry cream pie in a jar, with less tang and no sharp edges in the flavor.
Serving and Storage
These no bake strawberry cheesecake jars fit well at backyard barbecues, birthday tables, or as a make‑ahead finish for a weeknight dinner.
Because they’re portioned, you can pull out only what you need from the fridge.
Serve the jars straight from the refrigerator while they’re cold and set.
If they sit at room temperature for 15–20 minutes, the filling will loosen slightly and taste a bit richer, but avoid leaving dairy‑based jars out for more than 2 hours total.
They pair naturally with grilled foods, simple roasted chicken, or any menu where dessert should feel light but still satisfying.
For something a little more elaborate, you can serve them alongside fresh berries or a small scoop of vanilla ice cream.
Store covered jars in the refrigerator for up to 3 days.
The crumbs will gradually soften, and the strawberry layer may release a bit more juice, but the dessert remains very pleasant.
Freezing isn’t ideal here because the fresh strawberry pieces can turn mushy and the filling may become slightly grainy as it thaws.
Cultural Context
Cheesecake has roots that stretch back thousands of years.
Early versions made with fresh cheese, wheat, and honey were served in ancient Greece long before the cream‑cheese‑based versions familiar in North America today.
Modern styles evolved through Europe and later in the United States as cream cheese became widely available and bakers experimented with crusts made from cookies or graham crackers.
Strawberries also have a long history in European and North American desserts, from fruit‑topped tarts to layered cakes.
Using individual jars and a no‑bake method is a recent, practical adaptation that fits contemporary home kitchens, combining older cheesecake traditions with portable, refrigerator‑set desserts.
For a concise overview of cheesecake’s development over time, see this article on the history of cheesecake from Cheesetique, and for more on the rise of strawberry‑focused desserts, this piece on strawberry shortcake history from Baking Heritage provides additional context.
Common Questions and Troubleshooting
Why is my cheesecake filling lumpy?
Lumps almost always mean the cream cheese was too cold or not beaten long enough before adding other ingredients.
Next time, let the cream cheese sit out until it feels pliable and beat it until completely smooth before adding sugar, then other liquids.
If you already have lumps, press the filling through a fine‑mesh sieve or pulse it briefly in a food processor.
The filling won’t thicken—what went wrong?
If the filling is very loose, the cream may have been under‑whipped or over‑whipped.
Under‑whipped cream doesn’t provide enough structure, while over‑whipped cream can separate and lose volume.
Aim for medium‑stiff peaks and be gentle when folding.
A longer chill (4 hours or overnight) can help a slightly soft filling firm up.
My strawberry layer is runny. Can I fix it?
A runny topping usually means the cornstarch didn’t simmer long enough to activate.
You can return the mixture to the saucepan and gently cook it for another minute or two, stirring, until it thickens more.
Let it cool completely again before layering, or it will melt the cream.
For next time, measure the cornstarch and water carefully and wait for the mixture to turn from cloudy to glossy.
Can I use frozen strawberries?
Yes, but start with the fruit still frozen, cook it directly with the sugar and lemon juice, and expect a bit more liquid.
You may need a touch more cornstarch (up to an extra 1/4 teaspoon) to reach the same thickness.
For the fresh berry layer inside the jars, thawed strawberries can be too soft, so keep that part fresh if you can.
How far ahead can I assemble the jars?
The jars are best within 24 hours but still good up to 3 days if kept chilled.
If you need them to look especially neat for an event, you can prepare the crumb base and filling a day in advance, refrigerate them separately, and assemble with strawberries the morning you plan to serve.
Is there a way to make them lighter in calories?
You can use reduced‑fat cream cheese and swap the heavy cream for a light whipped topping, though the flavor and texture will be less rich.
Consider keeping the portion size modest rather than removing too much fat and sugar, which can make the texture chalky or watery.
Conclusion
No bake strawberry cheesecake jars offer a flexible template: once you’re comfortable with the basic crumb, cream, and fruit layers, you can adjust sweetness, tang, and texture to match your taste and schedule.
If you try these, I’d value your notes on how they set in your fridge and which tweaks—extra lemon, different crumbs, or a dairy‑free swap—worked for you.
Feel free to leave a rating and share how the jars turned out in your own kitchen, especially any adjustments you made for tools, timing, or ingredients you had on hand.
No Bake Strawberry Cheesecake Jars for Easy Nights
Equipment
- Small saucepan
- Shallow bowl
- Medium Bowl
- Mixing bowls
- Electric hand mixer
- Rubber spatula
- Fork
- Spoon or small glass (for pressing crumbs)
- 4 (8 oz / 240 ml) jars with lids or plastic wrap
Ingredients
For the strawberry layer
- 250 g fresh strawberries chopped, divided (about 2 cups total; reserve 1/2 cup for layering)
- 25 g granulated sugar or to taste
- 2 tsp fresh lemon juice
- 5 g cornstarch mixed with 30 ml / 2 tbsp cold water (slurry, for thickening)
For the crumb base
- 100 g graham cracker crumbs
- 30 g granulated sugar
- 60 g unsalted butter melted and slightly cooled (about 4 tbsp / 55 ml)
- fine salt optional pinch
For the cheesecake filling
- 225 g full-fat cream cheese softened to cool room temperature (8 oz)
- 120 g heavy whipping cream cold (about 1 cup)
- 60 g sour cream or plain Greek yogurt adds tang (about 1/4 cup)
- 70 g granulated sugar or 60 g powdered sugar for a smoother texture
- 1 tsp pure vanilla extract
- 2 tsp fresh lemon juice
- sliced strawberries optional garnish
- finely crushed graham crumbs optional garnish
Instructions
- Make the strawberry topping. Add 1 1/2 cups of the chopped strawberries (reserve the remaining 1/2 cup for layering), sugar, and lemon juice to a small saucepan. Stir over medium heat until the strawberries start to release juice, 2–3 minutes.
- Thicken the strawberries. Stir the cornstarch slurry again so it’s smooth, then drizzle it into the bubbling strawberries while stirring. Cook 1–2 minutes more, until the liquid turns glossy and lightly thickened; it should coat the back of a spoon but still spoon easily.
- Cool the strawberry mixture. Scrape the topping into a shallow bowl to cool faster. Let it come to room temperature, then chill briefly if you have time. It should be cool before it touches the cheesecake layer so the cream doesn’t melt.
- Prepare the crumb base. In a medium bowl, combine graham cracker crumbs, sugar, and salt if using. Pour in the melted butter and mix with a fork until evenly moistened and the mixture holds together when squeezed.
- Press crumbs into the jars. Divide the crumb mixture evenly among 4 clean jars (about 3–4 tablespoons per jar). Press down gently with the back of a spoon or a small glass to create a firm but not rock-hard base; set aside.
- Beat the cream cheese. In a mixing bowl, beat the softened cream cheese with an electric hand mixer on medium speed until completely smooth and fluffy, about 1–2 minutes, scraping down the bowl as needed.
- Add sugar, vanilla, and lemon. Add the sugar (or powdered sugar), vanilla, and lemon juice. Mix until the sugar dissolves and the mixture looks glossy and creamy, 1–2 minutes more.
- Blend in sour cream or yogurt. Add the sour cream or Greek yogurt and mix just until combined and silky; it should look like a thick, smooth frosting.
- Whip the cream separately. In another clean bowl, whip the cold heavy cream to medium-stiff peaks (a peak that just barely folds over at the tip).
- Fold whipped cream into the cheesecake base. Stir in about one-third of the whipped cream to lighten the base, then gently fold in the remaining whipped cream with a spatula until no heavy streaks remain.
- Assemble the first layers. Spoon or pipe a layer of cheesecake filling over the crumb base in each jar (about 1/4–1/3 cup per layer). Tap jars gently on the counter to settle and remove air pockets.
- Add fresh strawberries. Sprinkle a layer of the reserved chopped fresh strawberries over the filling in each jar.
- Top with strawberry compote. Spoon a layer of the cooled strawberry topping over the fresh berries. Leave as-is or repeat filling and topping if your jars are taller and you have extra.
- Chill to set. Cover each jar and refrigerate at least 2 hours (or up to 24 hours) until the filling is set enough to eat with a spoon.
- Garnish and serve. Just before serving, add thin strawberry slices and a pinch of extra graham crumbs if desired. Serve well chilled.
Leave a Reply