
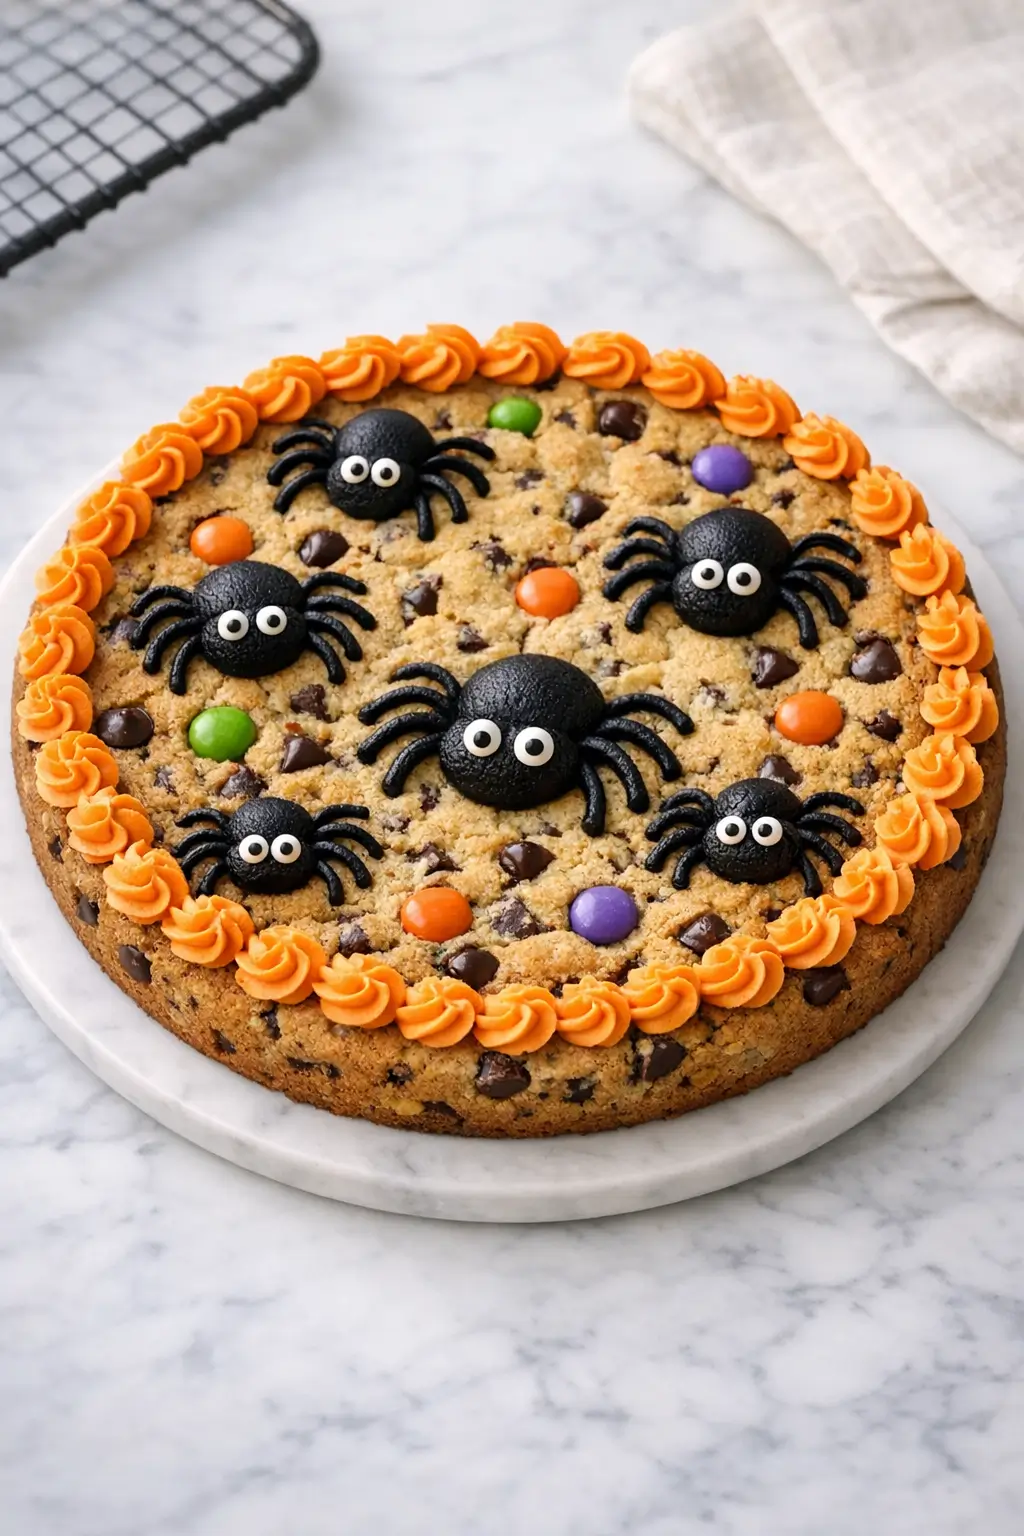
Halloween cookie cake is one of those desserts that looks impressive on the table but is very forgiving to make. It’s essentially a giant chocolate chip cookie baked in a pan, then topped with a simple vanilla buttercream and piped buttercream spiders that kids love. You’ll see this style of cookie cake a lot at bakeries and Halloween parties across North America, usually sliced like a pizza so it’s easy to serve.
If you’ve got a busy weeknight before a class party, start by softening your butter and lining your pan so the cookie can bake while you mix the buttercream. If you’re working in a small kitchen, clear one section of counter just for decorating so stray candies and crumbs don’t end up in the frosting.
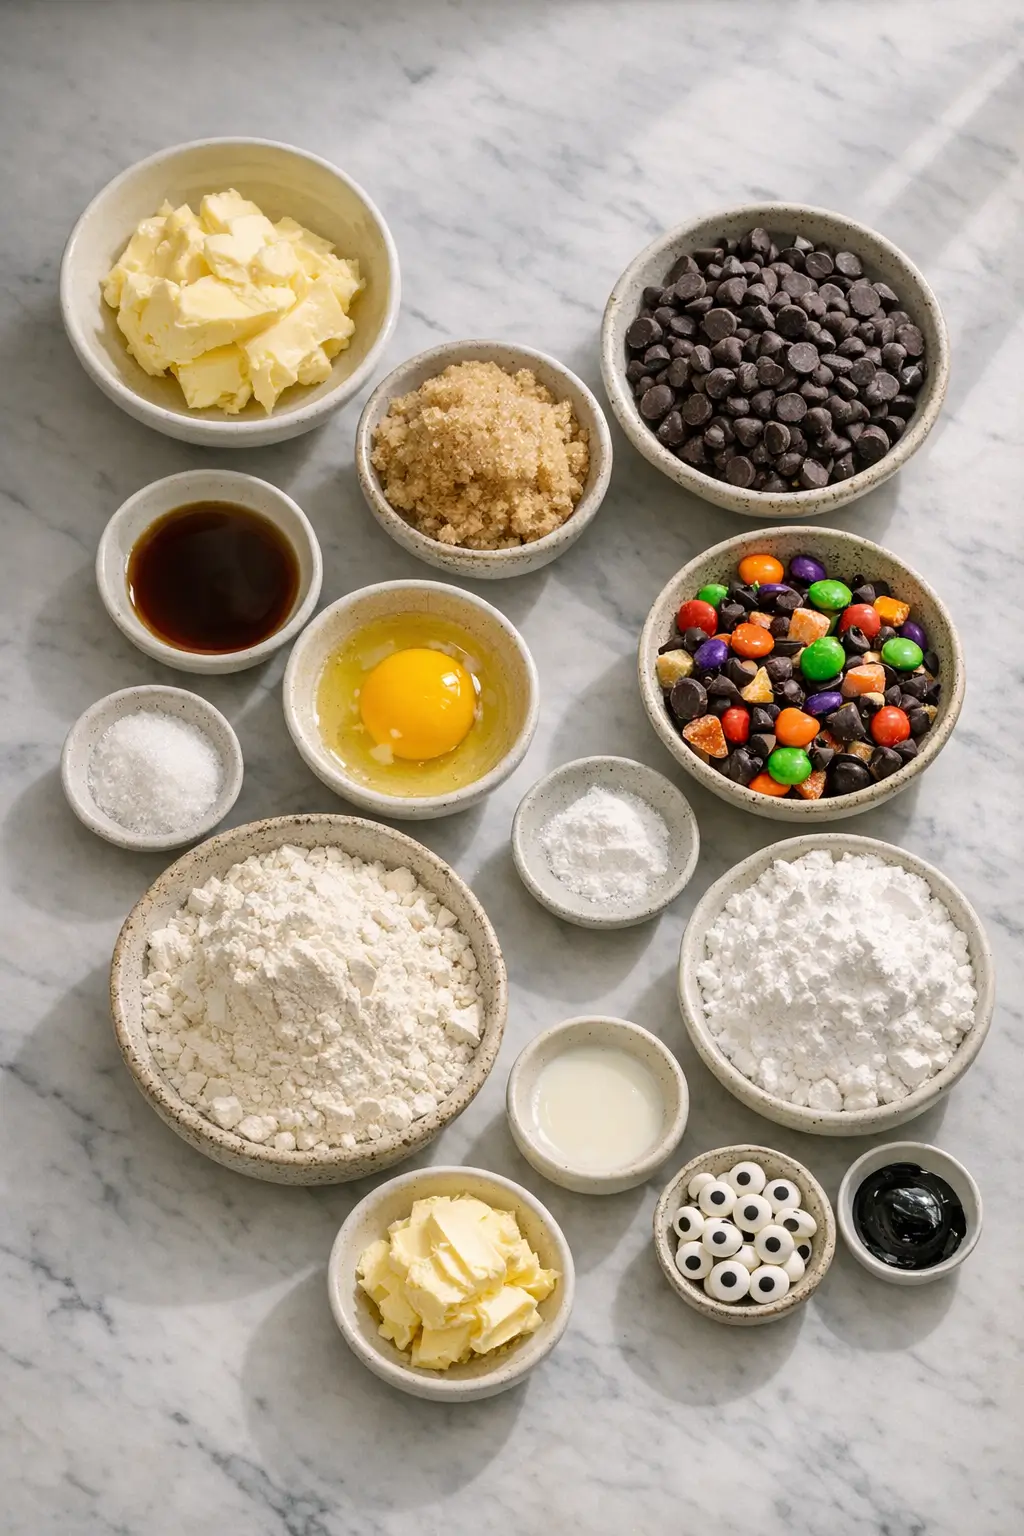
Ingredients
Makes one 9–10 inch cookie cake (8–10 wedges)
For the cookie cake base
- 115 g (1/2 cup) unsalted butter, softened to room temperature
- 100 g (1/2 cup, packed) light brown sugar
- 50 g (1/4 cup) granulated sugar
- 1 large egg, at room temperature
- 1 tsp vanilla extract
- 155 g (1 1/4 cups) all-purpose flour
- 1/2 tsp baking soda
- 1/4 tsp fine salt
- 150 g (3/4 cup) semi-sweet chocolate chips (or a mix of chips and mini chips for more even distribution)
- 30–45 g (2–3 tbsp) Halloween candies, roughly chopped if large (M&M’s, candy-coated chocolates, or similar) optional, for color
For the vanilla buttercream (spiders and border)
- 115 g (1/2 cup) unsalted butter, softened
- 260–300 g (2–2 1/2 cups) powdered sugar, sifted
- 1–2 tbsp milk or heavy cream, plus more as needed
- 1 tsp vanilla extract
- 1/8 tsp fine salt, or to taste
- Black gel food coloring (or cocoa powder plus black gel for deeper color)
- Candy eyeballs, about 16–24 pieces for decorating
Tools
- 9–10 inch metal tart pan, springform pan, or cake pan
- Parchment paper
- Electric hand mixer or stand mixer
- Piping bags
- Small round piping tips (sizes 2–5) or snipped disposable bags
Kitchen note: Use a light-colored metal pan if you have one. Dark nonstick pans brown the edges faster, so you may need to shorten the bake time by a couple of minutes.
Step-by-Step Instructions for Halloween Cookie Cake with Buttercream Spiders
-
Prep the pan and oven.
Preheat the oven to 175°C / 350°F. Lightly grease your pan and line the bottom with a circle of parchment. If using a cake pan without a loose base, leave some parchment overhang so you can lift the cookie cake out later.
-
Cream the butter and sugars.
In a mixing bowl, beat the softened butter with brown sugar and granulated sugar on medium speed for about 2 minutes, until lighter and slightly fluffy. The mixture should look a bit paler and feel creamy when you scrape it with a spatula.
-
Add the egg and vanilla.
Beat in the egg and vanilla extract just until fully combined. The batter may look slightly looser and glossy; scrape down the sides and bottom of the bowl to make sure there are no streaks.
-
Combine the dry ingredients.
In a separate small bowl, whisk together the flour, baking soda, and salt to evenly distribute the leavening. This helps the cookie cake rise evenly instead of forming tall bubbles.
-
Make the dough.
Add the dry ingredients to the butter mixture and mix on low speed just until no dry flour remains. Fold in the chocolate chips and any Halloween candies with a spatula, scraping the bottom of the bowl so everything is evenly mixed.
-
Press the dough into the pan.
Transfer the dough to the prepared pan. Use clean hands or an offset spatula to press it into an even layer, making sure to push it slightly higher at the edges to prevent a domed center. The surface doesn’t need to be perfectly smooth, but aim for even thickness.
Kitchen note: If the dough feels too sticky to spread, lightly dampen your fingertips with water or chill the dough for 10 minutes, then try again. Avoid adding extra flour or the cookie cake will turn dry.
-
Bake the cookie cake.
Bake for 16–22 minutes, depending on your oven and pan size. The edges should be lightly browned and set, while the center looks just a bit puffed and soft. A toothpick inserted near the center should come out with a few moist crumbs but not wet batter.
-
Cool completely.
Set the pan on a wire rack and cool the cookie cake completely in the pan. This can take 1–2 hours. Once cool, run a knife around the edge if needed and carefully remove the cookie cake to a serving board or platter.
-
Make the buttercream.
While the cookie cools, beat the softened butter with an electric mixer until smooth and slightly paler, about 2 minutes. Add half the powdered sugar, the salt, and vanilla, then mix on low until combined. Add the remaining powdered sugar and 1 tablespoon of milk or cream.
-
Adjust consistency.
Increase the mixer speed to medium and beat until the buttercream is creamy and spreadable. If it’s too stiff, add more milk/cream a teaspoon at a time. If too soft, add a spoonful of powdered sugar. You want a consistency that holds peaks but still pipes smoothly.
-
Tint the frosting.
Divide the buttercream if you’d like a contrast color for the border (for example, reserve 1/3 uncolored and tint 2/3 black), or color all of it black. Add a small amount of black gel food coloring and beat it in. The color will deepen slightly as it sits, so build the color gradually.
-
Transfer frosting to piping bags.
Fit piping bags with small round tips (or snip a tiny opening in the end of disposable bags). Fill one bag with black buttercream for spider bodies and legs, and another with a contrasting color (or more black) for any border or extra details.
-
Pipe a simple border (optional).
Pipe dots, shells, or a simple ring of frosting around the outer edge of the cooled cookie cake. This frames the spiders and gives a neat edge but is not required if you prefer a simpler look.
-
Create the buttercream spiders – bodies first.
Using the black buttercream, pipe small mounds or “kisses” for spider bodies across the surface of the cookie cake. Space them so each slice will get at least one spider. For larger spiders, pipe a bigger mound for the abdomen with a smaller one for the head.
-
Add eyes.
While the spiders are still soft, gently press 2 candy eyeballs into the front of each spider. If you don’t have candy eyes, dot on tiny white and black buttercream circles using two piping bags.
-
Pipe the spider legs.
With the same black buttercream and a small round tip, pipe four curved legs on each side of the body. Think of them as slightly bent lines that angle out and then back in.
Kitchen note: If legs are breaking or looking blobby, your frosting is either too stiff or the piping tip opening is too small. Loosen the frosting with a few drops of milk and snip the bag slightly wider.
-
Chill briefly to set.
Place the decorated cookie cake in the fridge for 20–30 minutes to let the buttercream spiders firm up. This makes slicing and transporting much easier.
-
Slice and serve.
Use a large, sharp knife to cut the cookie cake into wedges. Wipe the knife between cuts for clean slices that keep the spider details intact.
What to Expect
The finished Halloween cookie cake has a crisp, lightly caramelized edge and a chewy center, similar to a bakery-style chocolate chip cookie. The thickness means the center stays a little softer than a standard cookie, so don’t worry if it looks slightly underbaked as long as it’s not wet.
Flavor-wise, you get buttery dough, pockets of melted or set chocolate chips, and a sweet vanilla buttercream that adds that classic bakery-cookie-cake feel. The buttercream spiders provide little bursts of frosting with each bite without overwhelming the cookie itself.
Different pans and oven calibrations can shift the texture slightly. A dark pan may give you deeper browning and a crisper edge, while a glass dish can lengthen the baking time and produce a slightly softer crust. Variations in chocolate brands, butterfat, and how much you pack the brown sugar can all nudge the chewiness one way or another, but the basic profile should still be soft-centered and sturdy enough to slice.
Kitchen note: If you like a firmer cookie slice (for packing in lunchboxes), bake on the longer end of the time range and let the cookie sit at room temperature for several hours before cutting.
Ways to Change It Up
-
Simple spiderweb and spiders.
Instead of only spiders, spread a very thin layer of white or orange buttercream over the cookie surface, then pipe concentric circles of black frosting and drag a toothpick from the center outward to create a spiderweb. Add a few buttercream spiders crawling across the web. This uses the same frosting but changes the look dramatically.
-
Make it chocolate or candy-stuffed.
Swap 20 g (about 2 tbsp) of the flour for cocoa powder to make a chocolate cookie base, or mix in chopped Halloween candy bars instead of some of the chocolate chips. The cookie will be richer and slightly denser, and candies with caramel may create gooier pockets near the top.
-
Vegan-friendly version.
Use a plant-based butter stick and a flax egg (1 tbsp ground flaxseed plus 3 tbsp water, rested 5–10 minutes) in the cookie dough. For the frosting, swap in vegan butter and plant milk, and double-check that your chocolate chips and candy eyes are dairy-free. The texture will be a bit more tender and may spread slightly more, so watch the cookie closely in the last few minutes of baking.
-
Less sweet, more cookie-forward.
For those who prefer less frosting, keep the buttercream batch the same but use only a portion to pipe a narrow border and a few small spiders. You’ll get a more pronounced cookie flavor and can freeze any extra buttercream for later.
-
Mini spider cookie cakes.
Press the dough into several 10–12 cm (4–5 inch) tart pans or mini cake pans instead of one large pan. Baking time will drop to around 10–14 minutes depending on thickness. Decorate each with a single oversized buttercream spider for individual servings.
Serving and Storage
Serve the Halloween cookie cake at room temperature so the buttercream is soft and the crumb tastes richer. It works well as a centerpiece dessert for a Halloween party, classroom celebration, or casual movie night, and slices easily with a large sharp knife or pizza cutter.
It pairs nicely with cold milk for kids and coffee or tea for adults. For extra contrast, serve with a scoop of vanilla or chocolate ice cream, or drizzle slices with a little chocolate sauce if you like a sundae-style presentation.
Leftovers keep covered at room temperature for up to 2 days if your kitchen is cool, or in the refrigerator for up to 4 days. Wrap the pan or serving plate well to prevent the cookie from drying out and to keep fridge odors away from the buttercream.
For longer storage, cut the undecorated or decorated cookie cake into wedges, wrap each slice tightly in plastic, and freeze in an airtight bag or container for up to 1 month. Thaw slices at room temperature (still wrapped) for 30–45 minutes before serving.
Kitchen note: If you refrigerate the decorated cake, condensation can make the candy eyes slightly tacky when you bring it back to room temperature. Gently blot any moisture with a clean paper towel before serving.
Cultural Context
Cookie cakes like this one sit at the intersection of American-style chocolate chip cookies and decorated celebration cakes, both of which are now common at Halloween gatherings in the United States. Halloween itself has roots in the ancient Celtic festival of Samhain, which over centuries blended with Christian observances and eventually evolved into a largely secular, kid-focused holiday in North America.
The modern customs of dressing up in costumes and going door-to-door for treats, known as trick-or-treating, developed gradually from older European practices of souling and guising and became widespread in the United States during the 20th century. For more on how trick-or-treating emerged from these earlier customs, see this overview from History.com on the origins of trick-or-treating. Broader Halloween traditions and their links to Samhain are discussed by the Smithsonian in this article on the Celtic origins of trick-or-treating.
Common Questions and Troubleshooting
My cookie cake rose a lot in the center and sank as it cooled. What happened?
That usually means either the batter was overmixed after adding the flour or the cookie was slightly underbaked in the middle. Next time, mix on low speed just until the dry ingredients disappear, and check for doneness in several spots near the center before pulling it from the oven.
The edges are too crisp but the center feels underdone. How do I fix that?
Ovens often run hot, especially smaller ones. Try lowering the oven temperature to 165–170°C / 325°F and extending the bake time by a few minutes. Moving the pan to the middle rack instead of the lower rack can also help the cookie bake more evenly.
My buttercream spiders are sliding off the cookie.
Either the cookie cake is still a bit warm or the buttercream is too soft. Always cool the cookie completely before decorating, and if your kitchen is warm, chill the bowl of frosting for 5–10 minutes, then stir and try piping again. A short chill after decorating will also help the spiders set.
I don’t have candy eyes. What else can I use?
You can pipe tiny white dots of buttercream for eyes and add smaller black dots inside with another color, or press in small white chocolate chips (tip-side down) and add black pupils with an edible marker or a dot of frosting.
Can I make the dough ahead of time?
Yes. Make the cookie dough, press it into the lined pan, cover tightly, and refrigerate for up to 24 hours. Bake straight from the fridge, adding a few extra minutes as needed. The chilling time can actually deepen the flavor.
Is it safe to leave the finished cookie cake out during a party?
Because the buttercream is made with sugar and butter (no eggs in the frosting), it’s generally fine at room temperature for about 4 hours, assuming your space isn’t very hot. After that, refrigerate any leftovers.
Kitchen note: If you’re serving outdoors or in a warm room, keep the decorated cookie cake chilled right up until guests arrive, then bring it out so the spiders stay neat and the buttercream doesn’t droop.
Conclusion
Halloween cookie cake with buttercream spiders is approachable even if you don’t decorate cakes often, since the design leans more on playful shapes than precision. The giant-cookie format also means you get all the satisfaction of fresh chocolate chip cookies with far less scooping and rotating.
If you bake this for your Halloween gathering, I’d love to hear how it went—feel free to leave a rating, note what pan you used, and share any twists you added to the design or mix-ins. Those details help other home bakers adapt the recipe to their own kitchens and party plans.
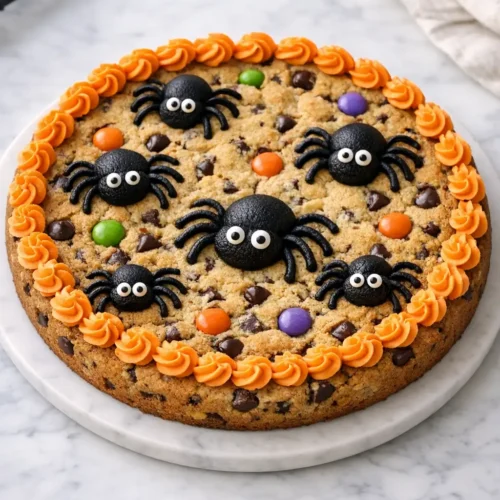
Easy Halloween Cookie Cake with Buttercream Spiders
Equipment
- 9–10 inch metal tart pan, springform pan, or cake pan
- Parchment paper
- Electric hand mixer or stand mixer
- Mixing bowls
- Rubber spatula
- Whisk
- Wire rack
- Piping bags
- Small round piping tips (sizes 2–5)
Ingredients
For the cookie cake base
- 115 g unsalted butter softened to room temperature (1/2 cup)
- 100 g light brown sugar packed (1/2 cup)
- 50 g granulated sugar (1/4 cup)
- 1 large egg room temperature
- 1 tsp vanilla extract
- 155 g all-purpose flour (1 1/4 cups)
- 1/2 tsp baking soda
- 1/4 tsp fine salt
- 150 g semi-sweet chocolate chips (3/4 cup)
- 30–45 g Halloween candies optional; roughly chopped if large (2–3 tbsp)
For the vanilla buttercream (spiders and border)
- 115 g unsalted butter softened (1/2 cup)
- 260–300 g powdered sugar sifted (2–2 1/2 cups)
- 1–2 tbsp milk or heavy cream plus more as needed
- 1 tsp vanilla extract
- 1/8 tsp fine salt or to taste
- black gel food coloring or cocoa powder plus black gel for deeper color
- 16–24 pieces candy eyeballs for decorating
Instructions
- Prep the pan and oven: Preheat the oven to 175°C / 350°F. Lightly grease your pan and line the bottom with a circle of parchment. If using a cake pan without a loose base, leave some parchment overhang so you can lift the cookie cake out later.
- Cream the butter and sugars: In a mixing bowl, beat the softened butter with brown sugar and granulated sugar on medium speed for about 2 minutes, until lighter and slightly fluffy.
- Add the egg and vanilla: Beat in the egg and vanilla extract just until fully combined; scrape down the sides and bottom of the bowl to remove streaks.
- Combine the dry ingredients: In a separate small bowl, whisk together the flour, baking soda, and salt.
- Make the dough: Add the dry ingredients to the butter mixture and mix on low just until no dry flour remains. Fold in the chocolate chips and any Halloween candies.
- Press the dough into the pan: Transfer the dough to the prepared pan and press into an even layer, slightly higher at the edges to prevent a domed center.
- Bake the cookie cake: Bake for 16–22 minutes, until edges are lightly browned and set and the center looks a bit puffed and soft; a toothpick near the center should come out with a few moist crumbs.
- Cool completely: Cool the cookie cake completely in the pan on a wire rack (about 1–2 hours). Remove from the pan once cool.
- Make the buttercream: Beat softened butter until smooth and slightly paler, about 2 minutes. Add half the powdered sugar, the salt, and vanilla; mix on low to combine. Add remaining powdered sugar and 1 tablespoon of milk/cream.
- Adjust consistency: Beat on medium until creamy and spreadable. If too stiff, add more milk/cream a teaspoon at a time; if too soft, add a spoonful of powdered sugar.
- Tint the frosting: Color all or part of the buttercream with black gel food coloring, building color gradually (it will deepen slightly as it sits).
- Transfer frosting to piping bags: Fit piping bags with small round tips (or snip disposable bags). Fill one bag with black buttercream for spiders and another with contrasting color (or more black) for a border/details.
- Pipe a simple border (optional): Pipe dots, shells, or a ring of frosting around the outer edge of the cooled cookie cake.
- Create the buttercream spiders (bodies first): Pipe small mounds for spider bodies across the surface; for larger spiders, pipe a larger mound for the abdomen and a smaller one for the head.
- Add eyes: Press 2 candy eyeballs into the front of each spider while the frosting is still soft.
- Pipe the spider legs: Using the same black buttercream, pipe four curved legs on each side of the body.
- Chill briefly to set: Refrigerate the decorated cookie cake for 20–30 minutes to firm up the buttercream.
- Slice and serve: Cut into wedges with a large sharp knife, wiping the knife between cuts for clean slices.
Leave a Reply