
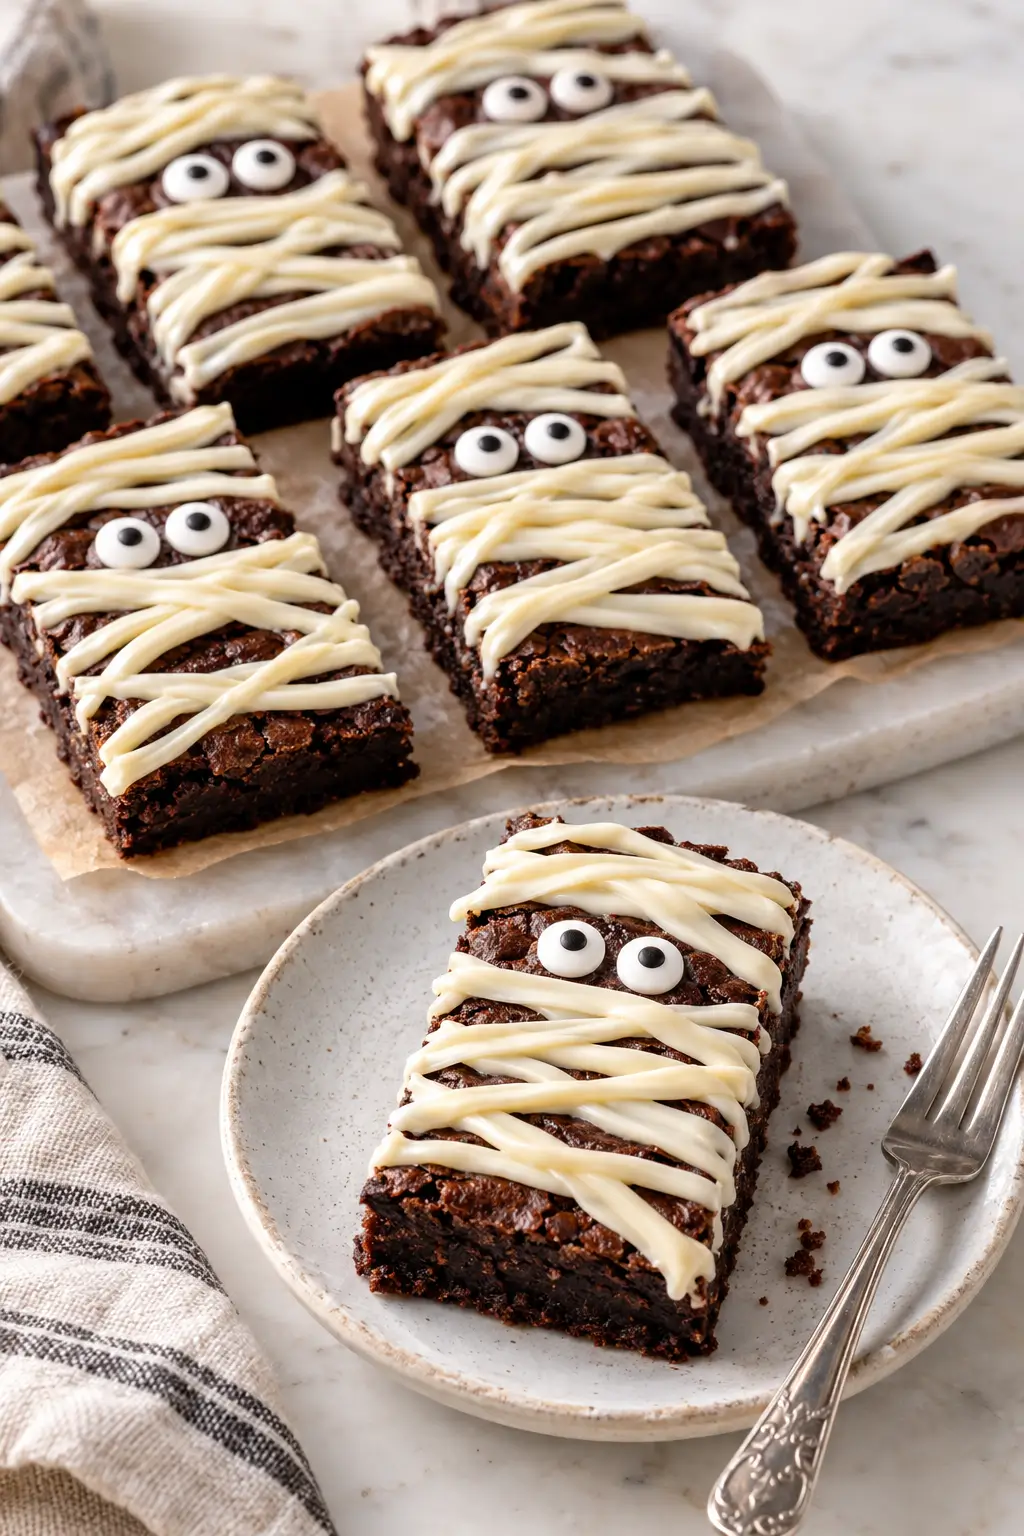
Mummy brownies are fudgy chocolate brownies with white chocolate piped across the top in messy stripes and two candy eyes peeking out from the gaps. That’s the whole trick. The brownie underneath does most of the work, so it’s worth making a good one from scratch.
The first time I made these for my niece’s class party, I decorated them warm and watched the eyes slide off. Don’t skip the cooling.
If it’s a school night and you’re short on time, bake the brownies the evening before, cover them, and leave them on the counter. Decorate the next afternoon and let the kids handle the eyeballs.
Ingredients
This makes one 8-inch (20 cm) square pan, cut into 8 rectangles. That’s two mummies each for four people, which is about right.
For the brownies
- 115 g (1/2 cup / 1 stick) unsalted butter
- 200 g (7 oz) dark or semisweet chocolate, chopped. Most of the fudgy texture comes from this. Semisweet chips work if that’s what you’ve got, but a chopped bar melts more smoothly.
- 150 g (3/4 cup) granulated sugar
- 100 g (1/2 cup, packed) light brown sugar, which keeps the middle chewy. All granulated works too, though the brownies come out a little drier and crisper on top.
- 3 large eggs, at room temperature
- 1 tsp vanilla extract
- 80 g (2/3 cup) all-purpose flour
- 25 g (1/4 cup) unsweetened cocoa powder. Natural or Dutch-process both work. Dutch-process gives you a darker brownie, and the white wrapping stands out more against it.
- 1/4 tsp fine salt
For the mummy wrap
- 140 g (5 oz) white chocolate, finely chopped. You can use white candy melts instead. They’re more forgiving and set firmer, but they taste sweeter and less like real chocolate.
- 1 tsp vegetable oil, optional, for thinning
- 16 candy eyes
Step-by-Step Mummy Brownies
-
Prep the pan. Heat the oven to 350°F (177°C). Line an 8-inch square pan with foil and leave extra hanging over two sides so you have handles. Grease the foil or give it a quick coat of nonstick spray.
-
Melt the chocolate and butter. Put the butter and chopped chocolate in a heatproof bowl set over a pan of gently simmering water. You can also use a saucepan on low heat. Stir until smooth, then take it off the heat.
-
Let it cool. Leave the mixture for about 15 minutes. It should feel warm, not hot. If it’s too hot, the eggs start to cook when they go in and the batter turns grainy.
-
Add the sugars and eggs. Whisk in both sugars. Add the eggs one at a time, whisking well after each, then add the vanilla. The batter should turn glossy and thicken a bit.
-
Fold in the dry ingredients. Sift the flour, cocoa and salt over the bowl and fold with a spatula until you can’t see any more dry streaks. Stop there, because overmixing makes the brownies cakey.
-
Bake. Scrape the batter into the pan and smooth the top. Bake for 25–30 minutes. They’re done when the top looks set and slightly crackly and a toothpick poked into the center comes out with moist crumbs, not wet batter. Ovens vary a lot, so start checking at 25 minutes.
-
Cool completely. At least 1.5–2 hours at room temperature. If the brownies are even slightly warm, the white chocolate stays soft and the eyes slide off. I learned that the hard way.
-
Cut before you decorate. Use the foil handles to lift the slab out. Cut it in half one way, then into quarters the other way, which gives you 8 rectangles about 4 x 2 inches. Wipe the knife between cuts and you’ll get much cleaner edges. Spread the pieces out on parchment.
-
Melt the white chocolate. Microwave it at 50% power for 30 seconds, stir, then keep going in 20-second bursts, stirring each time, until only a few small lumps are left. Stir until those melt too. If it’s too thick to pipe, stir in the oil.
Heads up: white chocolate scorches much faster than dark. If it starts to look dull or clumpy, stop heating and just keep stirring.
-
Wrap the mummies. Scrape the chocolate into a zip-top sandwich bag and snip a very small corner. If you have a piping bag, a size 3 or 5 round tip works too. Pipe back and forth across each brownie in uneven lines, crossing over now and then. Leave a small gap near the top for the face.
-
Add the eyes. Press two candy eyes into the gap while the chocolate is still wet. Leave everything to set at room temperature for about 30 minutes, or put it in the fridge for 10–15 minutes if you’re in a hurry.
What to Expect
The brownies have a thin, crackly top and a dense, fudgy middle. They’re closer to a truffle than to cake. The white chocolate sets into thin, slightly crisp lines.
They’re sweet, as you’d expect, but the dark chocolate and salt keep them from tasting sugary. Your wrapping won’t look tidy, and it shouldn’t. A wobbly mummy looks better than a perfect one.
If you swap in candy melts, the lines come out thicker and more matte. Real white chocolate gives you a softer sheen.
Ways to Change It Up
For a gluten-free batch, swap in a 1:1 gluten-free flour blend that contains xanthan gum. With so little flour in this recipe, the texture hardly changes. Check that your candy eyes and chocolate are labeled gluten-free, because some brands aren’t.
Colored candy melts in green, orange or purple are fun for a party table, and they’re easier for kids to pipe than real white chocolate. You do lose the white bandage look, so they end up as monsters more than mummies.
If you’d like these less sweet, use 70% dark chocolate in the batter. The contrast with the white chocolate gets sharper, and adults tend to prefer them that way.
Serving and Storage
These work well on a Halloween dessert table next to ghost meringue cookies and witch finger sugar cookies. If you need something savory to balance all the sugar, put out mummy dogs and a spooky charcuterie board. A cold glass of milk with them is never a bad idea.
For more context on how autumn treats like these grew out of much older customs, the Chiltern Open Air Museum has a readable piece on Halloween’s roots in the Celtic festival of Samhain.
Storage: keep decorated brownies in an airtight container at room temperature for 3–4 days, in a single layer or with parchment between layers. The fridge keeps them longer, but the white chocolate can bloom (a harmless dull, streaky look) and the candy eyes sometimes sweat.
Freezing: freeze the brownies undecorated. Wrap the uncut slab tightly and it’ll keep for about 2 months. Thaw it on the counter, then cut and decorate. Decorated mummies don’t freeze well because the eyes get soggy.
Common Questions
My white chocolate went thick and grainy. Can I save it?
Sometimes. That’s either overheating or a drop of water getting in. Stir in a teaspoon of vegetable oil and see if it smooths out. If it’s still gritty, start over with fresh chocolate and lower power. Burnt white chocolate can’t be fixed.
Can I use a boxed brownie mix?
Yes, and I won’t judge you. Bake it in an 8- or 9-inch pan following the box directions, let it cool completely, and pick up at step 8. The wrapping is the part kids remember anyway.
I can’t find candy eyes. What else works?
Two mini chocolate chips pressed in point-down work fine. So does a dot of white chocolate topped with a small dot of melted dark chocolate. They look a bit spookier, honestly.
How do I make a bigger batch for a party?
Double everything and bake it in a 9 x 13-inch pan. Thicker brownies can take a few extra minutes, so go by the toothpick test rather than the clock. Double the white chocolate too. If you’re feeding a whole class, it’s worth adding Halloween dirt cups or Oreo ball spiders. Kids can put those together while you pipe.
One last thing: pipe the first mummy on a scrap of parchment before you start on the brownies. It’ll show you whether the hole in the bag is the right size. If you end up giving yours a cyclops eye or a bow tie, tell me how it turned out.
Mummy Brownies with White Chocolate Wrap Kids Can Decorate

Equipment
- 8-inch square pan
- Aluminum foil
- Heatproof bowl
- Saucepan
- Whisk
- Spatula
- Sifter or sieve
- Parchment paper
- Zip-top sandwich bag
- Piping bag
- Round piping tip (size 3 or 5)
- Toothpick
Ingredients
For the brownies
- 115 g unsalted butter 1/2 cup / 1 stick
- 200 g dark or semisweet chocolate chopped; semisweet chips work too, but a chopped bar melts more smoothly
- 150 g granulated sugar 3/4 cup
- 100 g light brown sugar 1/2 cup, packed
- 3 large eggs at room temperature
- 1 tsp vanilla extract
- 80 g all-purpose flour 2/3 cup
- 25 g unsweetened cocoa powder 1/4 cup; natural or Dutch-process
- 1/4 tsp fine salt
For the mummy wrap
- 140 g white chocolate finely chopped; white candy melts can be used instead
- 1 tsp vegetable oil optional, for thinning
- 16 candy eyes
Instructions
- Prep the pan. Heat the oven to 350°F (177°C). Line an 8-inch square pan with foil, leaving extra hanging over two sides for handles. Grease the foil or coat it with nonstick spray.
- Melt the chocolate and butter. Put the butter and chopped chocolate in a heatproof bowl set over a pan of gently simmering water, or use a saucepan on low heat. Stir until smooth, then remove from the heat.
- Let it cool. Leave the mixture for about 15 minutes until it feels warm, not hot, so the eggs don’t scramble and the batter stays smooth.
- Add the sugars and eggs. Whisk in both sugars, then add the eggs one at a time, whisking well after each. Add the vanilla. The batter should turn glossy and thicken slightly.
- Fold in the dry ingredients. Sift the flour, cocoa and salt over the bowl and fold with a spatula until no dry streaks remain. Stop there, because overmixing makes the brownies cakey.
- Bake. Scrape the batter into the pan and smooth the top. Bake for 25 to 30 minutes, until the top looks set and slightly crackly and a toothpick inserted in the center comes out with moist crumbs, not wet batter. Start checking at 25 minutes because ovens vary.
- Cool completely. Let the brownies cool at room temperature for at least 1.5 to 2 hours. If they are even slightly warm, the white chocolate stays soft and the candy eyes slide off.
- Cut before you decorate. Use the foil handles to lift the slab out. Cut it in half one way, then into quarters the other way to make 8 rectangles about 4 x 2 inches. Wipe the knife between cuts for cleaner edges. Spread the pieces out on parchment.
- Melt the white chocolate. Microwave at 50% power for 30 seconds, stir, then continue in 20-second bursts, stirring each time, until only a few small lumps remain. Stir until those melt. If it is too thick to pipe, stir in the oil. White chocolate scorches quickly, so stop heating if it looks dull or clumpy and keep stirring.
- Wrap the mummies. Scrape the chocolate into a zip-top sandwich bag and snip a very small corner, or use a piping bag fitted with a size 3 or 5 round tip. Pipe back and forth across each brownie in uneven lines, crossing over now and then. Leave a small gap near the top for the face.
- Add the eyes. Press two candy eyes into the gap while the chocolate is still wet. Let everything set at room temperature for about 30 minutes, or refrigerate for 10 to 15 minutes if you are in a hurry.



Leave a Reply