
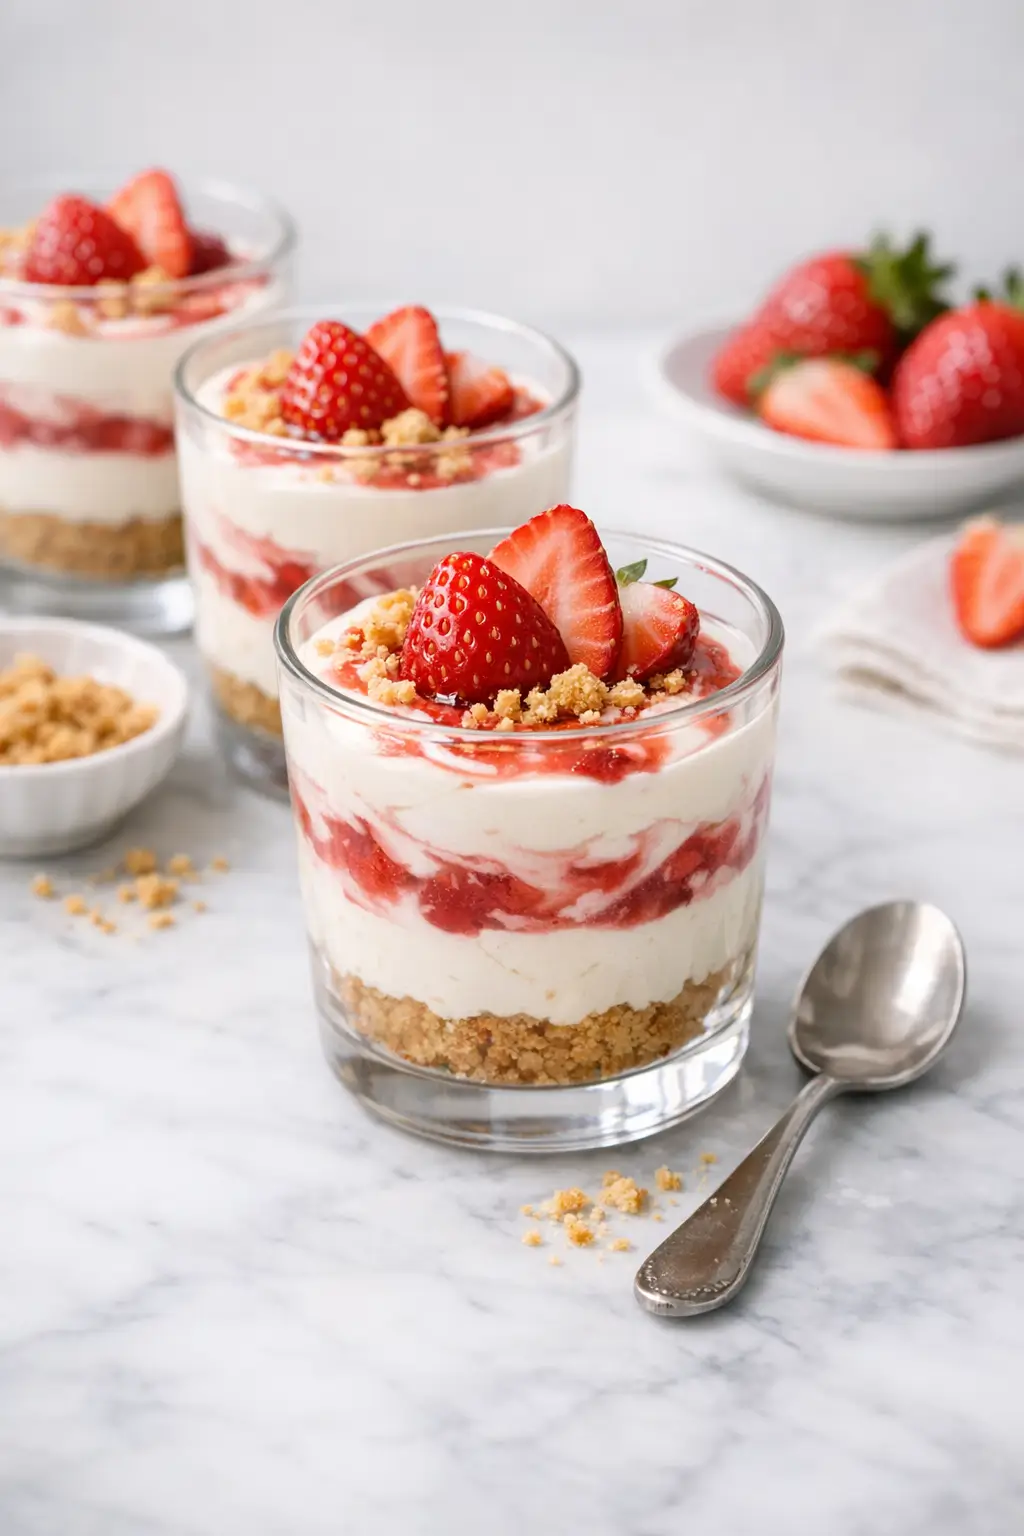
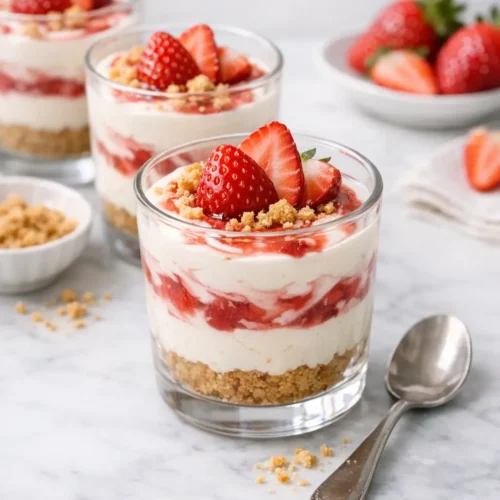
Individual no bake cheesecake cups with strawberry swirl give you all the creamy, tangy richness of cheesecake in a lighter, spoonable format that doesn’t tie up your oven. They’re built for spring entertaining: pretty layers, fresh berries, and a soft pink swirl that looks more elaborate than it is.
If it’s a busy weeknight or you’re prepping for a brunch, start by making the strawberry swirl and crushing the graham crackers; both can sit while you deal with everything else. If you’re working in a small kitchen, clear one tray or sheet pan so you can line up the cups and build them assembly-line style.
These cups lean gently sweet, with a creamy vanilla cheesecake base, a simple graham cracker crumb, and a bright strawberry swirl that cuts through the richness. They’re forgiving for newer bakers but pretty enough for showers, Easter, or a casual spring dinner.
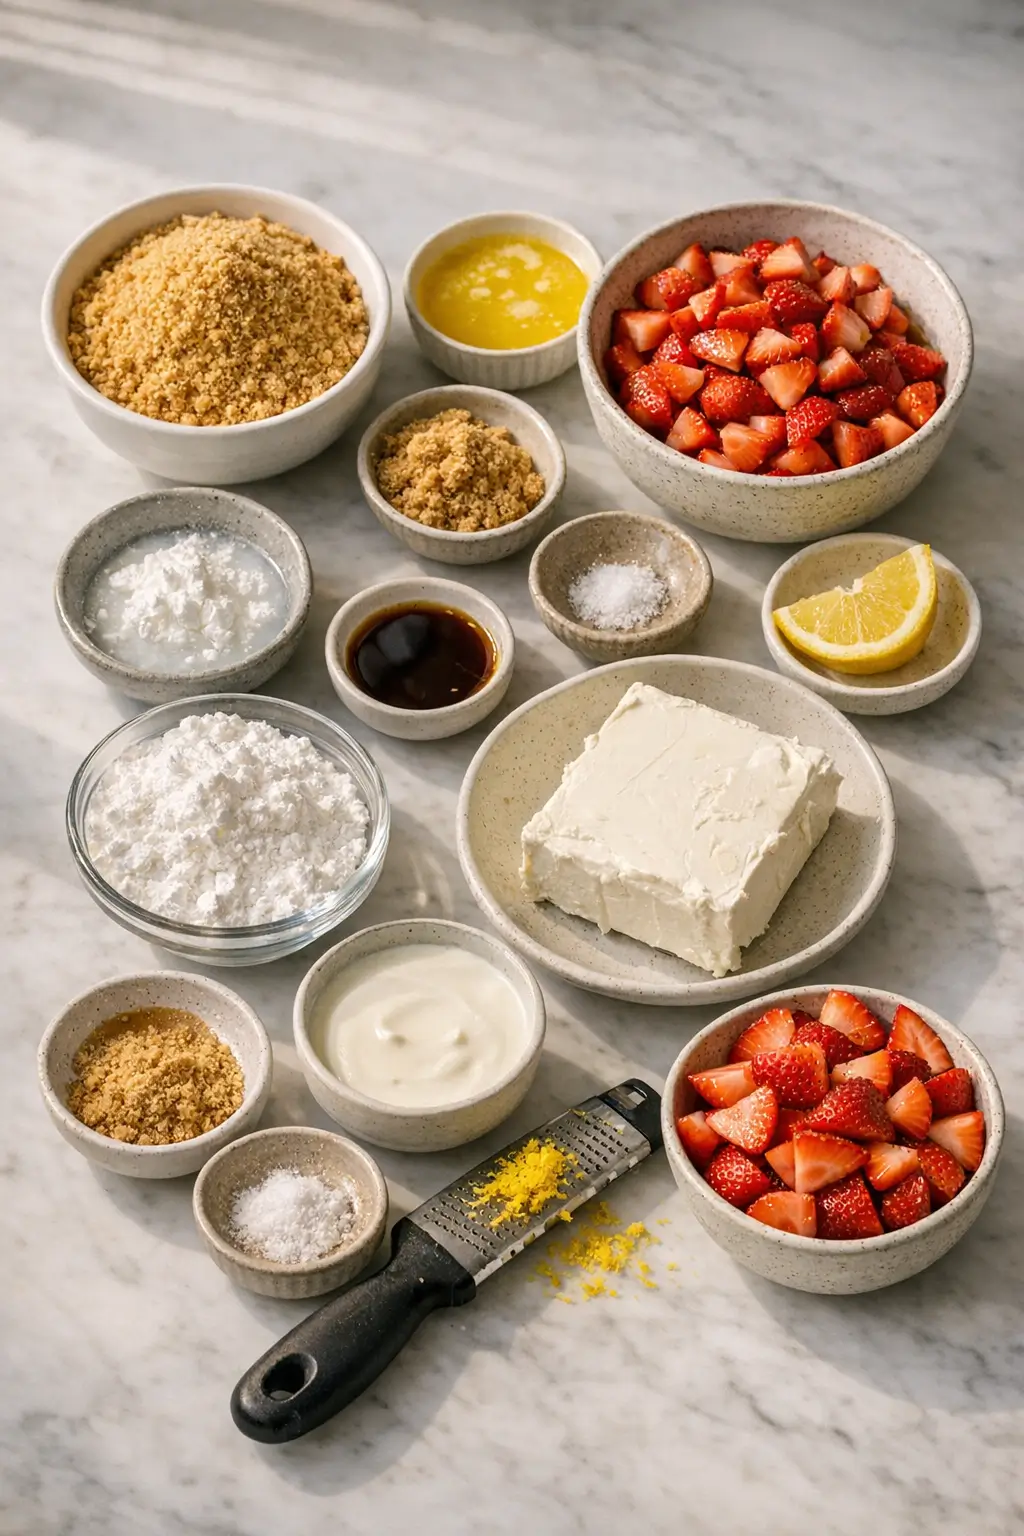
Ingredients
Makes 4–6 cups, depending on glass size (about 125–175 ml / 4–6 oz each)
For the crumb base
- 120 g (about 1 cup) graham cracker crumbs – classic cheesecake flavor and a bit of crunch
- 55 g (4 Tbsp / 1/2 stick) unsalted butter, melted – binds the crumbs
- 25 g (2 Tbsp) light or dark brown sugar – adds sweetness and caramel notes
- Pinch of fine salt – optional, balances sweetness and echoes the strawberry
For the strawberry swirl
- 200 g (1 1/2 cups) fresh strawberries, hulled and chopped – or frozen, thawed and drained
- 50 g (1/4 cup) granulated sugar – sweetens and helps thicken
- 1 tsp lemon juice – brightens the flavor
- 1 tsp cornstarch mixed with 1 Tbsp cold water – gives a jammy, swirlable texture
For the no bake cheesecake filling
- 225 g (8 oz) full‑fat cream cheese, room temperature – the main body of the cheesecake layer
- 60 g (1/2 cup) powdered sugar, sifted – smoother sweetness, no graininess
- 1 tsp pure vanilla extract – gentle flavor
- 120 ml (1/2 cup) cold heavy whipping cream – whipped in for lightness
- 1–2 tsp lemon zest – optional, for a bit more brightness
For topping and serving (optional but pretty)
- 4–6 fresh strawberries, thinly sliced or halved – to garnish the tops
- Extra graham cracker crumbs – for sprinkling
Kitchen note: Use full‑fat brick cream cheese, not whipped or low‑fat tubs. Lower‑fat versions tend to stay loose and can give you a runny filling that doesn’t hold layers cleanly.
Step-by-Step Instructions for No Bake Cheesecake Cups With Strawberry Swirl
1. Make the strawberry swirl
- Cook the strawberries:
- Add the chopped strawberries, granulated sugar, and lemon juice to a small saucepan.
- Cook over medium heat, stirring occasionally, until the berries release their juices and start to break down, about 5–7 minutes.
- Thicken the sauce:
- Stir the cornstarch and cold water together in a small bowl until smooth.
- Lower the heat to medium‑low and slowly drizzle the cornstarch slurry into the strawberries while stirring constantly.
- Continue to cook, stirring, for another 2–3 minutes, until the mixture looks glossy and coats the back of a spoon.
- Cool completely:
- Transfer the sauce to a shallow bowl to speed cooling.
- Let it cool to room temperature, then chill in the fridge while you prepare the crumbs and filling.
Kitchen note: Warm strawberry sauce will melt the cheesecake filling and blur your swirl. If you’re in a rush, spread the sauce in a thin layer on a plate and pop it into the fridge or freezer for a few minutes, checking often.
2. Prepare the graham cracker crumb base
- Make the crumbs:
- Crush the graham crackers in a zip‑top bag with a rolling pin, or pulse in a food processor, until you have fine, sandy crumbs.
- Measure out 120 g (about 1 cup) of crumbs into a medium bowl.
- Combine with butter and sugar:
- Stir in the brown sugar and a pinch of salt, if using.
- Pour in the melted butter and mix until all the crumbs are evenly moistened and hold together when you squeeze a bit in your hand.
- Portion into cups:
- Spoon 2–3 tablespoons of crumb mixture into the bottom of each of your cups or small jars.
- Press gently with the back of a spoon or a small glass to compact into a loose crust.
- Set the cups on a tray and refrigerate while you make the filling, so the butter firms and the base sets.
3. Whip the cheesecake filling
- Whip the cream:
- In a clean, cold bowl, whip the heavy cream with a hand mixer on medium‑high until you get medium peaks (the tip folds over slightly).
- Don’t go all the way to stiff peaks; the filling can feel stiff and less silky.
- Set aside in the fridge.
- Beat the cream cheese:
- In a separate large bowl, beat the room‑temperature cream cheese on medium speed for 1–2 minutes, scraping the bowl once or twice, until very smooth and fluffy.
- Sweeten and flavor:
- Add the powdered sugar and beat on low until incorporated, then increase to medium and beat until smooth.
- Mix in the vanilla and lemon zest, if using.
- Fold in the whipped cream:
- Add about one‑third of the whipped cream to the cream cheese mixture and beat briefly on low to loosen.
- Switch to a spatula and gently fold in the remaining whipped cream in two additions, using broad, sweeping motions to keep the mixture airy.
Kitchen note: If the filling looks lumpy, it usually means the cream cheese was still cold. Keep beating the cream cheese alone until completely smooth before adding sugar or cream; tiny lumps will show in the cups.
4. Layer and swirl the cups
-
Set up your assembly station:
- Place the chilled crumb‑lined cups on a tray.
- Transfer the cheesecake filling to a piping bag or large zip‑top bag with a corner snipped off for cleaner layers, or use a spoon.
- Give the cooled strawberry sauce a stir; it should be thick but spoonable.
-
First cheesecake layer:
- Pipe or spoon a 2–3 cm (about 1 inch) layer of cheesecake filling over the crumbs in each cup, smoothing lightly.
-
Add strawberry swirl:
- Spoon small dollops (about 1–2 teaspoons total per cup) of strawberry sauce on top of the filling.
- Use a toothpick, skewer, or the tip of a knife to gently drag through the sauce and cheesecake in a few slow figure‑eight motions to create a loose swirl.
-
Repeat layers (optional):
- For taller glasses, you can repeat with another layer of filling and another small amount of sauce, swirling just the top.
- Avoid overfilling to the rim so you have room for garnish.
-
Chill to set:
- Cover the tray loosely with plastic wrap and refrigerate for at least 2 hours, or up to 24 hours.
- The filling will firm slightly and the crumb base will hold together better.
5. Garnish and serve
-
Finish with fresh berries:
- Just before serving, top each cup with a sliced or halved strawberry and a pinch of extra crumbs.
-
Serve cold:
- Serve straight from the fridge for the cleanest layers.
- If they sit at room temperature for more than 30–40 minutes, the filling softens but will still taste great.
Kitchen note: If you need to transport these to a gathering, choose jars with lids and keep them in a snug container or baking dish with a cold pack underneath. Add fresh strawberry slices once you arrive so they don’t weep into the swirl.
What to Expect
The crumb base is soft but slightly nubbly, more like the bottom of a cheesecake slice than a hard crust. It should hold together when you spoon down but still break easily, not shatter.
The cheesecake filling is creamy and light from the whipped cream, with enough body to hold a swirl and sit in layers. Expect a gentle tang from the cream cheese, balanced with vanilla and a hint of lemon if you used the zest.
Strawberry swirl adds brighter flavor and a slightly jammy texture, with a stronger berry punch than just fresh fruit alone. Depending on your saucepan and stove, the swirl can end up thicker or looser; thicker will give defined ribbons, while looser swirl will marble more softly but still taste great.
If your cream cheese is slightly salty or if you add a pinch of salt to the crumbs, the overall effect leans toward that sweet‑salty cheesecake balance that works especially well with strawberries.
Ways to Change It Up
1. A lighter, yogurt‑forward version
Swap half of the cream cheese (about 115 g / 4 oz) for full‑fat Greek yogurt. The filling will be tangier and a bit looser, more like a cheesecake mousse.
In this case, be sure to chill at least 3–4 hours so it can firm, and consider serving in slightly smaller cups. This variation suits brunch, especially next to fruit and lighter bites like Mango Sticky Rice Made Easy: Creamy, Foolproof Dessert if you want a fruit‑centered dessert spread.
2. Extra‑strawberry swirl
For more intense strawberry flavor, double the strawberry swirl component and add a bit more between the layers.
If you do this, keep each dollop small so it doesn’t weigh down the filling. You can also fold a few teaspoons of cooled sauce directly into part of the cheesecake mixture for a pale pink layer beneath a white one.
3. Berry swap and sauce shortcuts
You can make the same recipe with raspberries, a raspberry‑strawberry mix, or even blueberries. If using raspberries, press the cooked sauce through a fine‑mesh sieve after thickening to remove seeds.
For the fastest route, use a good quality strawberry jam thinned with a teaspoon or two of water and a squeeze of lemon instead of cooking your own swirl. Warm the jam briefly so it loosens, then cool to room temperature before swirling.
4. A faster, simplified version
If time is tight, skip whipping cream separately and fold in about 120 ml (1/2 cup) of thawed whipped topping instead. The texture will be more stable and a bit sweeter, and you can reduce the powdered sugar slightly if you prefer.
The filling will set faster and stay firmer at room temperature, which can be helpful for buffet‑style serving alongside other desserts like Italian Tiramisu Made Simple: Creamy, Make-Ahead Magic.
Serving and Storage
These no bake cheesecake cups with strawberry swirl are at their best well‑chilled, served straight from the fridge. They’re ideal for spring brunches, baby or bridal showers, or as an easy dessert after something savory like Weeknight Pasta alla Norma With Crispy Eggplant or Chicken Fajitas Tonight: Juicy, Sizzling, Weeknight-Easy.
Serve them in clear glasses, small jars, or even sturdy disposable cups if you’re entertaining a crowd outdoors. The layers and swirl show best in glass, but the flavor is the same either way.
For storage, cover each cup with plastic wrap or lids and refrigerate for up to 3 days. The crumb layer will soften gradually but remain pleasant to eat.
To avoid watery tops, add fresh strawberry slices on the day you plan to serve. If some liquid collects around the fruit after a day or two, gently dab with a piece of paper towel before serving.
Freezing is possible but not ideal for the prettiest texture. If you do freeze, leave off the fresh fruit, wrap the cups well, and freeze for up to 1 month. Thaw overnight in the fridge; expect the texture to be slightly less airy.
Kitchen note: If you’re making these more than a day ahead, keep the crumb base and cheesecake filling separate in the fridge and assemble with swirl and fresh berries a few hours before serving. This keeps the crumb from absorbing too much moisture.
Cultural Context
No bake cheesecakes and cheesecake cups are part of a broad family of “icebox” or refrigerator desserts that became popular in the 20th century, especially as home refrigerators became common. These desserts avoid turning on the oven, relying instead on chilled fillings and crumb bases.
Strawberries in particular are a frequent pairing with cheesecake, especially in North American and European spring and summer desserts, when berries are in season. For a broader look at the history of cheesecake‑style desserts, including early versions made with fresh cheese, you can explore this overview from the cheesecake history article by Farming Life.
The rise of layered parfait‑style desserts in glasses connects to restaurant pastry and patisserie traditions, where clear containers show off contrasting textures and colors. An accessible introduction to how cream‑based desserts evolved in European kitchens can be found through the Capaldi Dairy Museum’s history of cheese and dairy desserts.
Common Questions and Troubleshooting
My filling is too runny. Can I save it?
If the filling won’t hold soft peaks, it usually means the cream wasn’t whipped enough, the cream cheese was too warm, or you added too much liquid. You can try chilling the bowl for 20–30 minutes, then gently folding in a bit more softly whipped cream cheese (beat it smooth first) or a spoonful or two of whipped cream. Worst case, serve the mixture as a softer mousse in deeper glasses.
The strawberry swirl sank into the cheesecake instead of sitting on top. What happened?
The swirl was likely too warm or too thin. Next time, cook the sauce a bit longer until thicker and let it chill completely before using. For this batch, you can add a second, thicker layer of swirl on top just before serving to give a clearer marbled look.
My crumbs are crumbly and won’t hold together.
Check that you measured the butter correctly and mixed until every crumb looks slightly damp. If the mixture still falls apart when squeezed, add 1–2 teaspoons of extra melted butter and mix again. Also make sure you’re pressing the base quite firmly into the cups before adding filling.
Can I use store‑bought strawberry jam instead of making the swirl?
Yes. Loosen a few tablespoons of jam with a teaspoon or two of water and a small squeeze of lemon juice, then stir until smooth. Let it cool if you warmed it, and use it exactly as you would the homemade swirl.
How far ahead can I assemble these for a party?
You can fully assemble the cups (without fresh fruit garnish) up to 24 hours in advance. For the best texture, add the sliced strawberries and any extra crumbs on top within 2–3 hours of serving.
Can I make this without an electric mixer?
It’s possible, but you’ll need some elbow grease. Soften the cream cheese thoroughly and whisk until completely smooth, then slowly whisk in powdered sugar. Whip the cream separately with a balloon whisk until it thickens and just holds peaks, then fold into the cream cheese. The texture may be slightly denser but still very good.
Kitchen note: If you regularly bake but don’t own a mixer, a simple hand whisk and a large metal bowl that you can briefly chill in the freezer make whipping cream by hand noticeably faster.
Conclusion
No bake cheesecake cups with strawberry swirl are a practical way to serve cheesecake to a group without worrying about slicing, water baths, or cracked tops. They pack easily into jars for picnics, fridge space, or make‑ahead desserts.
Use this base method as a template: crumb plus creamy filling plus a bright, fruit‑forward swirl. Once you’re comfortable with the timing and textures, you can adjust the fruit, toppings, and serving size to match your own kitchen and calendar. When you do, leave a comment and share how you adapted the flavors or format—those details help other home cooks tailor the recipe to their lives too.
No Bake Cheesecake Cups With Strawberry Swirl
Equipment
- Small saucepan
- Medium Bowl
- Large mixing bowl
- Small bowl
- Hand mixer
- Rubber spatula
- Spoon
- Piping bag or zip-top bag (optional)
- Cups or small jars
Ingredients
For the crumb base
- 120 g graham cracker crumbs about 1 cup
- 55 g unsalted butter melted (4 Tbsp / 1/2 stick)
- 25 g brown sugar light or dark (about 2 Tbsp)
- fine salt pinch (optional)
For the strawberry swirl
- 200 g fresh strawberries hulled and chopped (or frozen, thawed and drained; about 1 1/2 cups)
- 50 g granulated sugar about 1/4 cup
- 1 tsp lemon juice
- 1 tsp cornstarch mixed with 1 Tbsp cold water
- 1 Tbsp cold water for cornstarch slurry
For the no bake cheesecake filling
- 225 g full-fat cream cheese room temperature (8 oz)
- 60 g powdered sugar sifted (about 1/2 cup)
- 1 tsp vanilla extract pure
- 120 ml heavy whipping cream cold (1/2 cup)
- 1-2 tsp lemon zest optional
For topping and serving (optional)
- 4-6 fresh strawberries thinly sliced or halved, to garnish
- graham cracker crumbs extra, for sprinkling
Instructions
- Make the strawberry swirl: In a small saucepan, cook chopped strawberries, granulated sugar, and lemon juice over medium heat, stirring occasionally, until the berries release their juices and start to break down, about 5–7 minutes.
- Thicken the swirl: Stir cornstarch and cold water together until smooth. Lower heat to medium-low and slowly drizzle the slurry into the strawberries, stirring constantly. Cook 2–3 minutes more until glossy and thick enough to coat the back of a spoon.
- Cool completely: Transfer sauce to a shallow bowl and cool to room temperature, then chill in the refrigerator while you prepare the crumbs and filling.
- Prepare the graham crumb base: Crush graham crackers to fine crumbs (zip-top bag + rolling pin or food processor). Measure 120 g (about 1 cup) into a medium bowl.
- Combine crumbs: Stir in brown sugar and a pinch of salt (if using). Add melted butter and mix until evenly moistened and the crumbs hold together when squeezed.
- Portion into cups: Spoon 2–3 tablespoons crumb mixture into each cup/jar and press gently with the back of a spoon or a small glass. Refrigerate the cups on a tray while you make the filling.
- Whip the cream: In a clean, cold bowl, whip heavy cream with a hand mixer on medium-high to medium peaks (softly holding, tip slightly folding). Refrigerate until needed.
- Beat the cream cheese: In a separate large bowl, beat room-temperature cream cheese on medium 1–2 minutes until very smooth and fluffy, scraping the bowl as needed.
- Sweeten and flavor: Add powdered sugar and beat on low to incorporate, then beat on medium until smooth. Mix in vanilla and lemon zest (if using).
- Fold in whipped cream: Beat in about one-third of the whipped cream on low to loosen, then gently fold in the remaining whipped cream in two additions to keep the filling airy.
- Layer and swirl: Set chilled crumb-lined cups on a tray. Pipe or spoon about a 1-inch (2–3 cm) layer of filling over the crumbs. Add small dollops of cooled strawberry sauce (about 1–2 teaspoons per cup) and gently swirl with a toothpick/skewer or knife tip in a few slow figure-eight motions.
- Repeat layers (optional): For taller glasses, add another layer of filling and a small amount of sauce, swirling just the top. Leave room for garnish.
- Chill to set: Cover loosely and refrigerate at least 2 hours (or up to 24 hours) to firm the filling and help the crumb base hold together.
- Garnish and serve: Just before serving, top with sliced/halved strawberries and a pinch of extra crumbs. Serve cold for the cleanest layers.
Leave a Reply